©2018 Liquid Instruments
1
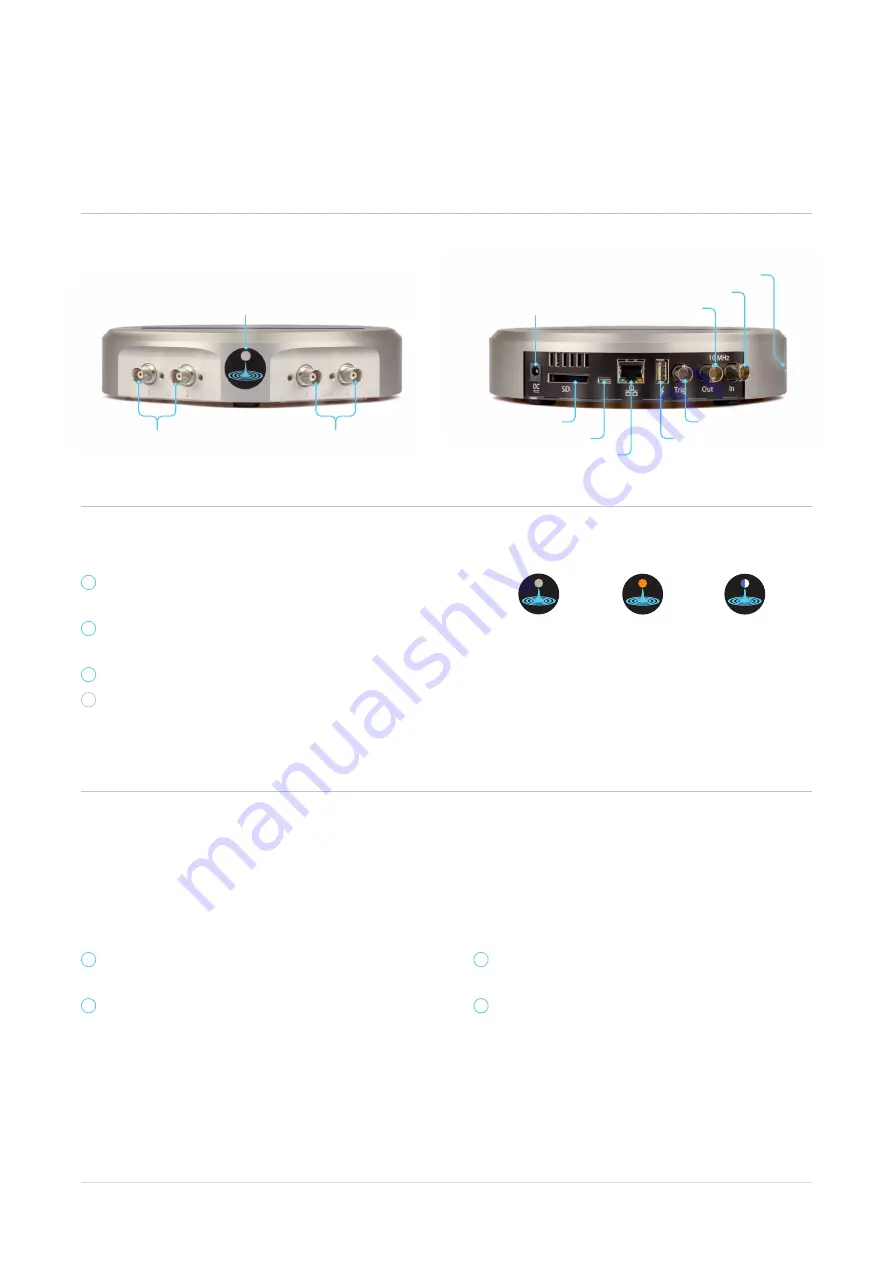
Moku:Lab layout
Moku:Lab
Quick start guide
SD card slot
Micro-USB data port
Ethernet port
External trigger input
USB charge port
10 MHz ref. input
Kensington Lock slot
10 MHz ref. output
Powering on & off
Connecting to your Moku:Lab
1
Connect the power supply to the DC power port
on the rear of the Moku:Lab.
2
Press and hold the power button for two seconds
until the status LED turns orange.
3
Wait for the status LED to turn blue / white.
X
To turn your Moku:Lab off, press and hold the
power button for two seconds until the status
LED turns orange.
Powered off
Powered on
Initializing /
Powering down
Ethernet
You can connect to your Moku:Lab using a wired
network connection. A wireless Access Point is
required in order to use the iPad.
1
Connect an Ethernet cable from your router to
the Ethernet port on the rear of the Moku:Lab.
2
Open the iPad’s Settings app and select
“Wi-Fi”
from the panel on the left and connect to an
Access Point on the same network.
Wi-Fi
You can connect to your Moku:Lab using a wired
network connection. A wireless Access Point is
required in order to use the iPad.
1
Open the iPad’s Settings app and select
“Wi-Fi”
from the panel on the left.
2
Select the network called
“Moku-
#####
”
, where
“
#####
”
is your Moku:Lab’s 5-digit serial number
printed on the bottom of the case. The default
password is
“mokuadmin”
.
Power button / status LED
DC power
Analog inputs
Analog outputs


