8. Firmware Update
MX-FR Series Modular Matrix Frames – User's Manual
153
Applied CPU2 firmware: v3.5.7b8 | LDC software: v2.5.17b2
8.2.
Forced Firmware Update
If a previous update process has failed or the matrix is not listed in the available devices list, then the normal
firmware updating process may not work. In this case the procedures below can help.
Device Not Listed
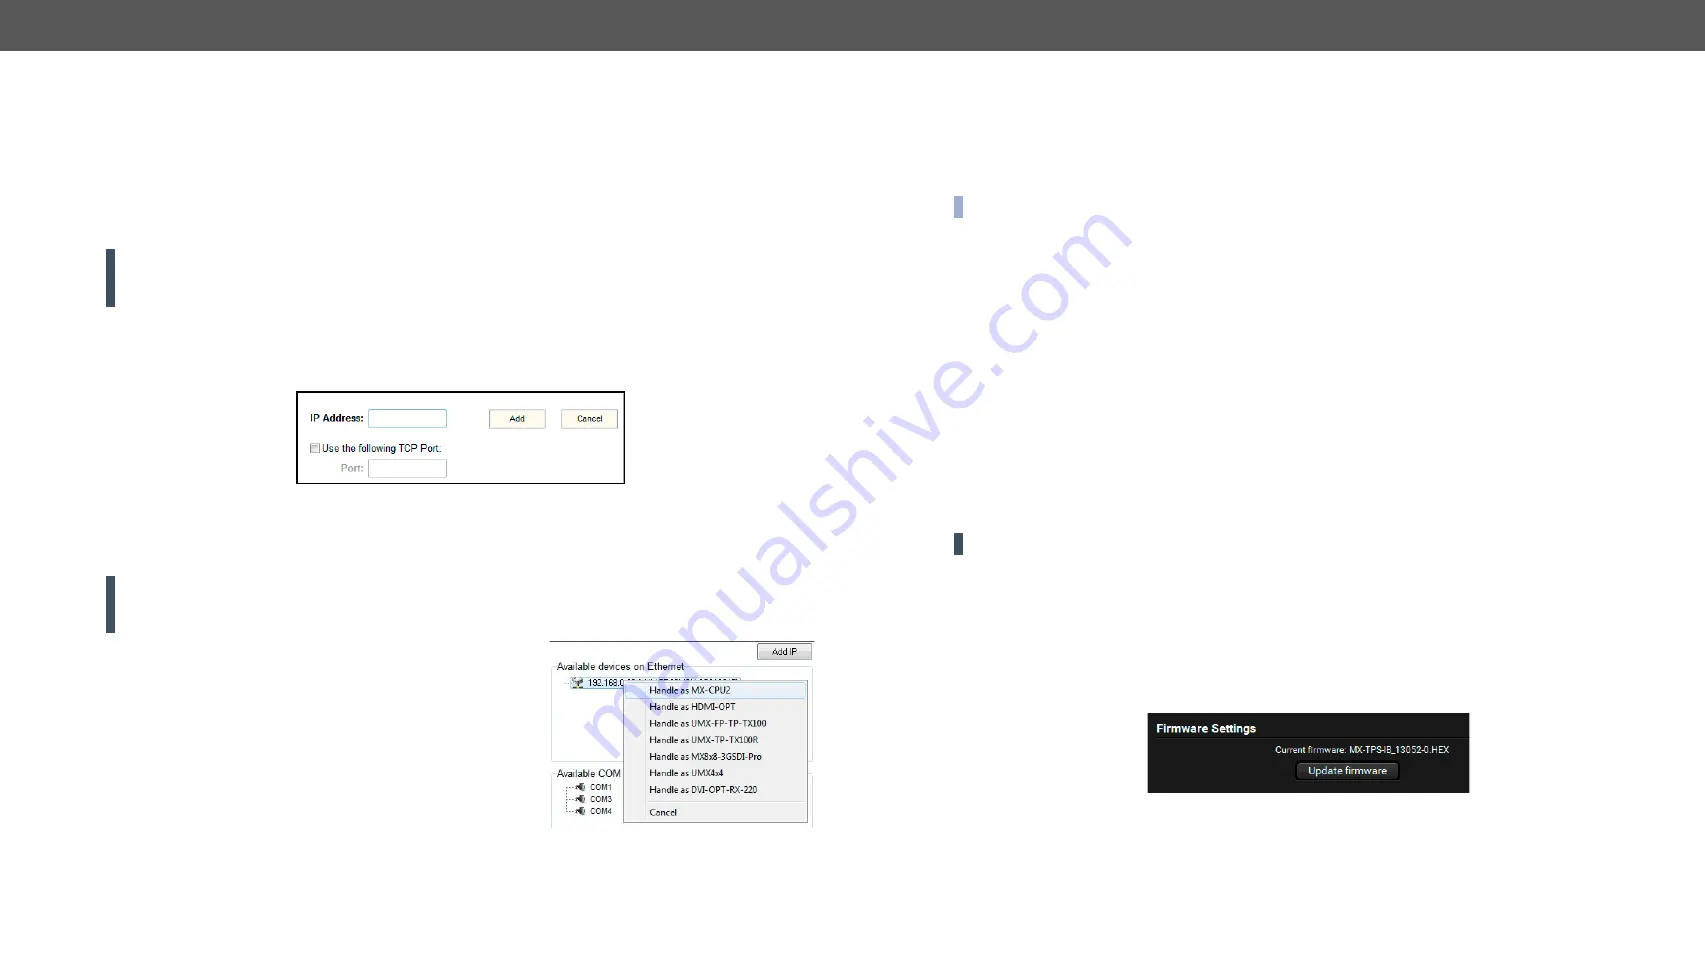
The IP address of a matrix may not be listed in the list because of wrong network configuration or if a
previous update process failed. In this case the router’s IP address can be added manually to the list with
the Add IP button.
ATTENTION!
Use this option with caution, as the manually typed IP address is not checked if it is a
Lightware device or not. If the address belongs to an unknown network device, then this may cause the
malfunction of the device.
Step 1.
Type the IP address of the matrix router (check on the front panel LCD if possible).
Step 2.
The TCP port can be selected manually if the checkbox is selected. If the port is not set, then the
default port 10001 is used.
Step 3.
Click on the Add button. The IP address will appear in the list.
Cannot Connect to Device
If the IP address was added manually, then the bootloader software usually cannot detect the device type
and cannot connect to it automatically. The IP addresses with unrecognized devices appear in the list
without showing the type and serial number.
ATTENTION!
Use this option with caution, as the manually typed IP address is not checked if it is a
Lightware device or not. If the address belongs to an unknown network device, then this may cause the
malfunction of the device.
Step 1.
Add the IP address manually as described above.
Step 2.
Right click on the desired IP address and select Handle
as MX-CPU2.
Step 3.
The software tries to connect to the device handling it as
the selected type. If the connection is successful, then
the further process is the same as the normal firmware
update.
8.3. Firmware Update of TPS(2) Ports
All MX-TPS and TPS2 I/O boards’ port has a separate firmware. All of the 8 firmwares can be different
version, and they are stored on the board instead of the MX-CPU2. Therefore the firmware update must be
performed differently than with the MX-CPU2. The firmware update can be performed with the Lightware
Device Controller software.
INFO:
All settings of the matrix remain after TPS firmware update.
Updating Steps in a Nutshell
Step 1.
Download and save all the firmware files that you want to update.
Step 2.
Connect the Lightware device and the computer via LAN port.
Step 3.
Start the Lightware Device Controller application.
Step 4.
Establish the connection with the device.
Step 5.
Open the input or output parameters window.
Step 6.
Click on the Firmware update button.
Step 7.
Upload the firmware files to the SD card.
Step 8.
Select the desired ports.
Step 9.
Starting the update process.
Step 10.
Restart the device.
Detailed Instructions
The TPS(2) boards can be updated with the LDC software.
WARNING!
Performing the update process via the LAN connection is strongly recommended.
Step 1.
Download and save all the firmware files that you want to update. If you have a zipped archive,
extract it.
Step 2.
Make sure the LDC software is installed on your computer.
Step 3.
Start the LDC and establish the connection with the matrix.
Step 4.
Open the TPS firmware update window.
By clicking on any TPS input or output label, a dialog window appears showing the parameters for
the corresponding input or output port. The current firmware version can be seen in the Firmware
settings section.
Step 5.
Click the
Update Firmware
button; a new dialog window appears showing the uploaded firmwares and
the available TPS ports. If the frame contains TPS input and output bboards, the user can reach both
from this window.


