5. Software Control – Using Lightware Device Controller
HDMI20-OPTC series – User's Manual
28
5.3. Establishing the Connection
Step 1.
Connect the device to a computer via USB, RS-232 or Ethernet.
Step 2.
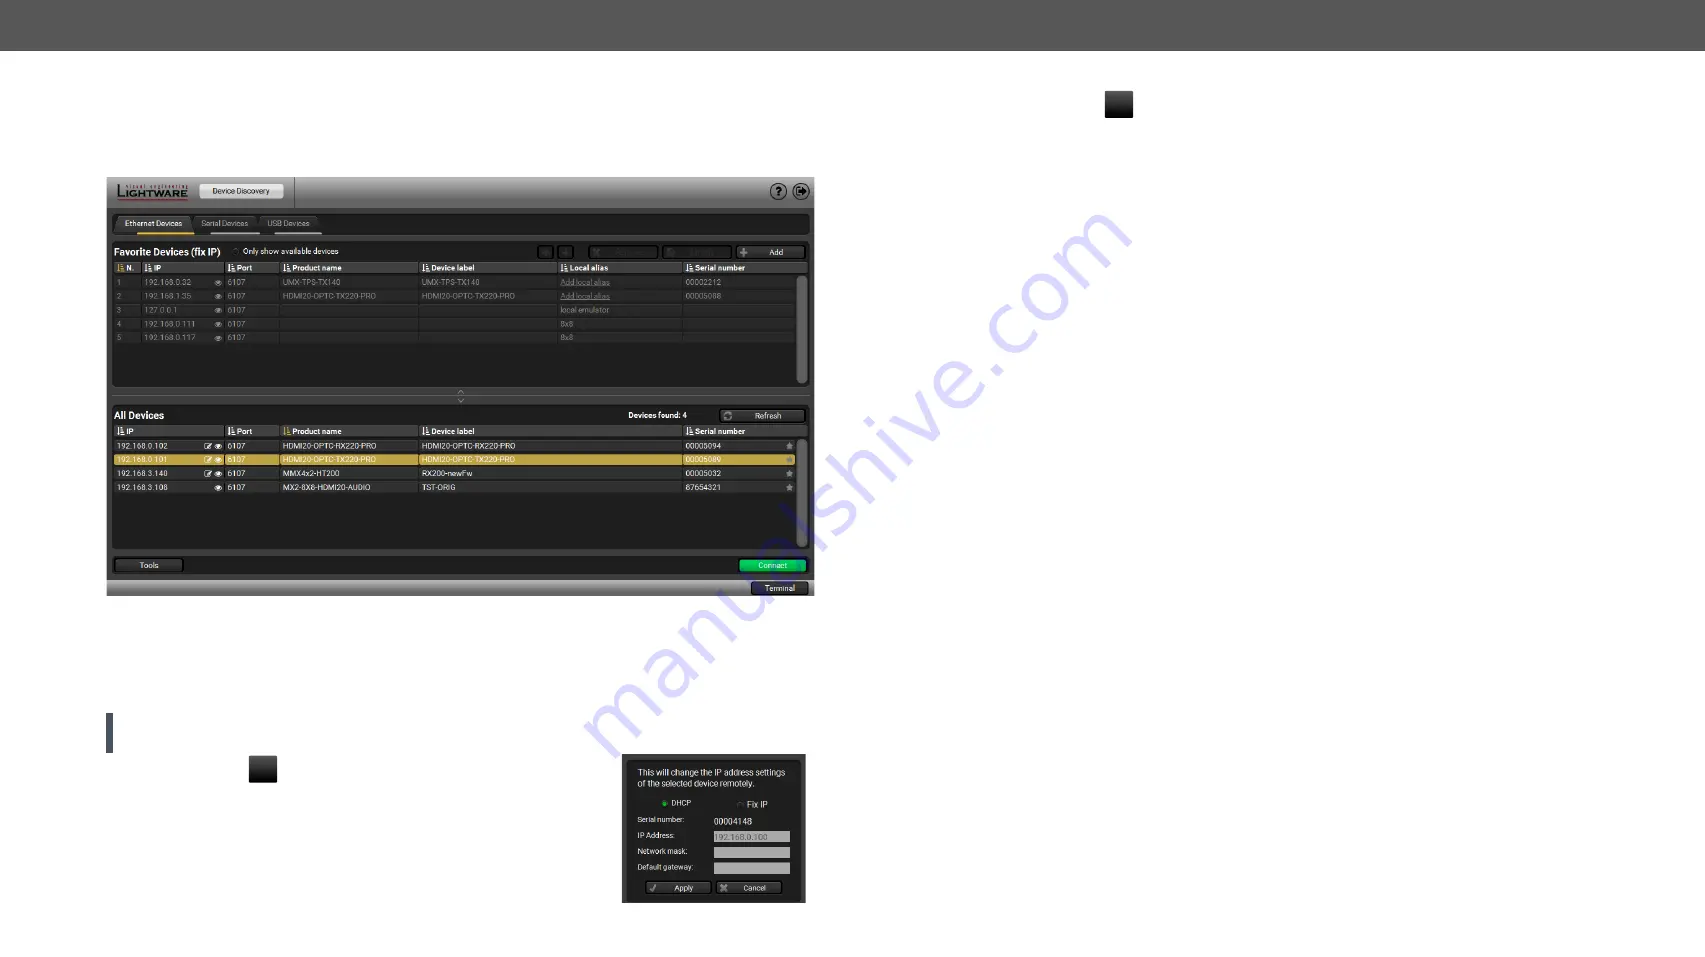
Run the controller software; device discovery window appears automatically.
Device Discovery Window in LDC
Step 3.
Select the unit from the discovered Ethernet devices or under USB devices; when the device is
connected through RS-232 click on the
Query
button next to the desired serial port to display the
device’s name and serial number. Double click on the receiver or select the device and click on the
Connect
button.
ATTENTION! When the device is connected via the local RS-232 port, make sure that Control mode and
LW3 protocol are set on the serial port.
Change IP Address
To modify IP address settings quickly it is not necessary to enter the device's
settings/network menu, you can set them by clicking the pencil icon beside
the IP address. In this window you can see only the new settings.
Identifying the Device
Clicking on the
icon results the blinking of the LDC screen for 10 seconds. The feature helps to
identify the device itself in the rack shelf.
Further Tools
The
Tools
menu contains the following options:
▪
Log Viewer:
The tool can be used for reviewing log files which have been saved previously.
▪
Create EDID:
This tool opens the Easy EDID Creator wizard which can be used for creating unique
EDIDs in a few simple steps. Functionality is the same as the Easy EDID Creator, for the detailed
information see
section.
▪
Demo Mode:
This is a virtual MX-FR17 matrix router with full functionality built into the LDC. Functions
and options are the same as a real MX-FR17 device.
The
Terminal
window is also available by pressing its button on the bottom.


