


4. Operation
HDMI-3D-OPT series – User's Manual
24
4.2.2.
Audio Select Button
Desired audio input can be selected by the
Audio Select button
from the
front panel. The selection order of the inputs depends on the model
as follows:
HDMI-3D-OPT-TX210A:
Analog audio 1
(2.5” Jack)
Analog audio 2
(Phoenix)
Embedded
audio
No audio
HDMI-3D-OPT-TX210RAK:
SW4-OPT-TX240RAK:
4.2.3.
Programmable Show Me Button
Action or an operation can be assigned to the Show Me button. “Show
Me button pressed” is a condition that can be selected in the Event
Manager. See more details in the
section.
4.3. Special Functions - Transmitter
4.3.1. Enable DHCP (Dynamic) IP Address
INFO: This function is available for the SW4-OPT-TX240RAK model
only.
The device has a static IP address as a factory default setting. If this
setting does not fit to the circumstances during install or usage, DHCP
can be enabled from the front panel:
Step 1.
Make sure the device is powered on and operational.
Step 2.
Press and keep pressed the
Show Me
button for 5 seconds.
Step 3.
After 5 seconds front panel LEDs start blinking; release the
button and press it 3 times again quickly (within 3 seconds).
Step 4.
The LEDs get dark, DHCP gets enabled.
1
4
5
3
2
USB
Autoselect
SHOW
ME
AUDIO
SELECT
VIDEO
SELECT
VIDEO
VIDEO
VIDEO
AUDIO
AUDIO
AUDIO
VIDEO
AUDIO
HDCP
AUDIO1
DP IN
DVI-D IN
RST
AUDIO2
AUDIO1 IN
HDMI2 IN
HDMI1 IN
1
4
5
3
2
USB
Autoselect
SHOW
ME
AUDIO
SELECT
VIDEO
SELECT
VIDEO
VIDEO
VIDEO
AUDIO
AUDIO
AUDIO
VIDEO
AUDIO
HDCP
AUDIO1
DP IN
DVI-D IN
RST
AUDIO2
AUDIO1 IN
HDMI2 IN
HDMI1 IN
1
4
5
3
2
USB
Autoselect
SHOW
ME
AUDIO
SELECT
VIDEO
SELECT
VIDEO
VIDEO
VIDEO
AUDIO
AUDIO
AUDIO
VIDEO
AUDIO
HDCP
AUDIO1
DP IN
DVI-D IN
RST
AUDIO2
AUDIO1 IN
HDMI2 IN
HDMI1 IN
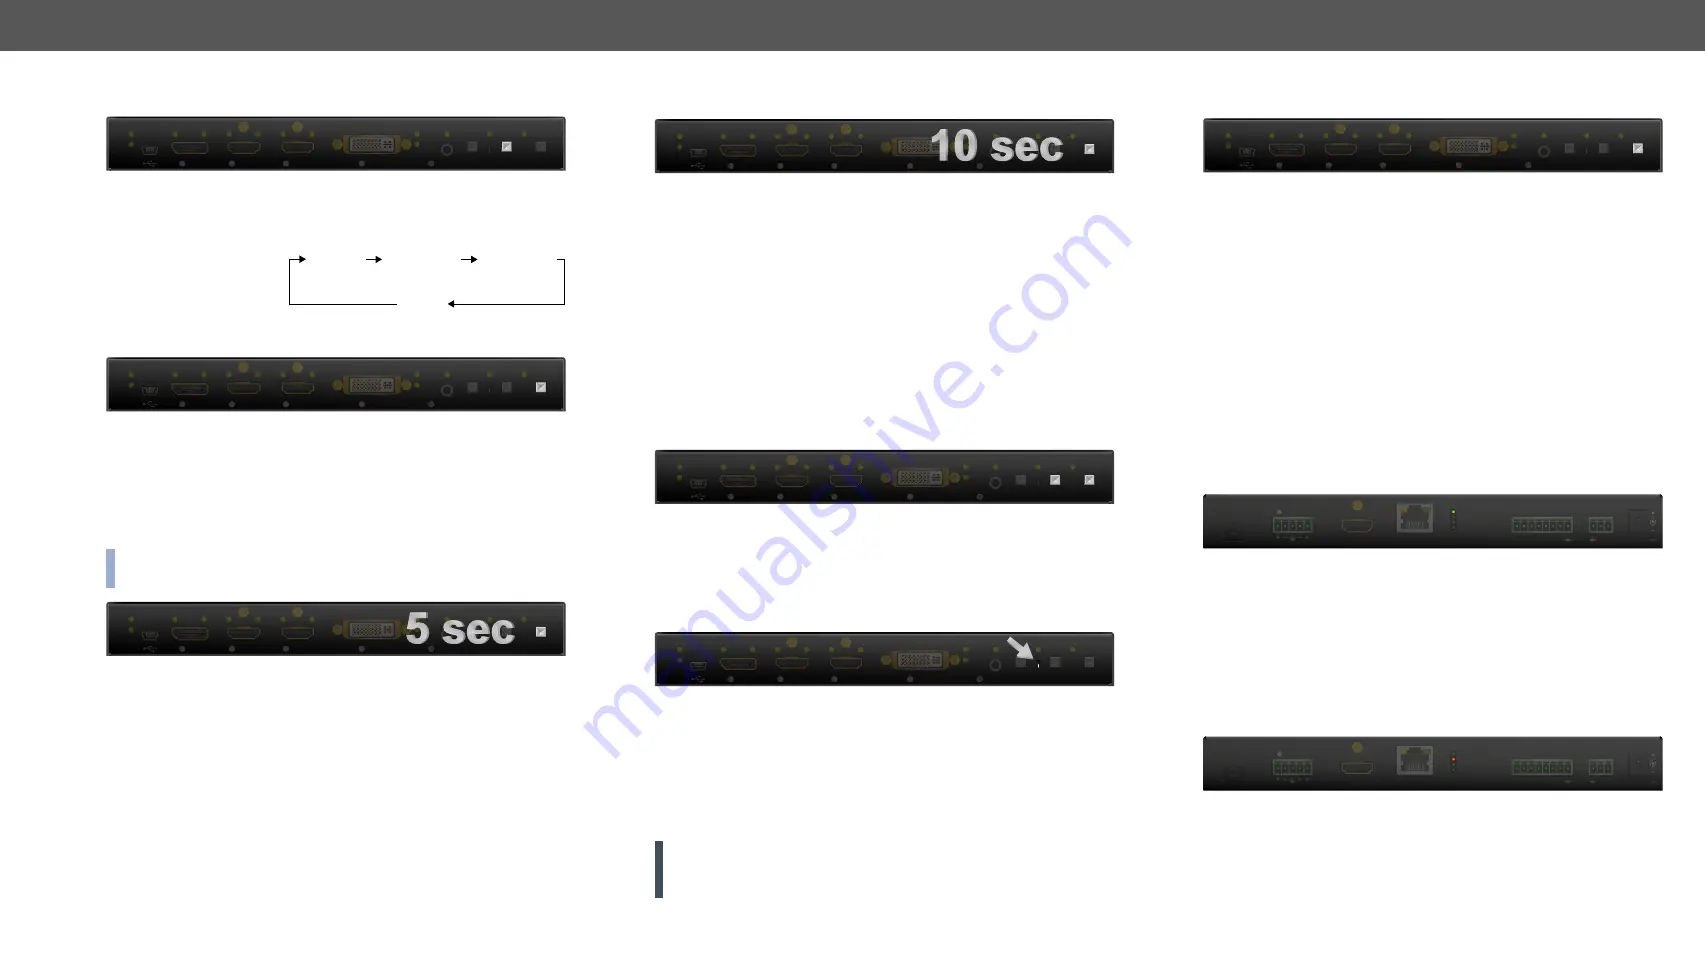
4.3.2. Reset to Factory Default Settings
To restore factory default values, do the following steps:
Step 1.
Make sure the device is powered on and operational.
Step 2.
Press and keep pressed the
Show Me
button for 10 seconds.
After 5 seconds front panel LEDs start blinking but keep on
pressing the button.
Step 3.
After 10 seconds the LEDs start blinking faster; release the
button and press it 3 times again quickly (within 3 seconds).
Step 4.
The LEDs get dark, the device restores the factory default
settings and reboots.
Factory default settings are listed in the
section.
4.3.3.
Control Lock
Press the
Audio Select
and
Show Me
buttons
together
(within 100 ms)
to disable/enable front panel buttons; front panel LEDs blink 4 times
when locking/unlocking. If the control lock is enabled and a button is
pressed, front panel LEDs blink 3 times quickly.
4.3.4.
Reseting the Device
In few cases (after firmware upgrade, etc) you may need to reset the
device. Pushing the reset button results the same as you disconnect
and reconnect the power adaptor to the transmitter. To reseting the
device follow the steps:
Step 1.
Push the button with a thin object for a second.
Step 2.
Wait until the device reboots. You can use the transmitter when
the LIVE LED is blinking slowly again.
ATTENTION!
Reseting the device does not reset the settings to
factory defaults. To reset factory default settings see previous
section.
1
4
5
3
2
USB
Autoselect
SHOW
ME
AUDIO
SELECT
VIDEO
SELECT
VIDEO
VIDEO
VIDEO
AUDIO
AUDIO
AUDIO
VIDEO
AUDIO
HDCP
AUDIO1
DP IN
DVI-D IN
RST
AUDIO2
AUDIO1 IN
HDMI2 IN
HDMI1 IN
1
4
5
3
2
USB
Autoselect
SHOW
ME
AUDIO
SELECT
VIDEO
SELECT
VIDEO
VIDEO
VIDEO
AUDIO
AUDIO
AUDIO
VIDEO
AUDIO
HDCP
AUDIO1
DP IN
DVI-D IN
RST
AUDIO2
AUDIO1 IN
HDMI2 IN
HDMI1 IN
1
4
5
3
2
USB
Autoselect
SHOW
ME
AUDIO
SELECT
VIDEO
SELECT
VIDEO
VIDEO
VIDEO
AUDIO
AUDIO
AUDIO
VIDEO
AUDIO
HDCP
AUDIO1
DP IN
DVI-D IN
RST
AUDIO2
AUDIO1 IN
HDMI2 IN
HDMI1 IN
4.3.5. Entering Firmware Upgrade Mode
It may happen that the firmware upgrade process is not successful
and the device cannot be switched to bootload mode automatically.
In this case, the device can be forced into firmware upgrade mode as
follows:
Step 1.
Make sure the transmitter is powered off.
Step 2.
Press and keep pressed the
Show Me
button.
Step 3.
Power on the transmitter while the
Show Me
button is being
pressed. If the device is switched to firmware upgrade mode
the LIVE LED is blinking quickly (less than 500 ms duty cycle).
The other LEDs are off.
The procedure of firmware upgrade can be found in the
chapter.
4.4.
Rear Panel Status LEDs - Transmitter
4.4.1.
LIVE LED
ON (yellow):
The device is powered but not operational.
BLINKING (green):
The device is powered and operational.
BLINKING (red):
Alert is detected.
BLINKING (yellow):
Firmware upgrade mode, device is in bootload
mode.
OFF:
The device is not powered.
4.4.2.
LASER ACTIVE LED
ON (red):
Laser transmission is enabled.
1
4
5
3
2
USB
Autoselect
SHOW
ME
AUDIO
SELECT
VIDEO
SELECT
VIDEO
VIDEO
VIDEO
AUDIO
AUDIO
AUDIO
VIDEO
AUDIO
HDCP
AUDIO1
DP IN
DVI-D IN
RST
AUDIO2
AUDIO1 IN
HDMI2 IN
HDMI1 IN
LASER ACTIVE
LIVE
PIN: 2.35mm
TX RX
1 2 3 4 5 6 7
FIBER LINK
RS-232
RS-232
GPIO
ETHERNET
HDMI OUT
5V DC 1A
AUDIO2 IN
6
L
R
SC MM
LASER APERTURE
OUTPUT
LASER ACTIVE
LIVE
PIN: 2.35mm
TX RX
1 2 3 4 5 6 7
FIBER LINK
RS-232
RS-232
GPIO
ETHERNET
HDMI OUT
5V DC 1A
AUDIO2 IN
6
L
R
SC MM
LASER APERTURE
OUTPUT


