8.1 Memory cards and chart cards
MicroSD memory cards can be used to back up /
archive data (e.g. Waypoint, and Tracks). Once
data is backed up to a memory card old data can
be deleted from the system, creating capacity for
new data. The archived data can be retrieved at any
time. Chart cards provide additional or upgraded
cartography.
It is recommended that your data is backed up to a
memory card on a regular basis. Do NOT save data
to a memory card containing cartography.
Compatible cards
The following types of MicroSD cards are compatible
with your display:
• Micro Secure Digital Standard-Capacity
(MicroSDSC)
• Micro Secure Digital High-Capacity (MicroSDHC)
Note:
• The maximum supported memory card capacity
is 32 GB.
• MicroSD cards must be formatted to use either
the FAT or FAT 32 file system format to enable
use with your MFD.
Speed class rating
For best performance it is recommended that you
use Class 10 or UHS (Ultra High Speed) class
memory cards.
Chart cards
Your product is pre-loaded with electronic charts
(worldwide base map). If you wish to use different
chart data, you can insert compatible chart cards into
the unit's memory card reader.
Use branded chart cards and memory cards
When archiving data or creating an electronic chart
card, Raymarine recommends the use of quality
branded memory cards. Some brands of memory
card may not work in your unit. Please contact
customer support for a list of recommended cards.
8.2 a6x and a7x
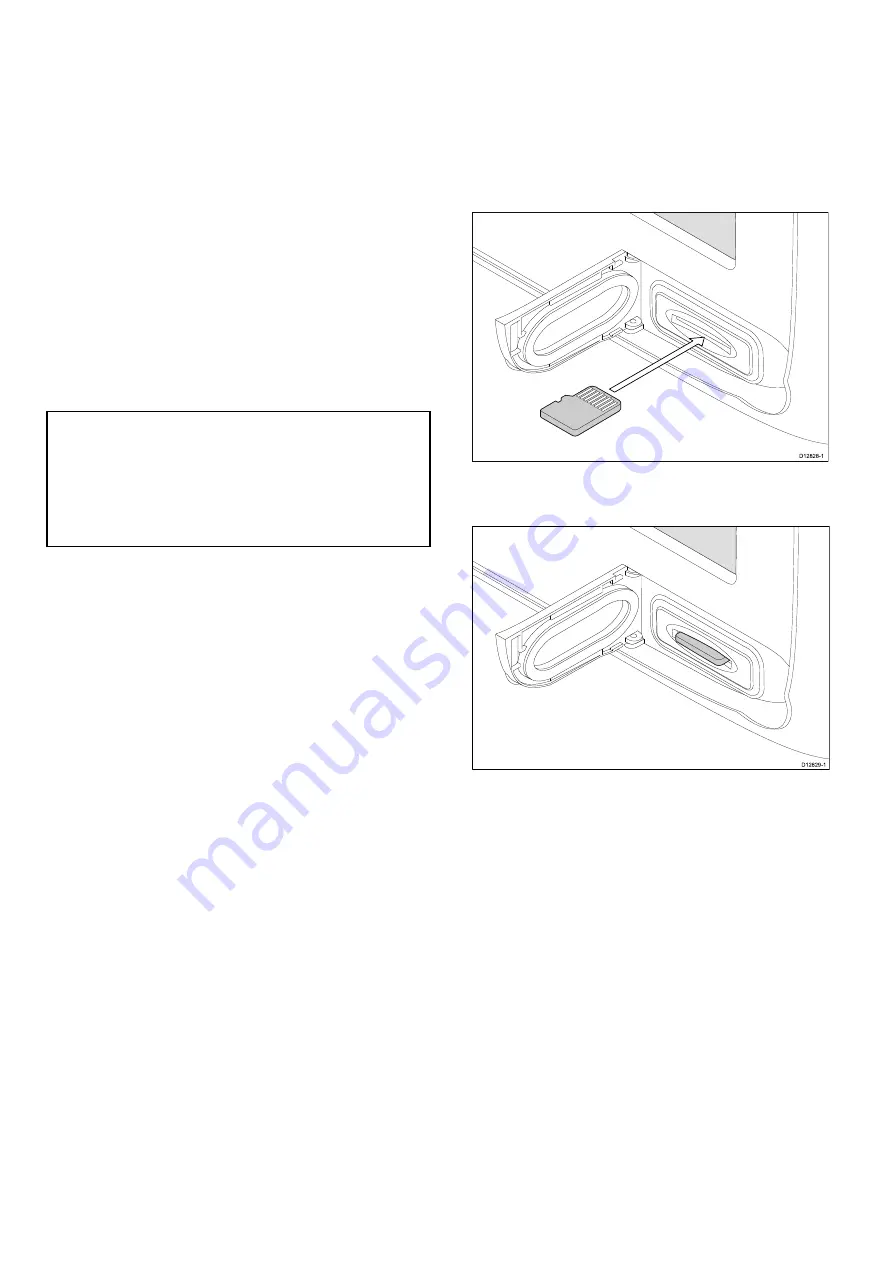
Inserting a memory card or chart card
1. Open the card reader door, located on the front
right of the display.
2. Insert the card, as shown in the diagram below,
the card contacts should be facing UP. Do NOT
force the card. If the card does not fit easily into
the slot, check the orientation.
D12828-1
3. Gently press the card all the way in to the card
slot, as shown in the diagram below. The card is
secure when an audible click is heard.
D12829-1
4. To prevent the ingress of water and consequent
damage, close the card reader door.
Removing a memory card or chart card
From the homescreen:
1. Select
My Data
.
2. Select
Eject Card
.
3. Open the card reader door, located on the front
right of the display.
4. Push the edge of the card towards the unit, until
an audible click is heard.
The card is released from the card slot
mechanism, as shown in the following diagram:
122
a Series / c Series / e Series
Содержание a125
Страница 2: ......
Страница 6: ......
Страница 16: ...16 a Series c Series e Series ...
Страница 43: ...13 GPS receiver 14 Thermal camera 15 Wireless connection Planning the installation 43 ...
Страница 50: ...50 a Series c Series e Series ...
Страница 82: ...82 a Series c Series e Series ...
Страница 114: ...114 a Series c Series e Series ...
Страница 120: ...120 a Series c Series e Series ...
Страница 186: ...186 a Series c Series e Series ...
Страница 187: ...Chapter 13 Man Overboard MOB Chapter contents 13 1 Man overboard on page 188 Man Overboard MOB 187 ...
Страница 190: ...190 a Series c Series e Series ...
Страница 193: ...Chapter 15 Fuel manager Chapter contents 15 1 Fuel manager overview on page 194 Fuel manager 193 ...
Страница 208: ...208 a Series c Series e Series ...
Страница 230: ...230 a Series c Series e Series ...
Страница 320: ...320 a Series c Series e Series ...
Страница 340: ...340 a Series c Series e Series ...
Страница 364: ...364 a Series c Series e Series ...
Страница 420: ...420 a Series c Series e Series ...
Страница 424: ...424 a Series c Series e Series ...
Страница 434: ...434 a Series c Series e Series ...
Страница 459: ......
Страница 460: ...www raymarine com ...


