background image

25

© 2013 Life Fitness

TRAINING INF

ORMA

TION

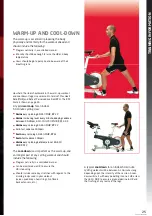
WARM-UP AND COOL-DOWN

The warm-up is essential in preparing the body 
physically and mentally for the workout ahead and 
should include the following:

• 

Progress naturally in a controlled manner

•  

Intensity should be enough to raise the HR and body 
temperature

•  

Users should begin to perspire and be aware of their 
breathing rate

The 

cool-down

 is as important as the warm-up, and 

an integral part of any cycling workout and should 
include the following:

• 

Progress naturally in a controlled manner

•  

Can be monitored via HR to ensure the 
HR is reducing

•  

Should include some key stretches with regards to the 
muscle groups used in your workout 
(calves, quadriceps, hamstrings, hip fl exors, 
back extensors, etc.)

A typical 

warm-up

 for an indoor 

60-minute cycling class:

• 

5mins

 easy spinning 60-65% MHR, RPE 2

•  

3mins

, increasing level every minute, keeping cadence 

between 90-95rpm, 65%-70%-75% MHR, RPE 2-3-5

• 

2mins

 easy spinning 60-65% MHR, RPE 2

• 

1min fast cadence

• 

1min

 easy spinning 60-65% MHR, RPE 2

• 

1min

 fast cadence

•  

2mins

 easy spinning before main set 60-65% 

MHR, RPE 2

A typical 

cool-down

 for an indoor 60-minute 

cycling

 workout will be between 5-10 minutes long 

depending upon the intensity of the session. A cool-
down will start with easy pedalling in zone 1 HR or less 
than 65% MHR to ensure a gradual decline in HR and 
the fl ushing of any toxins in the legs.

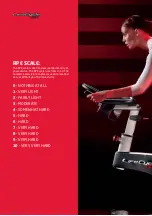
How hard the rider should work in the warm-up, workout 
and cool-down stages is expressed in terms of Max Heart 
Rate(MHR) and Rate of Perceived Exertion(RPE). The RPE 
Scale is shown on page 26.

Содержание LifeCycle GX

Страница 1: ...CYCLING TECHNIQUE OPERATION MANUAL...

Страница 2: ...2...

Страница 3: ...644 Fax 31 180 646 699 Service email service db cemea life tness com Sales marketing email marketing db cemea life tness com Operating hours 09 00 17 00 CET ASIA PACIFIC AP Japan Life Fitness Japan Ni...

Страница 4: ...4...

Страница 5: ...lever 14 Optional console display CYCLING TECHNIQUE SKILLS 20 Cycling technique 22 Upper Body and Hand Positions TRAINING INFORMATION 24 Heart rate monitor training 25 Warm up and cool down 28 LIFECYC...

Страница 6: ...ver place liquids of any type directly on the unit except in an accessory tray or holder Containers with lids are recommended Do not use these products in bare feet Always wear shoes Wear shoes with r...

Страница 7: ...TRUCTIONS FOR FUTURE REFERENCE This exercise bike is equipped with a locking system to prevent the uncontrolled use or moving of rotating parts Install cable and lock as shown below LOCKING SYSTEM WAR...

Страница 8: ...8...

Страница 9: ...9 2013 Life Fitness LIFECYCLE GX POSITION AND SETUP...

Страница 10: ...ngages a preset hole and turn the knob clockwise to secure Sit on the bike and bring the pedals in a vertical position roughly 12 and 6 o clock Place the heel of the foot on the pedal nearest the oor...

Страница 11: ...spindle Tighten the knob HANDLEBAR HEIGHT Handlebar height varies between users due to personal preference tness and exibility A general starting point is to adjust the handlebar height so that it is...

Страница 12: ...stress as possible on the spine lower back muscles shoulders and neck Users should be able to reach Position 3 without having to slide forward on the saddle see pages 22 23 for body and hand position...

Страница 13: ...s should hear a de nitive CLICK as the shoe cleat engages with the pedal Ensure comfort while engaging and disengaging the foot BRAKE LEVER ADJUSTMENTS Pedalling resistance is controlled by the increm...

Страница 14: ...feCycle GX are Polar and all brands Polar compatible Accuracy of non Polar brands may vary The console also has a Display 2 which will show the max and averages of all the data shown previously throug...

Страница 15: ...rst time these setup values become default settings If the brake is not calibrated a will appear on the console in the LEVEL window Refer to Assembly Manual for brake calibration procedure NAVIGATING...

Страница 16: ...and down button to set age 5 Press OK 6 Return back to DISPLAY mode 1 NOTE Data can be reset to default by holding the LOGO button for 3 seconds or after 5 minutes of no cadence DISPLAY MODE 1 ONSCREE...

Страница 17: ...sole turns off automatically after ve minutes if no signal cadence is being received DEFAULT SETTING Default settings apply if no data are entered in setup or user mode These values are preset in prod...

Страница 18: ...18...

Страница 19: ...19 2013 Life Fitness CYCLING TECHNIQUE SKILLS...

Страница 20: ...ackside at the rear of the saddle so that your sitting bones are supported Lift the chest and look straight ahead Lean forward hinging from the hips and NOT arching the spine Place the hands on the ha...

Страница 21: ...e workouts the ankle stays in the same position through the whole rotation approximately 90 with the toes slightly lower than the heels It reduces the degrees through which the ankle must rotate there...

Страница 22: ...UPPER BODY AND HAND POSITIONS The position of the upper body is key in achieving good form and technique The positioning of the hands will determine posture breathing comfort levels and can determine...

Страница 23: ...RIAL LONG EFFORTS In Position 3 the hands are placed in the aero position in the middle of the bars This position is commonly used for sustained efforts and seated high cadence efforts in a tucked pos...

Страница 24: ...ey are training within a speci c HR zone by either monitoring their current HR or max HR on the console By using the console and HR monitor a user can ensure they are not over exerting or underachievi...

Страница 25: ...riceps hamstrings hip exors back extensors etc A typical warm up for an indoor 60 minute cycling class 5mins easy spinning 60 65 MHR RPE 2 3mins increasing level every minute keeping cadence between 9...

Страница 26: ...4 SOMEWHAT HARD 5 HARD 6 HARD 7 VERY HARD 8 VERY HARD 9 VERY HARD 10 VERY VERY HARD The RPE scale is used to measure the intensity of your exercise The RPE scale runs from 0 10 The numbers below relat...

Страница 27: ...27 2013 Life Fitness TRAINING INFORMATION...

Страница 28: ...60 65 MHR RPE 2 Position 1 RECOVERY 5mins easy spin 60 65 MHR RPE 2 Position 1 REPEAT X1 2mins 70 75 MHR RPE 4 Position 1 2mins 75 80 MHR RPE 5 Position 2 2mins 80 90 MHR RPE 6 Position 2 out the sad...

Страница 29: ...ition 3 15secs Position 2 out the saddle RPE 7 COOL DOWN 8mins easy spin 60 65 MHR RPE 2 Position 1 DROP DOWNS WARM UP 4mins easy spin 90rpm or 60 65 MHR RPE 2 Position 1 3mins going up each minute in...

Страница 30: ...st two minutes for general disinfection purposes Contact customer support services to order these cleaners 1 800 351 3737 or email customersupport life tness com LIFE FITNESS COMPATIBLE CLEANERS Mild...

Страница 31: ...including any lost pro ts or lost savings for any special indirect secondary incidental or consequential damages of any nature arising out of the use of or inability to use this Product Some states d...

Страница 32: ...37 life tness com follow us 2013 Life Fitness a division of Brunswick Corporation All rights reserved Life Fitness and LifeCycle are a registered trademark of Brunswick Corporation Printed in USA PM 0...

Отзывы: