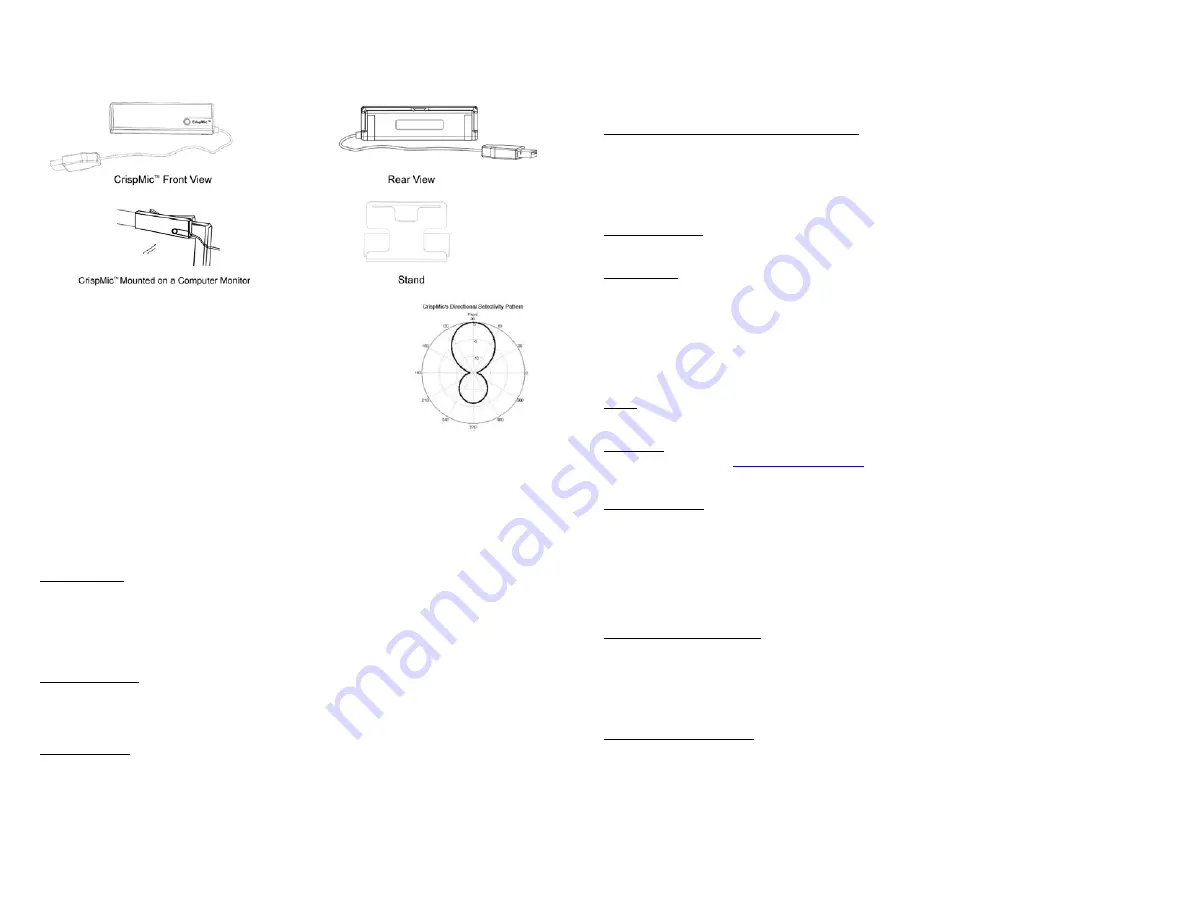
CrispMic™ User Guide
CrispMic
TM
is an advanced microphone developed by Li Creative Technologies
based on microphone array and noise reduction technology. This highly directional
microphone provides crisp, clear, noise-reduced speech signals. It is an ideal
solution for your voice communication and recording applications. CrispMic
TM
improves speech recognition accuracy and speech quality in voice based chat
programs and VoIP applications in noisy environments. CrispMic
TM
supports a
USB interface and can be directly plugged into a laptop or PC with no additional
software installation required prior to use.
We recommend you record your serial number from the bottom of the CrispMic
TM
package.
Serial number : ___________________________
Please refer to this number when contacting Li Creative Technologies for support with your CrispMic
TM
.
Specifications
Weight
3.2
oz.
Dimensions
3.8 x 1.09 x 0.55 inches (97 x 28 x 14 mm).
Bandwidth
200 Hz to 8000 Hz.
Instructions on use
Mounting CrispMic
TM
CrispMic
TM
needs to be mounted horizontally on a stable mount such as the provided Stand or the flat screen monitor. CrispMic
TM
should be mounted such that the front (black face) faces the user. In order to mount CrispMic
TM
at a selected location, follow these
steps:
1.
Pull back the securing clips at the back of CrispMic
TM
.
2.
Hook clips over the top of Monitor/Display or through the opening in the Stand provided.
3.
Gently release the clips as you position the CrispMic
TM
.
Un-mounting CrispMic
TM
In order to remove CrispMic
TM
from its mounted location, follow these steps:
1. Hold
CrispMic
TM
and pull back the securing clips behind the CrispMic
TM
.
2. Lift
CrispMic
TM
off the Monitor/Display or through the opening in the Stand provided.
3.
Gently release the clips.
CrispMic
TM
installation
In order to install CrispMic
TM
for speech recording (example: for VoIP or chat programs), follow these steps:
1. Plug
CrispMic
TM
into your USB port.
2.
Wait for 5 seconds. Once CrispMic
TM
is ready for use you will hear an audible tone from your computer. A tone may not be
heard on OS X or based on your Windows system settings. (If the tone is not heard please see the Troubleshooting section
for installation help and confirmation).
3. The
CrispMic
TM
is now ready to record speech.
4.
The Blue LED on the front face should be OFF. If ON, press the Mode Select button to switch OFF.
(CrispMic
TM
is always powered when connected to the computer's USB port).
CrispMic
TM
installation for use with speech recognition software
In order to install CrispMic
TM
for speech recognition (example: Nuance's Dragon Naturally Speaking), follow these steps:
1. Plug
CrispMic
TM
into your USB port.
2. Once
CrispMic
TM
is ready for use you will hear an audible tone from your computer.(If the tone is not heard please see the
troubleshooting section for installation help).
3.
Press the Mode Select button on the front face of the CrispMic
TM
. The Blue LED will light showing CrispMic
TM
is ready to
start recording speech for speech recognition.
CrispMic
TM
uninstallation
In order to uninstall CrispMic
TM
, follow this single step:
1. Unplug
CrispMic
TM
from your USB port.
Using CrispMic
TM
In order to start using CrispMic
TM
, follow these steps. Please refer above for detailed instructions on carrying out each step.
1. Mount
CrispMic
TM
.
2. Install
CrispMic
TM
.
3.
Press the Mode Select button based on your speech recording needs.
LED
Light
OFF
CrispMic
TM
is ready to record audio.
LED Light ON CrispMicTM is ready to record audio for speech recognition.
Troubleshooting
Warning
Do not open or pry apart the CrispMic
TM
device. Any attempt to open the device will void all warranties. In case your CrispMic
TM
is
not functioning as described please refer the help for your particular OS, below.
Additional help
For additional information go to
www.licreativetech.com/crispmic
.
Troubleshooting for Windows XP
1) CrispMic
TM
installation
In order to manually install CrispMic
TM
, follow these steps:
1. Plug
CrispMic
TM
into your USB port.
2.
Go to the Control Panel (from the Start Menu) and select "Sounds and Audio Devices".
3.
Select the “Audio" tab.
4.
Scroll the list of Default devices under "Sound recording" and pick "CrispMic by LcT".
5. CrispMic
TM
is ready to start recording audio.
6.
If you desire to use CrispMic
TM
with speech recognition software: Press the Mode Select button on CrispMic
TM
. The Blue LED
will light showing CrispMic
TM
is ready to start recording speech for speech recognition.
2) CrispMic
TM
recording volume control
In order to manually adjust the CrispMic
TM
recording volume, follow these steps:
1.
Go to the Control Panel (from the Start Menu) and select “Sounds and Audio Devices".
2.
Select the "Audio" tab.
3.
Scroll the list of Default devices under “Sound recording" and Select "CrispMic by LcT".
4.
Press the "Volume..." button once "CrispMic by LcT" is highlighted.
5.
Adjust the volume on the window that appears.
3) CrispMic
TM
recording volume mute
In order to mute the CrispMic
TM
recording volume, follow these steps:
1.
Go to the Control Panel (from the Start Menu) and select "Sounds and Audio Devices".
2.
Select the "Audio" tab.
3.
Scroll the list of Default devices under "Sound recording" and Select "CrispMic by LcT ".
4.
Press the “Volume...” button once “CrispMic by LcT" is highlighted.
5.
Adjust the volume on the window that appears to its minimum level.


