background image

20

ENGLISH

User Settings

Menu Settings

To view the settings menu, press the joystick button at the bottom of the monitor and then enter the 

Menu

.

Configure the options by moving the joystick up/down/left/right.

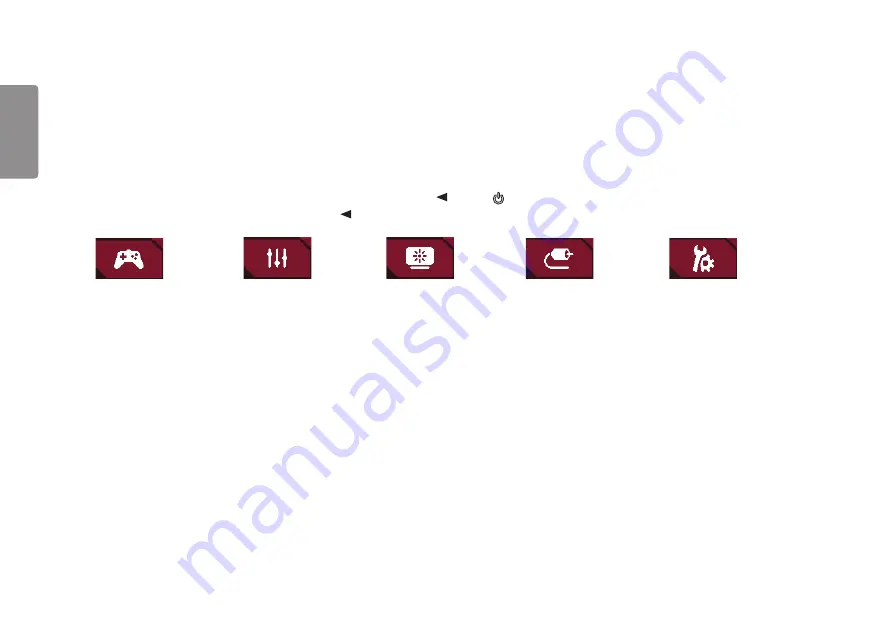
To return to the upper settings or set other settings items, move the joystick to 


or press ( ).

If you want to exit the settings menu, move the joystick to 


until you exit.

Game Mode

Game Adjust

Picture Adjust

Input

General

Содержание UltraGear 27GK65S

Страница 1: ... screen with LED backlights Please read this manual carefully before operating your set and retain it for future reference www lg com Copyright 2019 LG Electronics Inc All Rights Reserved 27GL63T 27GK65S OWNER S MANUAL LEDMonitor ...

Страница 2: ... Tidying up Cables Using the Kensington Lock Installing the Wall Mount Plate Installing on the Wall USING THE MONITOR 15 Connecting to a PC 15 HDMI Connection DisplayPort Connection Connecting AV Devices 16 HDMI Connection Connecting Peripherals 17 Connecting Headphones USER SETTINGS 18 Activating the Main Menu 18 Main Menu Features User Settings 20 Menu Settings TROUBLESHOOTING 30 PRODUCT SPECIFI...

Страница 3: ...has different licenses Visit www lg com for more information on the license The terms HDMI and HDMI High Definition Multimedia Interface and the HDMI Logo are trademarks or registered trademarks of HDMI Licensing Administrator Inc ...

Страница 4: ...d and could result in personal injury When lifting or moving the monitor do not touch the monitor screen The force applied to the monitor screen may cause damage to it For wave pattern on appearance unlike the general method of coating it s applied to added glittering material in raw material With no peeled off appearance it has good durability Please use it with confidence because there is no prob...

Страница 5: ...inger Basic Functions Power on Press the joystick button once with your finger to turn on the monitor Power off Press and hold the joystick button once with your finger to turn off the monitor Volume control You can control the volume by moving the joystick button left right Controls screen brightness You can control the screen s brightness by moving the joystick button up down NOTE The joystick b...

Страница 6: ...nnect the power cord and all other cables Hold the bottom and side of the monitor frame firmly Do not hold the panel itself When holding the monitor the screen should face away from you to prevent it from being scratched When transporting the monitor do not expose the monitor to shock or excessive vibration When moving the monitor keep it upright and never turn the monitor on its side or tilt it s...

Страница 7: ...the monitor panel without the stand base its joystick button may cause the monitor to become unstable and fall resulting in damage to the monitor or human injury In addition this may cause the joystick button to malfunction ...

Страница 8: ...s WARNING When adjusting the screen height do not place your hand on the stand body to avoid injury to your fingers Installing on a Table Lift the monitor and place it on the table in an upright position Place the monitor at least 100 mm 3 94 inches away from the wall to ensure sufficient ventilation 100 mm 3 94 inches 100 mm 3 94 inches 100 mm 3 94 inches 100 mm 3 94 inches ...

Страница 9: ...gle of the screen can be adjusted forward or backward from 5 to 15 for a comfortable viewing experience Front Rear WARNING To avoid injury to the fingers when adjusting the screen do not hold the lower part of the monitor s frame as illustrated below Be careful not to touch or press the screen area when adjusting the angle of the monitor ...

Страница 10: ...stand base make sure that when rotating the monitor using the pivot feature the stand does not make contact with the monitor 1 Raise the monitor to the maximum height 2 Adjust the angle of the monitor in the direction of the arrow as shown in the figure 3 Rotate the monitor clockwise as shown in the figure Head Stand ...

Страница 11: ...ted easily using the screen pivot shortcut key provided with your Windows operating system Note that some Windows versions and some graphics card drivers may use different settings for the screen pivot key or may not support the pivot key at all Tidying up Cables Arrange the cables using the cable holder as shown in the illustration Mouse Holder Cable Holder ...

Страница 12: ...ts the specifications for the wall mount plate or other compatible devices 1 Place the screen face down To protect the monitor panel screen cover the surface with a soft cloth or the monitor protection pad included in the product package 2 Remove the four screws tightened on the back of the monitor 3 Place the wall mount plate onto the monitor and align it with the screw holes 4 Tighten the four s...

Страница 13: ...100 mm 3 94 inches 100 mm 3 94 inches 100 mm 3 94 inches To install the monitor to a wall attach a wall mounting bracket optional to the back of the monitor Make sure that the wall mounting bracket is securely fixed to the monitor and to the wall 1 If you use screws longer than the standard length it may damage the inside of the product 2 A non VESA standard screw may damage the product and cause ...

Страница 14: ... ceiling or on a slanted wall may result in the monitor falling off which could lead to injury Use an authorized LG wall mount and contact the local dealer or qualified personnel Applying excessive force when tightening screws may cause damage to the monitor Damage caused in this way will not be covered by the product warranty Use the wall mounting bracket and screws that conform to VESA standards...

Страница 15: ... is normal Sometimes red green or blue spots may appear on the screen This is normal Connecting to a PC This monitor supports the Plug and Play feature Plug and Play A feature that allows you to add a device to your computer without having to reconfigure anything or install any manual drivers HDMI Connection Transmits digital video and audio signals from your PC to the monitor CAUTION Using a DVI ...

Страница 16: ... cause the device to malfunction Connecting AV Devices HDMI Connection HDMI transmits digital video and audio signals from your AV device to the monitor NOTE Using a DVI to HDMI DP DisplayPort to HDMI cable may cause compatibility issues Use a certified cable with the HDMI logo attached If you do not use a certified HDMI cable the screen may not display or a connection error may occur Recommended ...

Страница 17: ...eripheral devices are sold separately If you use angled earphones it may cause a problem with connecting another external device to the monitor Therefore it is recommended to use straight earphones Angled Straight Depending on the audio settings of the PC and external device headphones and speaker functions may be limited ...

Страница 18: ...tick Button Button Menu Status Description Main menu disabled Enables the main menu Main menu enabled Exits the main menu Holding down the button to turn off the monitor You can turn off the monitor this way at any time including when the OSD is on Main menu disabled Adjusts the monitor volume level Main menu enabled Enters the Input features Main menu disabled Adjusts the monitor volume level Mai...

Страница 19: ... Features Main Menu Description Input Sets input mode Power Off Turns off the monitor Menu Configures the screen settings Game Mode Sets the game mode for gaming Exit Exits the main menu Power Off Input Menu Game Mode Exit ...

Страница 20: ...monitor and then enter the Menu 2 Configure the options by moving the joystick up down left right 3 To return to the upper settings or set other settings items move the joystick to or press 4 If you want to exit the settings menu move the joystick to until you exit Game Mode Game Adjust Picture Adjust Input General ...

Страница 21: ...w you to save two sets of customized display settings including game related setup options FPS This mode is optimized for FPS games It is suitable for very dark FPS games RTS This mode is optimized for RTS Game Vivid Optimized the screen for vivid colors Reader Optimizes the screen for viewing documents You can brighten the screen in the settings menu HDR Effect Optimizes the screen for high dynam...

Страница 22: ...is mode is optimized for RTS Game Vivid Optimized the screen for vivid colors NOTE HDR content may not be operated properly depending on the Windows10 OS setting Please check the HDR On Off setting of Windows When the HDR function is turned on the characters or picture quality may be poor according to Graphic card performance While the HDR function is on screen flickering or cracking may occur whe...

Страница 23: ...tion This function is available for the following vertical frequency 120Hz 144Hz Off Turns 1ms Motion Blur Reduction Mode off NOTE To reduce motion blur brightness is reduced with backlight control 1ms Motion Blur Reduction and Adaptive Sync feature can not used at the same time This function is game optimized It is recommended to turn off when you are not using the gaming function Flicker may occ...

Страница 24: ...terface DisplayPort Adaptive Sync HDMI FreeSync Supported Graphic Card A graphic card that supports NVIDIA s G SYNC or AMD s FreeSync is necessary Supported Version Make sure to update the graphic card to the latest driver For more information and requirement refer to NVIDIA website www nvidia com and AMD website www amd com On Adaptive Sync function on Off Adaptive Sync function off Black Stabili...

Страница 25: ...the response time to Fast Normal Sets the response time to Normal Off Does not use the response time improvement feature Cross Hair Cross hair provides a mark on the center of the screen for First Person Shooter FPS games Users can select the cross hair that fits their gaming environment among four different cross hairs When the monitor is off or enters energy saving mode the cross hair feature is...

Страница 26: ...en color to a bluish tone Manual The user can fine tune the color temperature R G B You can customize the picture color using Red Green and Blue colors Six Color Meets the user requirements for colors by adjusting the hue and saturation of the six colors and then saving the settings Hue Adjusts the tone of the screen colors Saturation Adjusts the saturation of the screen colors The lower the value...

Страница 27: ...spect Ratio Adjusts the aspect ratio of the screen Full Wide Displays the video in widescreen regardless of the video signal input Original Displays video according to the aspect ratio of the video signal input NOTE The display may look the same for Full Wide and Original options at the recommended resolution 1920 x 1080 Auto Input Switch When automatic input switch is set to On display will autom...

Страница 28: ... a timer for the auto off function Off 4H 6H and 8H HDMI Compatibility Mode HDMI Compatibility Mode feature can recognize the legacy equipment that does not support HDMI 2 0 On Enables HDMI Compatibility Mode Off Disables HDMI Compatibility Mode NOTE If the connected device does not support HDMI Compatibility Mode the screen or sound may not work properly When HDMI Compatibility Mode is on 1920 x ...

Страница 29: ...Lock Off Disables OSD Lock NOTE All features are disabled except Brightness Contrast in Picture Adjust Input OSD Lock and Information in General Information The display information will be shown Total Power On Time Resolution Reset to Initial Settings No Cancel the select Yes Returns to the default settings ...

Страница 30: ...s see the troubleshooting guide in the product owner s manual message being displayed This occurs when signals transferred from the PC graphics card are out of the recommended horizontal or vertical frequency range of the monitor Please see the Product Specification section of this manual to set the appropriate frequency Is the No Signal message being displayed This is displayed when the signal ca...

Страница 31: ...isplay one horizontal line is called the horizontal cycle If 1 is divided by the horizontal interval the result is the number of horizontal lines displayed per second This is called horizontal frequency and is represented by kHz Check if the graphics card s resolution or frequency is within the range allowed by the monitor and set it to the recommended optimal resolution Control Panel Display Menu...

Страница 32: ...screen When using the monitor pixilated spots red green blue white or black may appear on the screen This is normal for an LCD screen It is not an error nor is it related to the monitor s performance No sound from the headphone port Are images displayed using DP DisplayPort or HDMI input without sound Make sure that the headphone port connections are made properly Try increasing the volume with th...

Страница 33: ...0 144 Hz Power Sources Power Rating 19 V 2 4 A Or 19 V 2 0 A Power Consumption Typical Operating Mode 30 W Typical Sleep Mode Standby Mode 0 3 W Off Mode 0 3 W AC DC Adapter type DA 48F19 manufactured by Asian Power Devices Inc or type ADS 48FSK 19 19048EPCU 1 manufactured by SHENZHEN HONOR ELECTRONIC or type ADS 48FSK 19 19048EPK 1 manufactured by SHENZHEN HONOR ELECTRONIC or type ADS 48FSK 19 19...

Страница 34: ...tronics H K Ltd or Type AD2137S20 manufactured by PI Electronics H K Ltd or Type AD2137620 manufactured by PI Electronics H K Ltd Output 19 V 2 1 A Environmental Conditions Operating Conditions Temperature 0 C to 40 C 32 F to 104 F Humidity Less than 80 Storing Conditions Temperature 20 C to 60 C 4 F to 140 F Humidity Less than 85 Dimensions Monitor Size Width x Height x Depth With Stand 615 1 x 5...

Страница 35: ...75 75 0 800 x 600 37 879 60 317 1024 x 768 97 551 120 1024 x 768 60 023 75 029 1280 x 1024 63 194 59 96 1280 x 1024 79 976 75 025 1280 x 1024 130 035 119 96 1280 x 720 45 00 60 00 1920 x 1080 137 26 119 98 1920 x 1080 67 50 60 1920 x 1080 84 36 74 99 1920 x 1080 113 22 99 93 1920 x 1080 163 44 144 If you use an input timing that is outside the supported frequency you may experience poor response s...

Страница 36: ...e Horizontal Frequency kHz Vertical Frequency Hz Remarks 480P 31 5 60 576P 31 25 50 720P 37 5 50 720P 45 60 1080P 56 25 50 1080P 67 5 60 1080P 112 5 100 1080P 135 120 Power LED Mode LED Color On Mode Red For a few seconds Sleep Mode Standby Mode Off Off Mode Off ...

Страница 37: ...ss 2 5 2 Game Adjust Cross Hair Red Dot 2 5 3 Game Adjust Cross Hair Green Dot 2 5 4 Game Adjust Cross Hair Off 2 5 5 Game Adjust Game Reset 2 6 Game Adjust Game Reset No 2 6 1 Game Adjust Game Reset Yes 2 6 2 Picture Adjust 3 Picture Adjust Brightness 3 1 Picture Adjust Brightness 3 1 1 Slider Picture Adjust Contrast 3 2 Picture Adjust Contrast 3 2 1 Slider Picture Adjust Sharpness 3 3 Menu Locat...

Страница 38: ...ist 4 1 Input Input List HDMI 1 4 1 1 Input Input List HDMI 2 4 1 2 Input Input List DisplayPort 4 1 3 Input Aspect Ratio 4 2 Input Aspect Ratio Full Wide 4 2 1 Input Aspect Ratio Original 4 2 2 Input Auto Input Switch 4 3 Input Auto Input Switch On 4 3 1 Input Auto Input Switch Off 4 3 2 General 5 General Language 5 1 General Language English 5 1 1 General Language German 5 1 2 General Language F...

Страница 39: ...General HDMI Compatibility Mode Off 5 5 2 General DisplayPort Version 5 6 General DisplayPort Version 1 4 5 6 1 General DisplayPort Version 1 2 5 6 2 General DisplayPort Version 1 1 5 6 3 General OSD Lock 5 7 General OSD Lock On 5 7 1 General OSD Lock Off 5 7 2 General Information 5 8 General Reset to Initial Settings 5 9 General Reset to Initial Settings No 5 9 1 General Reset to Initial Settings...

Страница 40: ... warranty disclaimers and copyright notices are available for download LG Electronics will also provide open source code to you on CD ROM for a charge covering the cost of performing such distribution such as the cost of media shipping and handling upon email request to opensource lge com This offer is valid for three 3 years from the date on which you purchased the product Supplier s Declaration ...

Отзывы: