90
206-4334
(Continued from previous page)
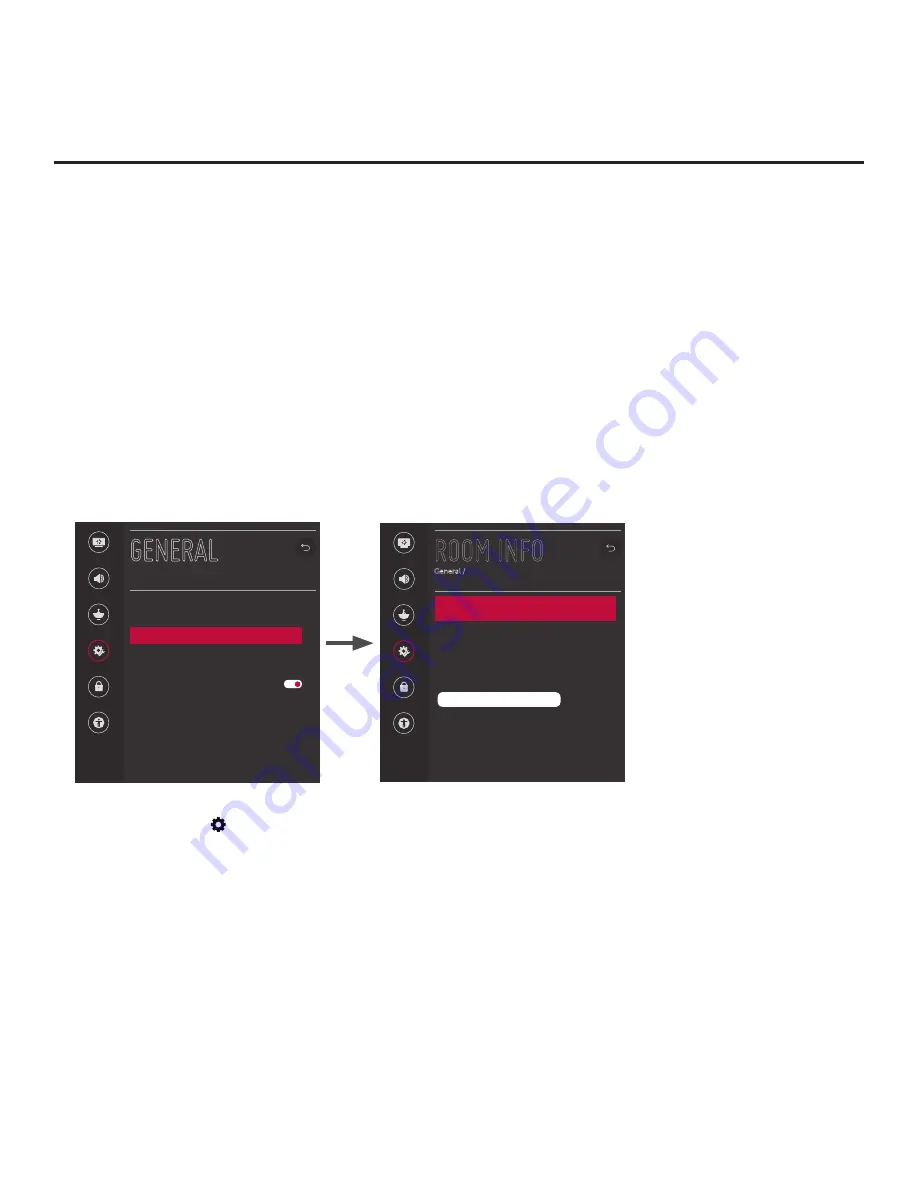
To change the TV Zone, select/highlight the
TV Zone
field and press the Wheel (
OK
) button. Then,
use the Left/Right arrow keys to specify the desired TV Zone # (0–8). Press
the Wheel (
OK
) button
when you are finished.
• Label: Allows you to select a North, South, East, or West text label for this TV. Select/highlight
the
Label
field and press the Wheel (
OK
) button. Then, use the Up/Down arrow keys to select the
applicable label. Press the Wheel (
OK
) button when you are finished.
• Room Number: Allows you to specify the number of the room—up to 16 characters—in which the TV
is located. To enter a room number, use the Up/Down arrow keys to select/highlight the
Room Number
field and press
the Wheel (
OK
) button. You can then use the number keys on the Installer Remote to
direct enter a room number, or you can use the arrow keys to select the appropriate alphanumeric
character(s) from the pop-up virtual keyboard at the bottom of the screen. When you are done, select
Enter
from the virtual keyboard, and then press the Wheel (
OK
) button on the Installer Remote.
Note:
The TV name (default: TV’s serial number) will be changed to the room number specified
here.
See “Media Share Setup” on pages 74 to 76 for further information on the TV name.
Picture
Sound
Channels
General
Safety
Accessibility
GENERAL
Language
Location
Room Info
Time & Date
Timers
Standby Light
Set ID
1
SIMPLINK (HDMI-CEC)
USB Eject
User Agreements
^
^
^
Picture
Sound
Channels
General
Safety
Accessibility
ROOM INFO
General /
Wi-Fi Zone
0
TV Zone
0
Label
-----
Room Number
^
^
^
^
5.
When you have completed the fields as necessary, press
BACK/EXIT
to return to and/or exit the TV
menus, or press the button
to return to program viewing.
Reference: Using the TV’s Zoning Features (Cont.)


