Note:
Mobile printing applications may also be available from your mobile device manufacturer.
Printing confidential and other held jobs
Storing print jobs in the printer
1
From the printer control panel, navigate to:
>
Security
>
Confidential Print
> select the print job type
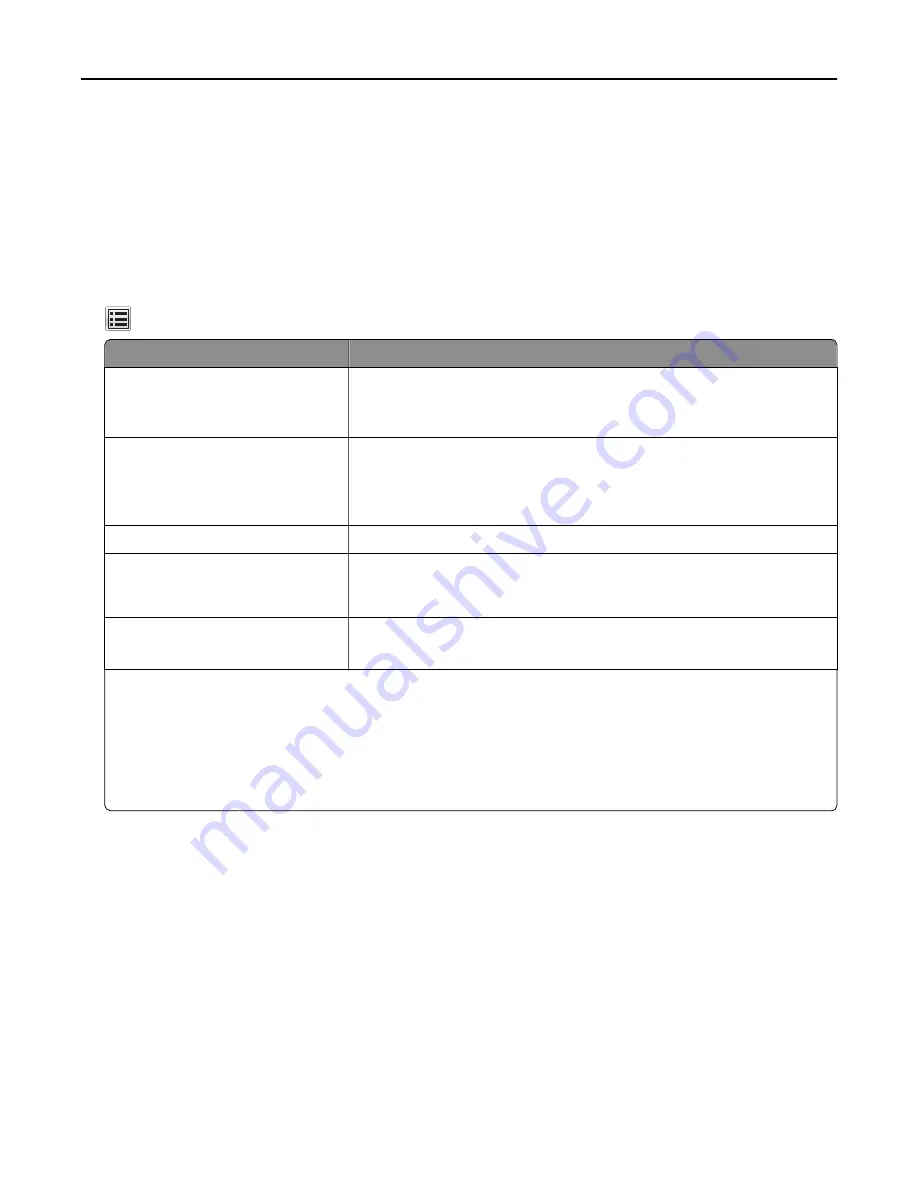
Use
To
Max Invalid PIN
Limit the number of times an invalid PIN can be entered.
Note:
When the limit is reached, the print jobs for that user name and PIN
are deleted.
Confidential Job Expiration
Hold print jobs in the computer until you enter the PIN from the printer control
panel.
Note:
The PIN is set from the computer. It must be four digits, using the
numbers 1–9.
Repeat Job Expiration
Print and store print jobs in the printer memory.
Verify Job Expiration
Print one copy of a print job and hold the remaining copies. It allows you to
examine if the first copy is satisfactory. The print job is automatically deleted
from the printer memory when all copies are printed.
Reserve Job Expiration
Store print jobs for printing at a later time.
Note:
The print jobs are held until deleted from the Held Jobs menu.
Notes:
•
Confidential, Verify, Reserve, and Repeat print jobs may be deleted if the printer requires extra memory to
process additional held jobs.
•
You can set the printer to store print jobs in the printer memory until you start the print job from the printer
control panel.
•
All print jobs that can be initiated by the user at the printer are called
held jobs
.
2
Touch
Submit
.
Printing confidential and other held jobs
Notes:
•
Confidential and Verify print jobs are automatically deleted from memory after printing. Repeat and Reserve
jobs are
held
in the printer until you delete them.
•
Confidential print jobs require a four
‑
digit PIN.
For Windows users
1
With a document open, select
File
>
.
2
Open the printer properties, and then select
Print and Hold
.
Printing
73
Содержание XM9100 Series
Страница 1: ...XM9100 Series User s Guide June 2014 www lexmark com Machine type s 7421 Model s 039 239 439...
Страница 209: ...Emptying the hole punch box 1 Open door H 2 Remove and empty the hole punch box Maintaining the printer 209...
Страница 246: ...Fuser area Below the fuser area Duplex area Above the duplex area Clearing jams 246...
Страница 267: ...Area H8 Area H9 Clearing jams 267...
Страница 270: ...7 Close the door 8 Close the scanner cover Clearing jams 270...


