E-mailing
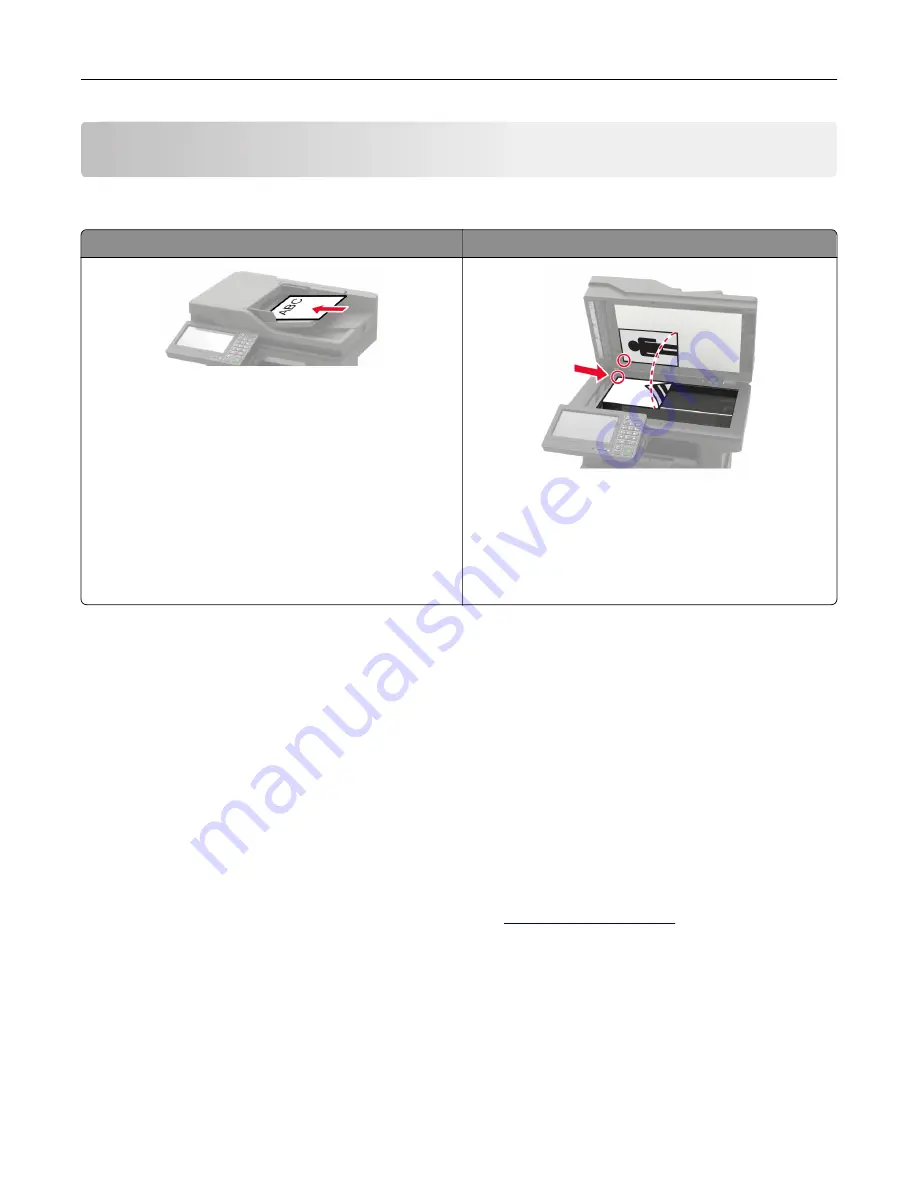
Using the automatic document feeder and scanner glass
Automatic document feeder (ADF)
Scanner glass
•
Use the ADF for multiple
‑
page or two-sided
documents.
•
Load an original document faceup. For multiple
‑
page
documents, make sure to align the leading edge
before loading.
•
Make sure to adjust the ADF guides to match the width
of the paper that you are loading.
•
Use the scanner glass for single
‑
page documents,
book pages, small items (such as postcards or
photos), transparencies, photo paper, or thin media
(such as magazine clippings).
•
Place the document facedown in the corner with the
arrow.
Configuring the e
‑
mail SMTP settings
Configure the Simple Mail Transfer Protocol (SMTP) settings to send a scanned document through e-mail. The
settings vary with each e
‑
mail service provider.
Before you begin, make sure that the printer is connected to a network and that the network is connected to
the Internet.
Using the Settings menu in the printer
1
From the home screen, touch
Settings
>
E
‑
>
E
‑
mail Setup
.
2
Configure the settings.
Notes:
•
For more information on the password, see the list of
.
•
For e
‑
mail service providers that are not on the list, contact your provider and ask for the settings.
Using the Embedded Web Server
1
Open a web browser, and then type the printer IP address in the address field.
Notes:
•
View the printer IP address on the printer home screen. The IP address appears as four sets of
numbers separated by periods, such as 123.123.123.123.
E-mailing
46
Содержание XM3250
Страница 160: ... ADF glass pad Scanner glass Scanner glass pad 3 Close the scanner cover Maintaining the printer 160 ...
Страница 170: ...7 Close door A Replacing the staple cartridge 1 Open the stapler access door Maintaining the printer 170 ...
Страница 171: ...2 Remove the staple cartridge 3 Remove the spare staple cartridge Maintaining the printer 171 ...
Страница 173: ...4 Remove the used pick tires one after the other 5 Unpack the new pick tires Maintaining the printer 173 ...
Страница 175: ...Maintaining the printer 175 ...
Страница 177: ...7 Insert the new pick roller assembly 8 Flip the tray base and then insert the tray insert Maintaining the printer 177 ...
Страница 189: ...6 Insert the imaging unit Note Use the arrows inside the printer as guides Clearing jams 189 ...
Страница 198: ...4 Close the staple guard 5 Insert the staple cartridge holder 6 Close the staple access door Clearing jams 198 ...
Страница 262: ...b Connect the ISP extended cable to the ISP connector Upgrading and migrating 262 ...
Страница 263: ...c Install the hard disk Upgrading and migrating 263 ...


