9
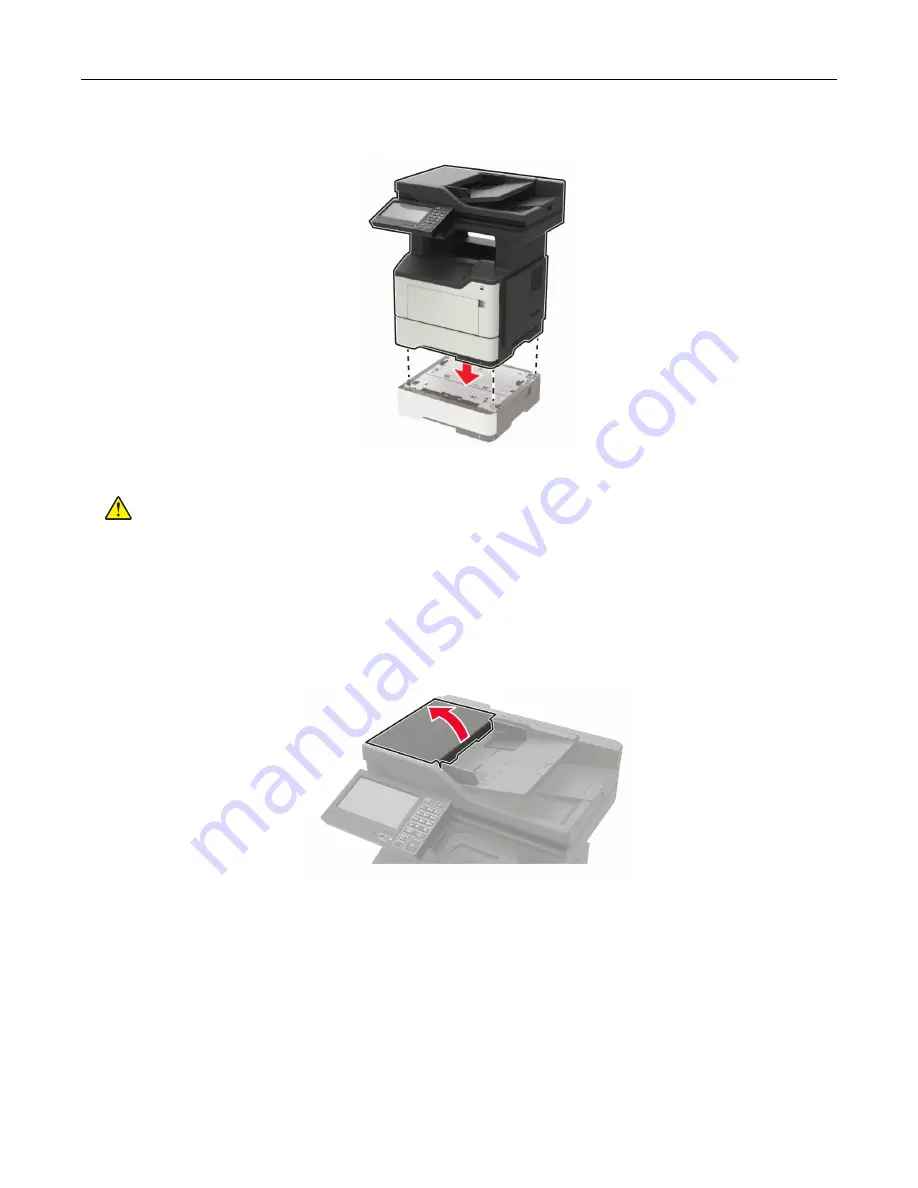
Align the printer with the optional tray, and then lower the printer until it
clicks
into place.
10
Connect the power cord to the printer, and then to the electrical outlet.
CAUTION—POTENTIAL INJURY:
To avoid the risk of fire or electrical shock, connect the power cord
to an appropriately rated and properly grounded electrical outlet that is near the product and easily
accessible.
11
Turn on the printer.
Replacing the ADF separator roller
1
Open the ADF cover.
Maintaining the printer
178
Содержание XM3250
Страница 160: ... ADF glass pad Scanner glass Scanner glass pad 3 Close the scanner cover Maintaining the printer 160 ...
Страница 170: ...7 Close door A Replacing the staple cartridge 1 Open the stapler access door Maintaining the printer 170 ...
Страница 171: ...2 Remove the staple cartridge 3 Remove the spare staple cartridge Maintaining the printer 171 ...
Страница 173: ...4 Remove the used pick tires one after the other 5 Unpack the new pick tires Maintaining the printer 173 ...
Страница 175: ...Maintaining the printer 175 ...
Страница 177: ...7 Insert the new pick roller assembly 8 Flip the tray base and then insert the tray insert Maintaining the printer 177 ...
Страница 189: ...6 Insert the imaging unit Note Use the arrows inside the printer as guides Clearing jams 189 ...
Страница 198: ...4 Close the staple guard 5 Insert the staple cartridge holder 6 Close the staple access door Clearing jams 198 ...
Страница 262: ...b Connect the ISP extended cable to the ISP connector Upgrading and migrating 262 ...
Страница 263: ...c Install the hard disk Upgrading and migrating 263 ...


