Understanding the status of the power button and
indicator light
Indicator light
Printer status
Off
The printer is off or in Hibernate mode.
Blue
The printer is ready or processing data.
Red
The printer requires user intervention.
Power button light
Printer status
Off
The printer is off, ready, or processing data.
Solid amber
The printer is in Sleep mode.
Blinking amber
The printer is in Hibernate mode.
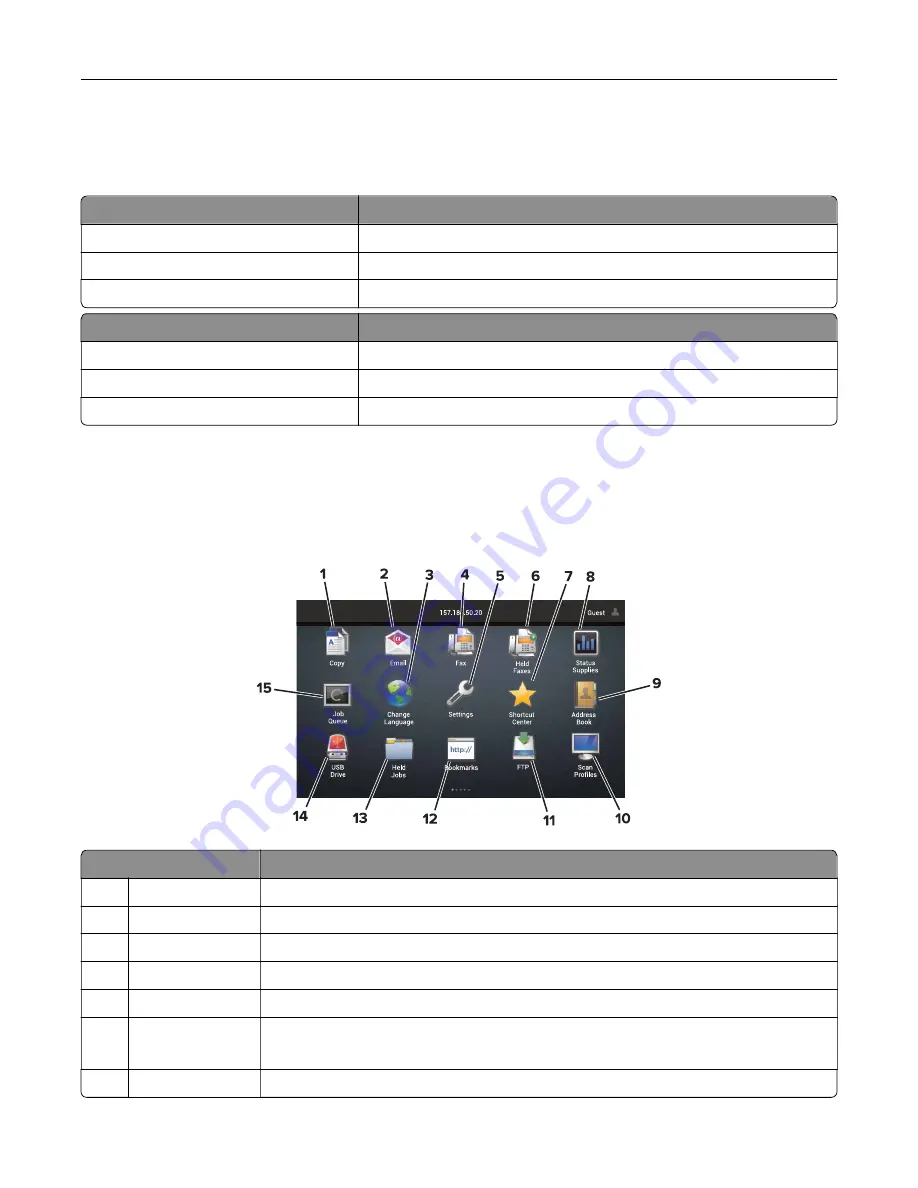
Using the home screen
Note:
Your home screen may vary depending on your home screen customization settings, administrative
setup, and active embedded solutions.
Touch
To
1
Copy
Make copies.
2
E
‑
Send e
‑
mails.
3
Change Language Change the language on the printer display.
4
Fax
Send fax.
5
Settings
Access the printer menus.
6
Held Faxes
Show all the current held fax jobs.
Note:
If Held Faxes is hidden, then Release Held Faxes appears.
7
Shortcut Center
Organize all shortcuts.
Learning about the printer
17
Содержание XC8155
Страница 66: ...5 Touch Scan Here If necessary change the scan settings 6 Scan the document Scanning 66 ...
Страница 159: ... Scanner glass pad 3 Close the scanner cover Emptying the hole punch box 1 Open door J Maintaining the printer 159 ...
Страница 160: ...2 Remove and empty the hole punch box 3 Insert the hole punch box 4 Close door J Maintaining the printer 160 ...
Страница 170: ...2 Remove the waste toner bottle 3 Remove the imaging unit 4 Remove the photoconductor unit Maintaining the printer 170 ...
Страница 172: ...Replacing an imaging unit 1 Open door A 2 Remove the waste toner bottle Maintaining the printer 172 ...
Страница 176: ...3 Remove the pick roller 4 Unpack the new pick roller Maintaining the printer 176 ...
Страница 186: ...4 Insert the new transfer roller 5 Remove the white packing material 6 Close door B Maintaining the printer 186 ...
Страница 193: ...2 Open door G 3 Remove the staple cartridge 4 Unpack the new staple cartridge Maintaining the printer 193 ...
Страница 195: ...2 Open door G 3 Pull out the staple cartridge holder Maintaining the printer 195 ...
Страница 218: ...2 Open door G 3 Pull out the staple cartridge holder Clearing jams 218 ...
Страница 222: ... Area J1 Areas J3 and J4 Areas J5 and J6 3 Close door J Clearing jams 222 ...
Страница 227: ...5 Insert the staple cartridge holder 6 Close door J Clearing jams 227 ...
Страница 284: ...Installing the staple finisher 1 Turn off the printer 2 Open door C 3 Remove the paper bail Upgrading and migrating 284 ...
Страница 287: ...4 Open the covers at the side of the caster base 5 Open door C Upgrading and migrating 287 ...


