Menu item
Description
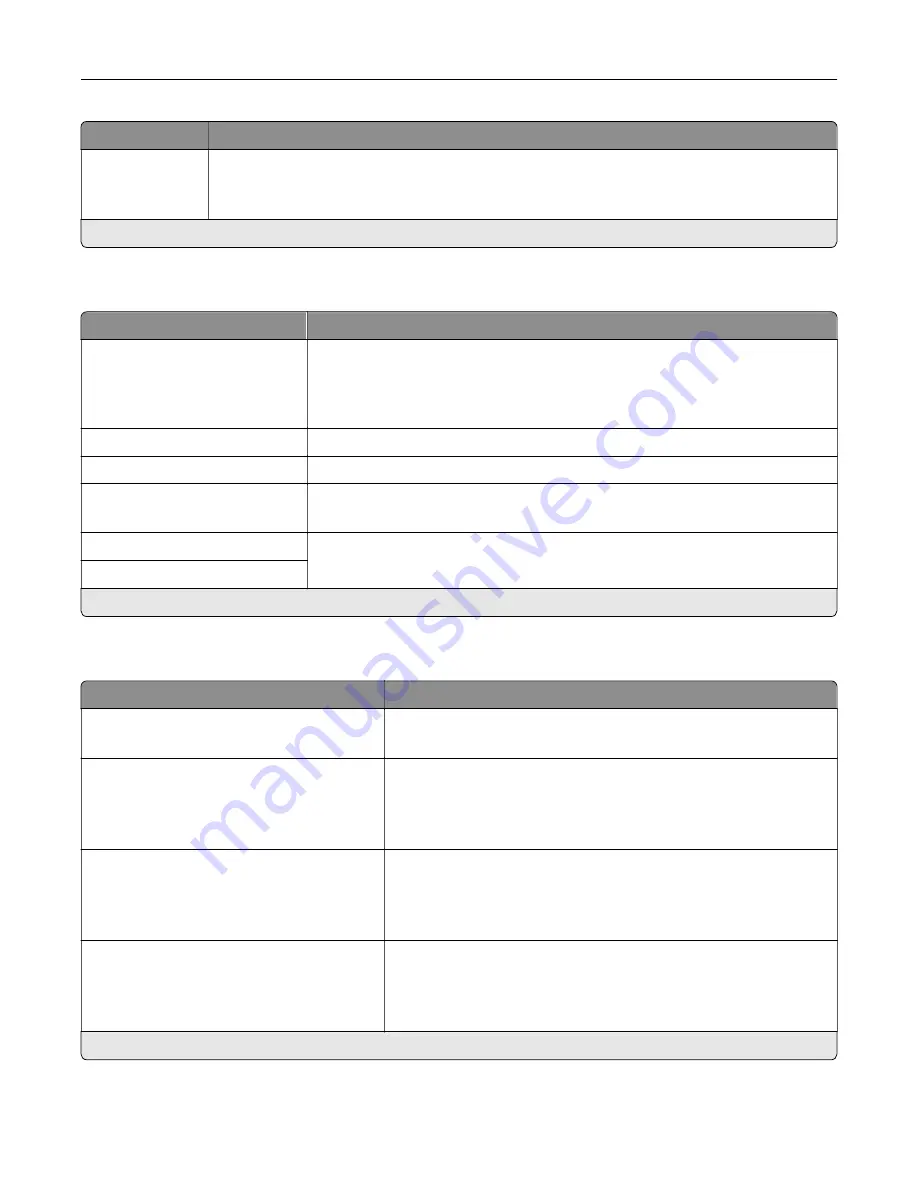
Enable USB Port
Off
On*
Enable the front USB drive port.
Note:
An asterisk (*) next to a value indicates the factory default setting.
Restrict external network access
Menu item
Description
Restrict external network
access
Off*
On
Restrict access to network sites.
External network address
Specify the network addresses with restricted access.
E
‑
mail address for notification
Specify an e
‑
mail address to send a notification of logged events.
Ping frequency
1–300 (10*)
Specify the network query interval in seconds.
Subject
Specify the subject and message of the notification e
‑
mail.
Message
Note:
An asterisk (*) next to a value indicates the factory default setting.
Google Cloud Print
Menu item
Description
Registration
Register
Register the printer to the Google Cloud Print server.
Options
Enable Google Cloud Print
Off
On*
Print directly from your Google account.
Options
Enable Local Discovery
Off
On*
Allow the registered user and other users on the same subnet to
send jobs to the printer locally.
Options
Enable SSL Peer Verification
Off
On*
Verify authenticity of the peer certificate to connect to your Google
account.
Note:
An asterisk (*) next to a value indicates the factory default setting.
Understanding the printer menus
138
Содержание XC8155
Страница 66: ...5 Touch Scan Here If necessary change the scan settings 6 Scan the document Scanning 66 ...
Страница 159: ... Scanner glass pad 3 Close the scanner cover Emptying the hole punch box 1 Open door J Maintaining the printer 159 ...
Страница 160: ...2 Remove and empty the hole punch box 3 Insert the hole punch box 4 Close door J Maintaining the printer 160 ...
Страница 170: ...2 Remove the waste toner bottle 3 Remove the imaging unit 4 Remove the photoconductor unit Maintaining the printer 170 ...
Страница 172: ...Replacing an imaging unit 1 Open door A 2 Remove the waste toner bottle Maintaining the printer 172 ...
Страница 176: ...3 Remove the pick roller 4 Unpack the new pick roller Maintaining the printer 176 ...
Страница 186: ...4 Insert the new transfer roller 5 Remove the white packing material 6 Close door B Maintaining the printer 186 ...
Страница 193: ...2 Open door G 3 Remove the staple cartridge 4 Unpack the new staple cartridge Maintaining the printer 193 ...
Страница 195: ...2 Open door G 3 Pull out the staple cartridge holder Maintaining the printer 195 ...
Страница 218: ...2 Open door G 3 Pull out the staple cartridge holder Clearing jams 218 ...
Страница 222: ... Area J1 Areas J3 and J4 Areas J5 and J6 3 Close door J Clearing jams 222 ...
Страница 227: ...5 Insert the staple cartridge holder 6 Close door J Clearing jams 227 ...
Страница 284: ...Installing the staple finisher 1 Turn off the printer 2 Open door C 3 Remove the paper bail Upgrading and migrating 284 ...
Страница 287: ...4 Open the covers at the side of the caster base 5 Open door C Upgrading and migrating 287 ...


