•
Keep the printer:
–
Clean, dry, and free of dust.
–
Away from stray staples and paper clips.
–
Away from the direct airflow of air conditioners, heaters, or ventilators.
–
Free from direct sunlight and humidity extremes.
•
Observe the recommended temperatures and avoid fluctuations:
Ambient temperature 10 to 32.2°C (50 to 90°F)
Storage temperature
-40 to 43.3°C (-40 to 110°F)
•
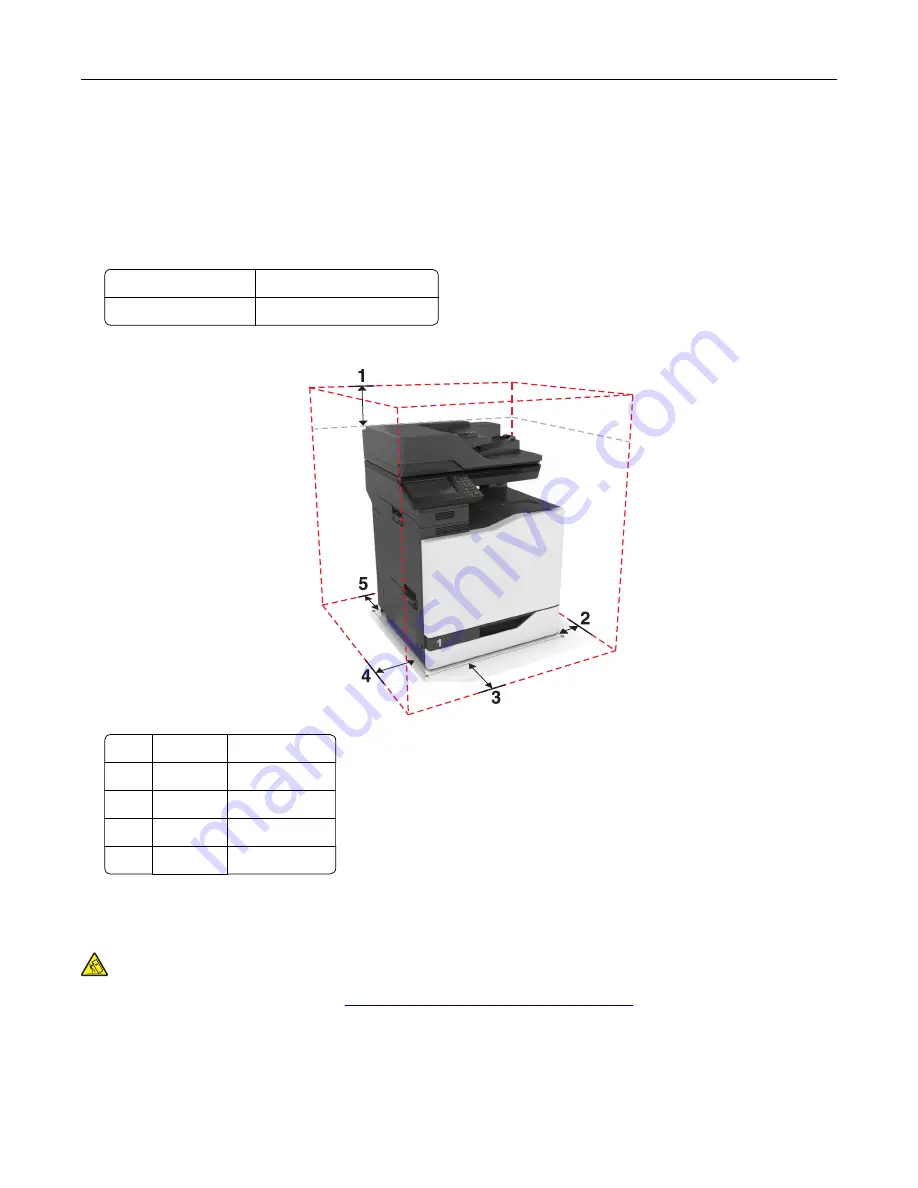
Allow the following recommended amount of space around the printer for proper ventilation:
1
Top
330 mm (13 in.)
2
Right side 152 mm (6 in.)
3
Front
381 mm (15 in.)
4
Left side
457 mm (18 in.)
5
Rear
203 mm (8 in.)
Printer configurations
CAUTION—TIPPING HAZARD:
Installing one or more options on your printer or MFP may require a
caster base, furniture, or other feature to prevent instability causing possible injury. For more information
on supported configurations, see
www.lexmark.com/multifunctionprinters
.
You can configure your printer by adding an optional 2200
‑
sheet tray or a combination of up to three optional
550
‑
sheet trays or envelope trays.
Learning about the printer
12
Содержание XC6152
Страница 65: ...5 Touch Scan Here If necessary change the scan settings 6 Scan the document Scanning 65 ...
Страница 161: ... Scanner glass pad 3 Open door E Maintaining the printer 161 ...
Страница 162: ...4 Wipe the following areas ADF glass in door E Maintaining the printer 162 ...
Страница 163: ... ADF glass pad in door E 5 Close the door and then close the scanner cover Maintaining the printer 163 ...
Страница 173: ...2 Remove the waste toner bottle 3 Remove the imaging unit 4 Remove the photoconductor unit Maintaining the printer 173 ...
Страница 175: ...Replacing an imaging unit 1 Open door A 2 Remove the waste toner bottle Maintaining the printer 175 ...
Страница 179: ...3 Remove the pick roller 4 Unpack the new pick roller Maintaining the printer 179 ...
Страница 189: ...4 Insert the new transfer roller 5 Remove the white packing material 6 Close door B Maintaining the printer 189 ...
Страница 196: ...2 Open door G 3 Remove the staple cartridge 4 Unpack the new staple cartridge Maintaining the printer 196 ...
Страница 198: ...2 Open door G 3 Pull out the staple cartridge holder Maintaining the printer 198 ...
Страница 216: ...2 Open door G 3 Pull out the staple cartridge holder Clearing jams 216 ...
Страница 274: ...4 Remove the paper bail 5 Remove the standard bin insert Upgrading and migrating 274 ...


