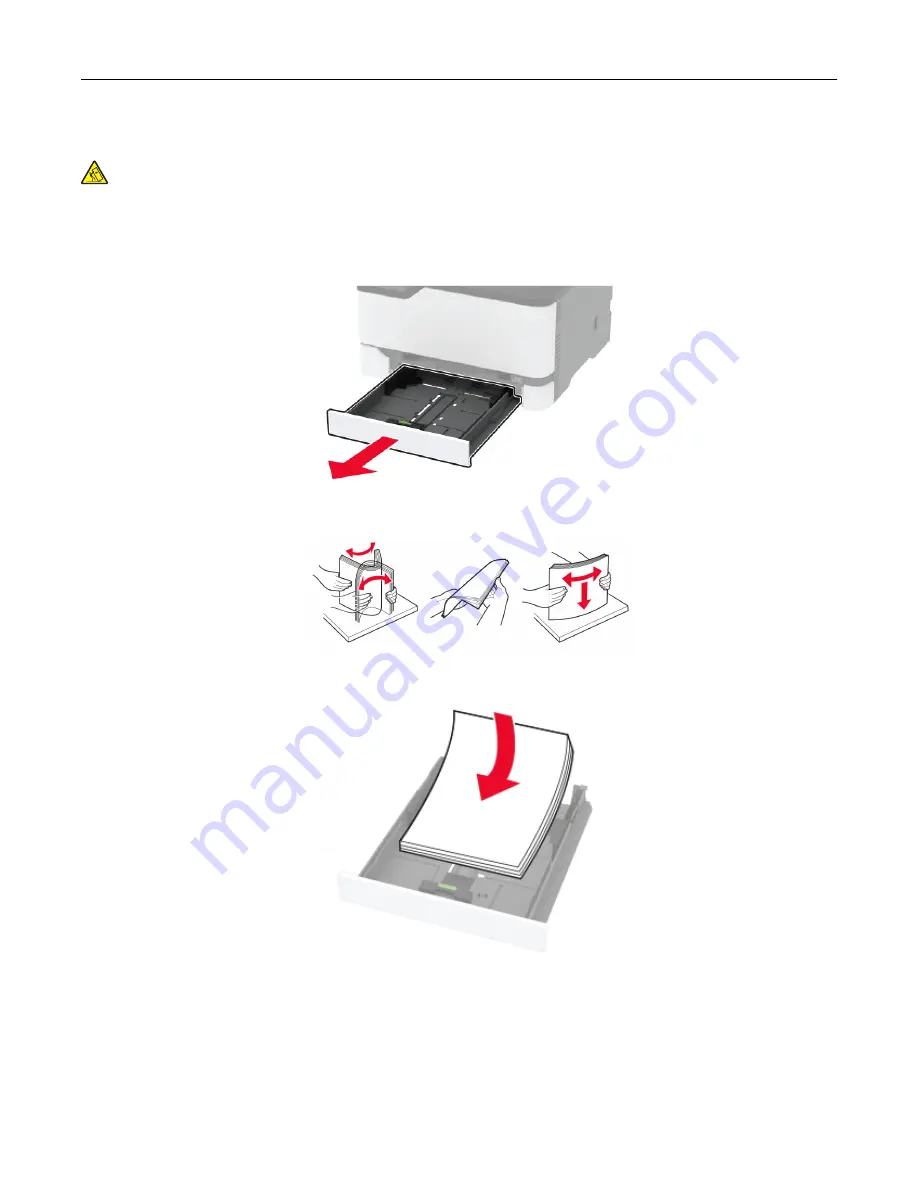
Loading trays
CAUTION—TIPPING HAZARD:
To reduce the risk of equipment instability, load each tray separately.
Keep all other trays closed until needed.
1
Remove the tray.
Note:
To avoid paper jams, do not remove trays while the printer is busy.
2
Flex, fan, and align the paper edges before loading.
3
Load the paper stack with the printable side faceup.
Notes:
•
Load letterhead faceup with the header toward the back of the tray for one
‑
sided printing.
•
Load letterhead facedown with the header toward the front of the tray for two
‑
sided printing.
•
Do not slide paper into the tray.
•
To avoid paper jams, make sure that the stack height is below the maximum paper fill indicator.
Set up, install, and configure
41
Содержание XC2326
Страница 145: ...5 Insert the new print cartridge 6 Insert the print cartridge tray and then close the door Maintain the printer 145 ...
Страница 148: ...4 Insert the new manual feeder 5 Insert the tray Replacing the ADF tray 1 Open the ADF cover Maintain the printer 148 ...
Страница 149: ...2 Remove the used ADF tray 3 Unpack the new ADF tray Maintain the printer 149 ...
Страница 156: ...4 Insert the new separator pad until it clicks into place 5 Close the ADF cover Maintain the printer 156 ...
Страница 205: ...2 Lower the scanner Troubleshoot a problem 205 ...
Страница 208: ... Below the fuser area Duplex unit 3 Close the door Troubleshoot a problem 208 ...
Страница 254: ...Wi Fi Protected Setup wireless network 50 Index 254 ...


