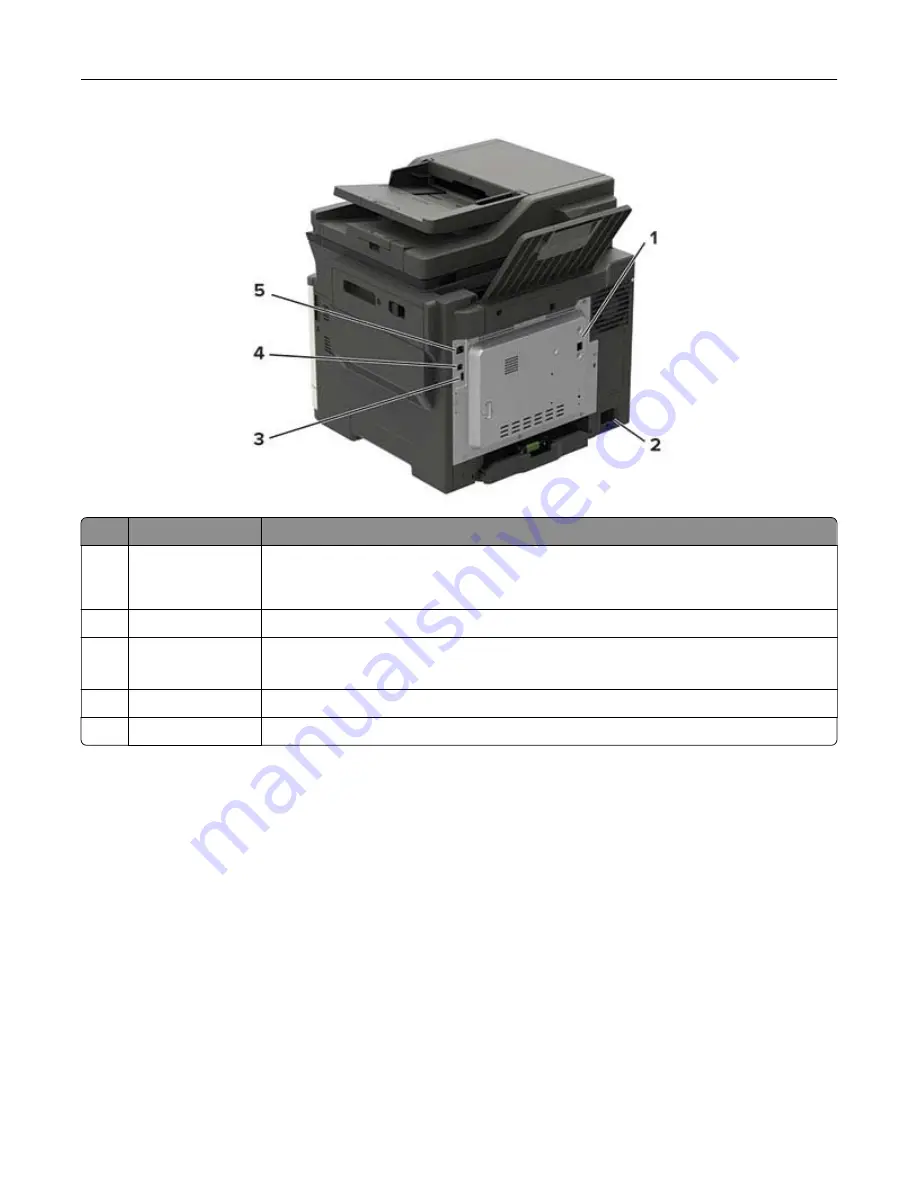
Use the
To
1
LINE port
Connect the printer to an active telephone line through a standard wall jack (RJ
‑
11), DSL
filter, or VoIP adapter, or any other adapter that allows you to access the telephone line
to send and receive faxes.
2
Power cord socket Connect the printer to a properly grounded electrical outlet.
3
USB port
Attach a keyboard or any compatible option.
Note:
This port is available only in some printer models.
4
USB printer port
Connect the printer to a computer.
5
Ethernet port
Connect the printer to a network.
Installing the printer software
1
Obtain a copy of the software installer package.
•
From our website.
•
From the place where you purchased the printer.
2
Run the installer, and then follow the instructions.
Learning about the printer
12
Содержание MX-C357F
Страница 40: ...3 From the Shortcut Type menu select E mail and then configure the settings 4 Apply the changes E mailing 40 ...
Страница 132: ...2 Remove the used toner cartridge 3 Unpack the new toner cartridge Maintaining the printer 132 ...
Страница 136: ...6 Insert the new waste toner bottle 7 Insert the right side cover Maintaining the printer 136 ...
Страница 143: ...2 Remove the jammed paper Note Make sure that all paper fragments are removed Clearing jams 143 ...
Страница 147: ...2 Remove the jammed paper Note Make sure that all paper fragments are removed 3 Close door A Clearing jams 147 ...
Страница 150: ...4 Close doors A and B Clearing jams 150 ...
Страница 153: ...3 Remove the jammed paper Note Make sure that all paper fragments are removed 4 Close door C Clearing jams 153 ...


