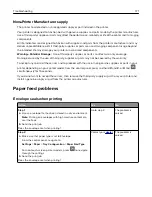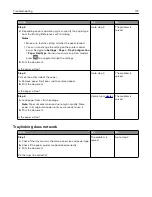
Network connection problems
Cannot open Embedded Web Server
Action
Yes
No
Step 1
Check if the printer is on.
Is the printer on?
Go to step 2.
Turn on the printer.
Step 2
Make sure that the printer IP address is correct.
Notes:
•
View the IP address on the home screen.
•
An IP address appears as four sets of numbers separated by
periods, such as 123.123.123.123.
Is the printer IP address correct?
Go to step 3.
Type the correct
printer IP address in
the address field.
Step 3
Check if you are using a supported browser:
•
Internet Explorer version 11 or later
•
Microsoft Edge
•
Safari version 6 or later
•
Google Chrome
TM
version 32 or later
•
Mozilla Firefox version 24 or later
Is your browser supported?
Go to step 4.
Install a supported
browser.
Step 4
Check if the network connection is working.
Is the network connection working?
Go to step 5.
Contact your
administrator.
Step 5
Make sure that the cable connections to the printer and print server
are secure. For more information, see the documentation that
came with the printer.
Are the cable connections secure?
Go to step 6.
Secure the cable
connections.
Step 6
Check if the web proxy servers are disabled.
Are the web proxy servers disabled?
Go to step 7.
Contact your
administrator.
Troubleshooting
169
Содержание MX-B557P
Страница 1: ...LASER PRINTER MX B557P MX B707P User s Guide October 2021 Machine type 4064 Models 29H 69H ...
Страница 5: ...Upgrading and migrating 176 Hardware 176 Software 200 Firmware 202 Notices 204 Index 213 Contents 5 ...
Страница 90: ...For non touch screen printer models press to navigate through the settings Understanding the printer menus 90 ...
Страница 103: ...5 Insert the pick roller 6 Close the multipurpose feeder 7 Turn on the printer Maintaining the printer 103 ...
Страница 109: ...2 Unlock the fuser 3 Remove the used fuser 4 Unpack the new fuser Maintaining the printer 109 ...
Страница 110: ...5 Insert the new fuser until it clicks into place 6 Lock the fuser 7 Close the door Maintaining the printer 110 ...
Страница 114: ...3 Remove the used hot roll fuser wiper Maintaining the printer 114 ...
Страница 120: ...2 Remove the used pick roller 3 Unpack the new pick roller Maintaining the printer 120 ...
Страница 121: ...4 Install the new pick roller 5 Close the multipurpose feeder Maintaining the printer 121 ...
Страница 142: ...2 Remove the staple cartridge holder 3 Remove the loose staples Clearing jams 142 ...
Страница 146: ...5 Insert the staple cartridge holder until it clicks into place 6 Close the door Clearing jams 146 ...
Страница 193: ...b Insert the tabs of the guide bar into the output expander Upgrading and migrating 193 ...


