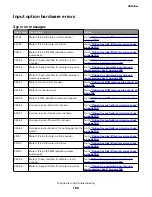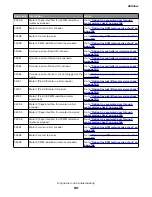
959 errors
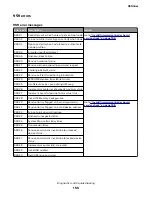
959 error messages
Error code Description
Action
959.01
Controller verification failure of pensive boot code Go to
“Invalid firmware/controller board
.
959.02
Failure to authenticate Signature Verification Code
959.03
Signature Verification Code failed to authenticate
a code partition
959.04
Jump to unverified address
959.05
Unknown Boot Failure
959.20
Pensive hardware failure
959.21
Pensive did not respond to command request
959.22
Challenge Secret Failure
959.23
Pensive self test failed during initialization
959.24
EEPROM Retention Error (Write failure)
959.25
Insufficient device space during HW prog
959.26
Incremental counter reset exceeds maximum value
959.27
Increment count failed due to max value limit
959.28
Invalid SP Memory Configuration
959.30
Pensive library flagged an invalid argument(s)
Go to
“Invalid firmware/controller board
.
959.31
Pensive library flagged an invalid device address
959.32
Failure to init physical interface
959.33
Unknown/unexpected Error
959.34
System Pensive Bus Busy Error
959.35
Transmission Error
959.36
Pensive command is invalid due to unlocked
device status
959.37
Pensive command is invalid due to locked device
status
959.38
Incremental counter id(s) are invalid
959.39
Invalid NV address
959.40
Invalid Pensive command
4514-6xx
Diagnostics and troubleshooting
155
Содержание M3150
Страница 12: ...Part name index 393 4514 6xx Table of contents 12 ...
Страница 20: ...4514 6xx 20 ...
Страница 38: ...4514 6xx 38 ...
Страница 172: ...4514 6xx 172 ...
Страница 233: ...c Insert the cable into the hole B d Route the cable using the new path 4514 6xx Parts removal 233 ...
Страница 246: ...3 Remove two screws A and then remove the cooling fan mount A 4514 6xx Parts removal 246 ...
Страница 256: ...5 Remove the four screws B and then remove the right front mount B 4514 6xx Parts removal 256 ...
Страница 258: ...Cartridge plunger removal 1 Open the front door 2 Tilt the cartridge plunger 4514 6xx Parts removal 258 ...
Страница 260: ...b Set the spring over the plunger 4514 6xx Parts removal 260 ...
Страница 262: ...Bezel removal MS610dn 1 Open the front door 2 Push the latches A and then remove the bezel A 4514 6xx Parts removal 262 ...
Страница 277: ...3 Squeeze the latches B to release the left and right links B 4514 6xx Parts removal 277 ...
Страница 300: ...3 Place the printer on its rear side 4 Release the sensor flag A 4514 6xx Parts removal 300 ...
Страница 301: ...5 Remove the screw B 6 Remove the sensor flag bracket C 4514 6xx Parts removal 301 ...
Страница 306: ...8 Remove the three screws A A 9 Disconnect the cable from the pick lift motor gearbox 4514 6xx Parts removal 306 ...
Страница 323: ...3 Swing the right cover backward to remove 4 Remove the screw D 4514 6xx Parts removal 323 ...
Страница 333: ...4514 6xx 333 ...
Страница 335: ...Assembly 1 Covers 4514 6xx Parts catalog 335 ...
Страница 338: ...4514 6xx Parts catalog 338 ...
Страница 339: ...Assembly 2 Electronics 1 1 2 3 4 5 7 9 10 11 6 8 12 4514 6xx Parts catalog 339 ...
Страница 342: ...4514 6xx Parts catalog 342 ...
Страница 343: ...Assembly 3 Electronics 2 4 3 2 1 5 6 8 9 7 4514 6xx Parts catalog 343 ...
Страница 345: ...4514 6xx Parts catalog 345 ...
Страница 346: ...Assembly 4 Frame 10 11 12 13 14 9 1 5 6 7 8 4 4 2 3 4514 6xx Parts catalog 346 ...
Страница 349: ...Assembly 5 Option trays 3 4 5 6 1 2 4514 6xx Parts catalog 349 ...
Страница 354: ...4514 6xx Parts catalog 354 ...
Страница 356: ...4514 6xx Parts catalog 356 ...
Страница 364: ...4514 6xx 364 ...
Страница 376: ...4514 6xx 376 ...
Страница 386: ...4514 6xx Index 386 ...
Страница 392: ...4514 6xx Part number index 392 ...
Страница 398: ...4514 6xx Part name index 398 ...


