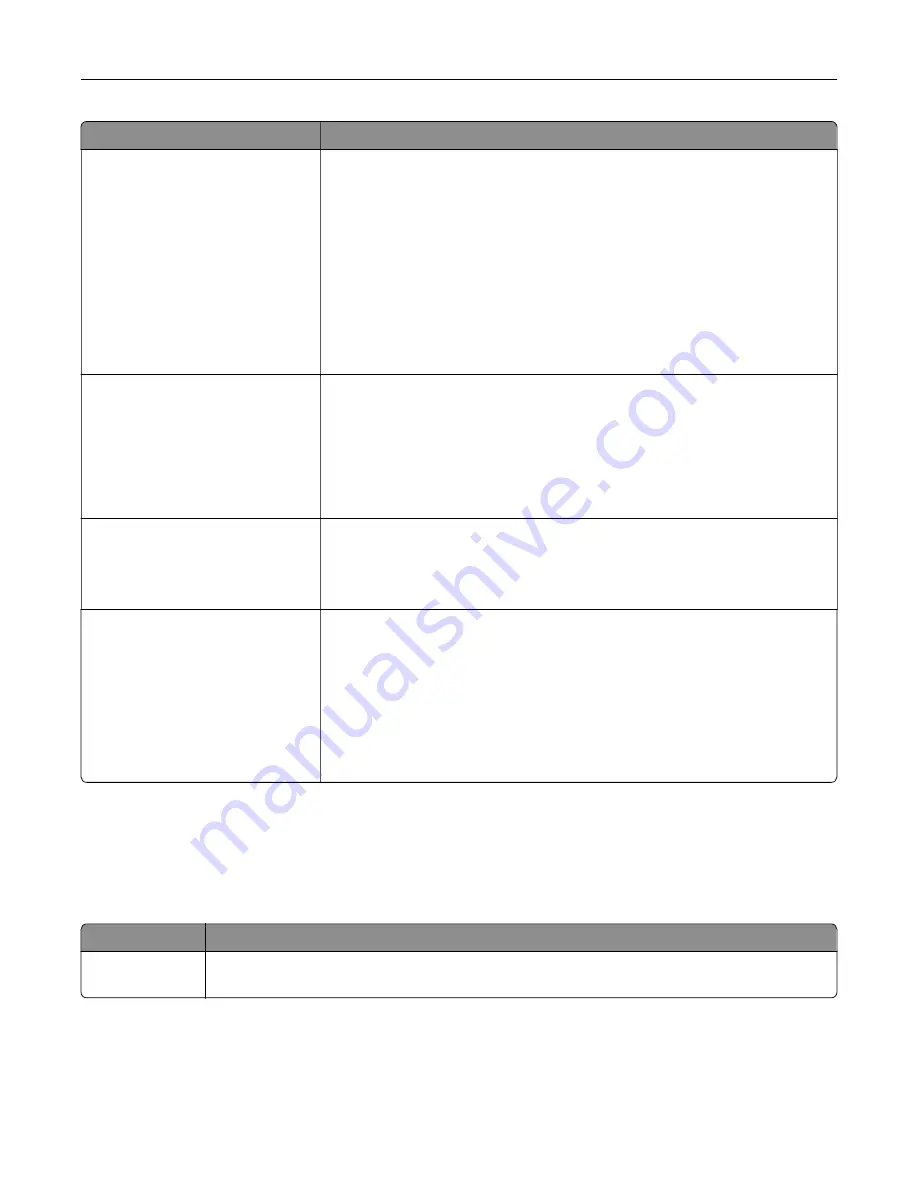
Use
To
Network Buffer
Auto
3KB to [maximum size allowed]
Set the size of the network input buffer.
Notes:
•
Auto is the factory default setting.
•
The maximum size allowed depends on the amount of memory in the
printer, the size of the other link buffers, and whether Resource Save is
set to On or Off.
•
To increase the maximum size range for the Network Buffer, disable or
reduce the size of the parallel, serial, and USB buffers.
•
The printer automatically restarts when the setting is changed from the
control panel.
Job Buffering
Off
On
Auto
Temporarily store print jobs in the printer hard disk before printing. This menu
only appears when a formatted disk is installed.
Notes:
•
Off is the factory default setting.
•
The printer automatically restarts when the setting is changed from the
control panel. The menu selection is then updated.
Mac Binary PS
On
Off
Auto
Set the printer to process Macintosh binary PostScript print jobs.
Note:
Auto is the factory default setting.
Standard Network Setup OR
Network [x] Setup
Reports
Network Card
TCP/IP
IPv6
Wireless
AppleTalk
Show and set the printer network settings.
Note:
The Wireless menu appears only when the printer is connected to a
wireless network.
Reports menu
To access the menu, navigate to either of the following:
•
Network/Ports
>
Standard Network
>
Standard Network Setup
>
Reports
•
Network/Ports
>
Network [x]
>
Network [x] Setup
>
Reports
Use
To
Print Setup Page
Print a report containing information about the network printer settings, such as the TCP/IP
address.
Understanding the printer menus
72
Содержание CS410 series
Страница 1: ...CS410 Series and CS417 User s Guide November 2017 www lexmark com Machine type s 5027 Model s 410 430...
Страница 19: ...2 1 1 Memory card connector 2 Option card connector 5 Reattach the cover 1 2 Additional printer setup 19...
Страница 114: ...3 Open the top door 1 2 4 Remove the right side cover 1 2 Maintaining the printer 114...
Страница 117: ...2 Open the top door 1 2 3 Remove the toner cartridges 1 2 4 Remove the right side cover 1 2 Maintaining the printer 117...
Страница 122: ...16 Insert the waste toner bottle 17 Insert the right side cover Maintaining the printer 122...
Страница 126: ...2 Open the top door 1 2 3 Remove the toner cartridges 1 2 Maintaining the printer 126...
Страница 140: ...Below the fuser In the fuser access door 3 Close the front door Clearing jams 140...
Страница 144: ...4 Reload paper Clearing jams 144...


