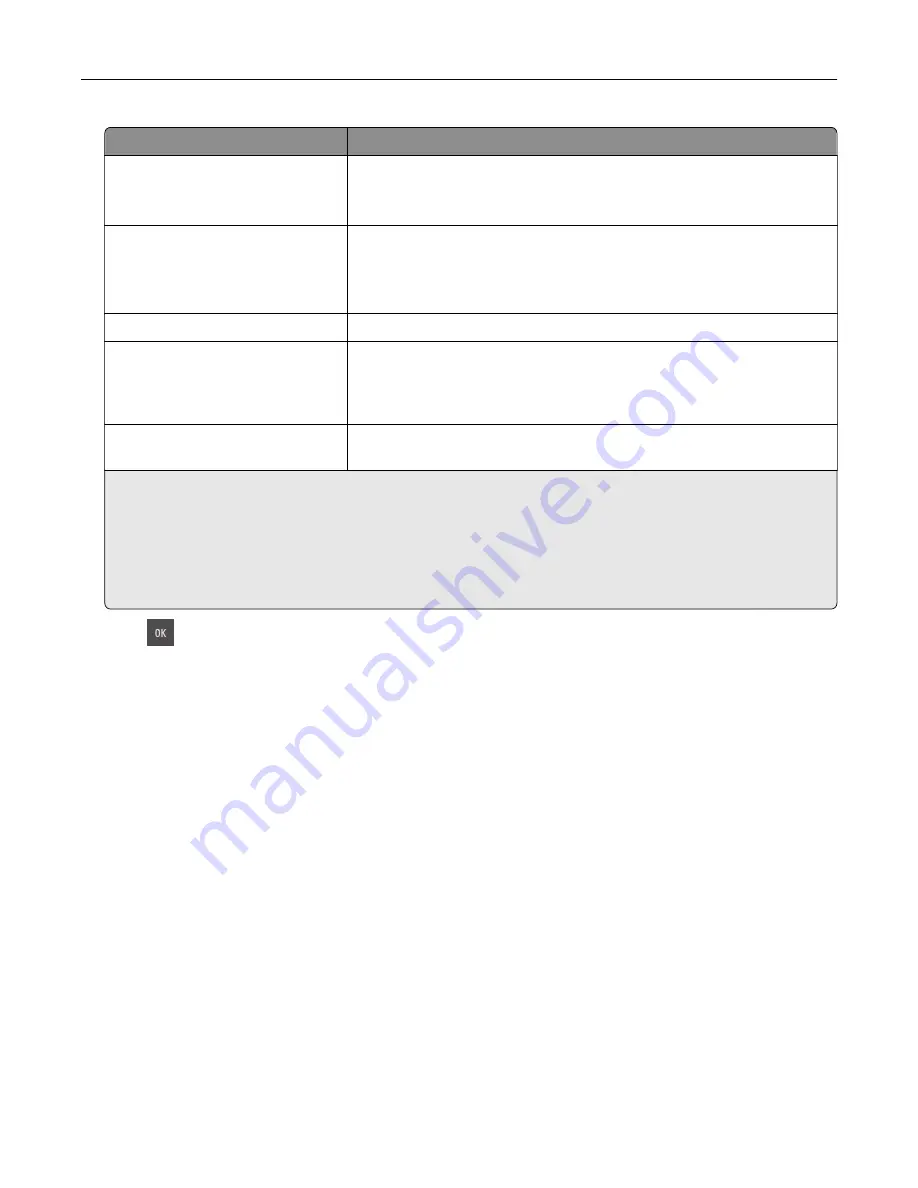
Print job type
Description
Max Invalid PIN
Limits the number of times an invalid PIN can be entered.
Note:
When the limit is reached, the print jobs for that user name and
PIN are deleted.
Confidential Job Expiration
Lets you hold print jobs in the computer until you enter the PIN from the
printer control panel.
Note:
The PIN is set from the computer. It must be four digits, using the
numbers 0–9.
Repeat Job Expiration
Lets you print
and
store print jobs in the printer memory for reprinting.
Verify Job Expiration
Lets you print one copy of a print job while the printer holds the remaining
copies. It allows you to examine if the first copy is satisfactory. The print
job is automatically deleted from the printer memory once all copies are
printed.
Reserve Job Expiration
Lets you store print jobs for printing at a later time. The print jobs are held
until deleted from the Held Jobs menu.
Notes:
•
Confidential, Verify, Reserve, and Repeat print jobs may be deleted if the printer requires extra memory to
process additional held jobs.
•
You can set the printer to store print jobs in the printer memory until you start the print job from the
printer control panel.
•
All print jobs that can be initiated by the user at the printer are called
held jobs
.
2
Press
.
Printing held jobs
1
From the document you are trying to print, open the Print dialog.
2
Select the printer, and then do either of the following:
•
For Windows users, click
Properties
or
Preferences
, and then click
Print and Hold
.
•
For Macintosh users, select
Print and Hold
.
3
Select the print job type.
4
If necessary, assign a user name.
5
Send the print job.
6
From the printer home screen, select
Held Jobs
.
7
Send the print job.
Printing
58
Содержание CS410 series
Страница 1: ...CS410 Series and CS417 User s Guide November 2017 www lexmark com Machine type s 5027 Model s 410 430...
Страница 19: ...2 1 1 Memory card connector 2 Option card connector 5 Reattach the cover 1 2 Additional printer setup 19...
Страница 114: ...3 Open the top door 1 2 4 Remove the right side cover 1 2 Maintaining the printer 114...
Страница 117: ...2 Open the top door 1 2 3 Remove the toner cartridges 1 2 4 Remove the right side cover 1 2 Maintaining the printer 117...
Страница 122: ...16 Insert the waste toner bottle 17 Insert the right side cover Maintaining the printer 122...
Страница 126: ...2 Open the top door 1 2 3 Remove the toner cartridges 1 2 Maintaining the printer 126...
Страница 140: ...Below the fuser In the fuser access door 3 Close the front door Clearing jams 140...
Страница 144: ...4 Reload paper Clearing jams 144...


