•
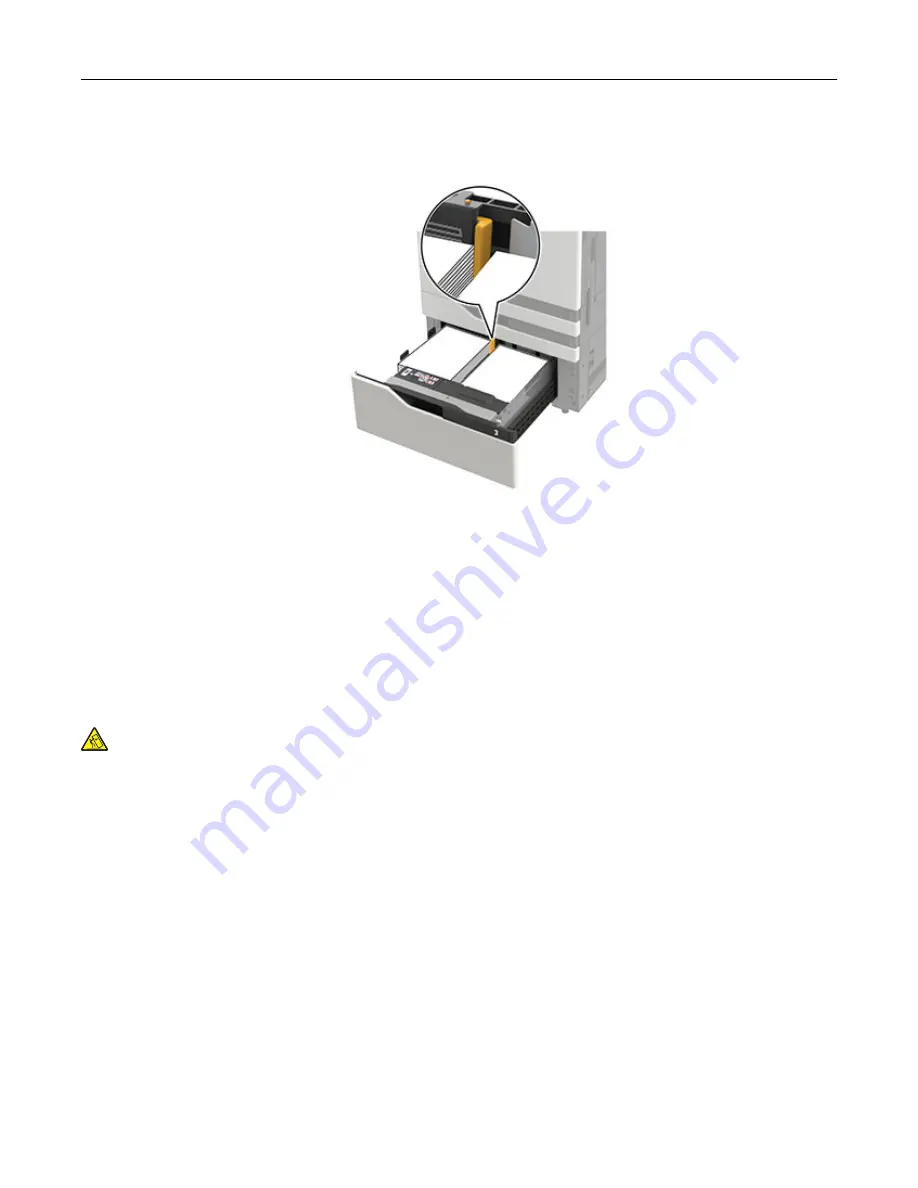
Make sure that the paper stacks do not cross the divider. Push each paper stack against the sides of the
tray.
4
Insert the tray.
5
From the control panel, navigate to:
Settings
>
Device
>
Maintenance
>
Configuration Menu
>
Tray
Configuration
>
Size Sensing
.
6
Select the tray and paper size.
Loading the 3000
‑
sheet tray
The 3000
‑
sheet tray supports only one paper size, either A4 or letter.
CAUTION—TIPPING HAZARD:
To reduce the risk of equipment instability, load each tray separately.
Keep all other trays closed until needed.
1
Open door F, and then lift the feed roller.
Warning—Potential Damage:
To avoid damage and poor performance, do not touch the feed rollers.
Loading paper and specialty media
31
Содержание C9235
Страница 1: ...C9235 Printer User s Guide May 2020 www lexmark com Machine type s 5059 Model s 190...
Страница 102: ...2 Remove and then empty the hole punch box 3 Insert the hole punch box 4 Close the door Maintaining the printer 102...
Страница 106: ...4 Shake the toner cartridge three times 5 Insert the new toner cartridge Maintaining the printer 106...
Страница 108: ...9 Insert the waste toner bottle and then close the door Maintaining the printer 108...
Страница 112: ...8 Insert the waste toner bottle and then close the door Maintaining the printer 112...
Страница 135: ...Below the fuser area Duplex area Clearing jams 135...
Страница 140: ...2 Open door J 3 Open door H Clearing jams 140...
Страница 145: ...Staple jam in the staple nisher 1 Slide the staple nisher 2 Remove the staple cartridge holder Clearing jams 145...
Страница 147: ...Staple jam in the staple hole punch nisher 1 Open door H 2 Remove the staple cartridge holder Clearing jams 147...
Страница 188: ...6 Remove the controller board shield Upgrading and migrating 188...
Страница 191: ...6 Remove the controller board shield 7 Unpack the printer hard disk Upgrading and migrating 191...
Страница 197: ...4 Remove the controller board shield Upgrading and migrating 197...
Страница 199: ...8 Attach the thumbscrews 9 Connect the wireless print server to the controller board Upgrading and migrating 199...
Страница 203: ...7 Connect the tray connector to the printer 8 Open trays 2 and 3 Upgrading and migrating 203...
Страница 208: ...9 Remove the stabilizing feet from the tray Upgrading and migrating 208...
Страница 212: ...17 Secure the tray cable with the clamp Upgrading and migrating 212...
Страница 213: ...18 Connect the tray cable to the printer 19 Attach the tray cable cover Upgrading and migrating 213...
Страница 214: ...20 Slide the tray until it clicks into place 21 Attach the stabilizing feet to the printer Upgrading and migrating 214...
Страница 219: ...7 Remove the paper guides 8 Attach the sensor cover Upgrading and migrating 219...
Страница 225: ...8 Attach the nisher to the printer Upgrading and migrating 225...


