


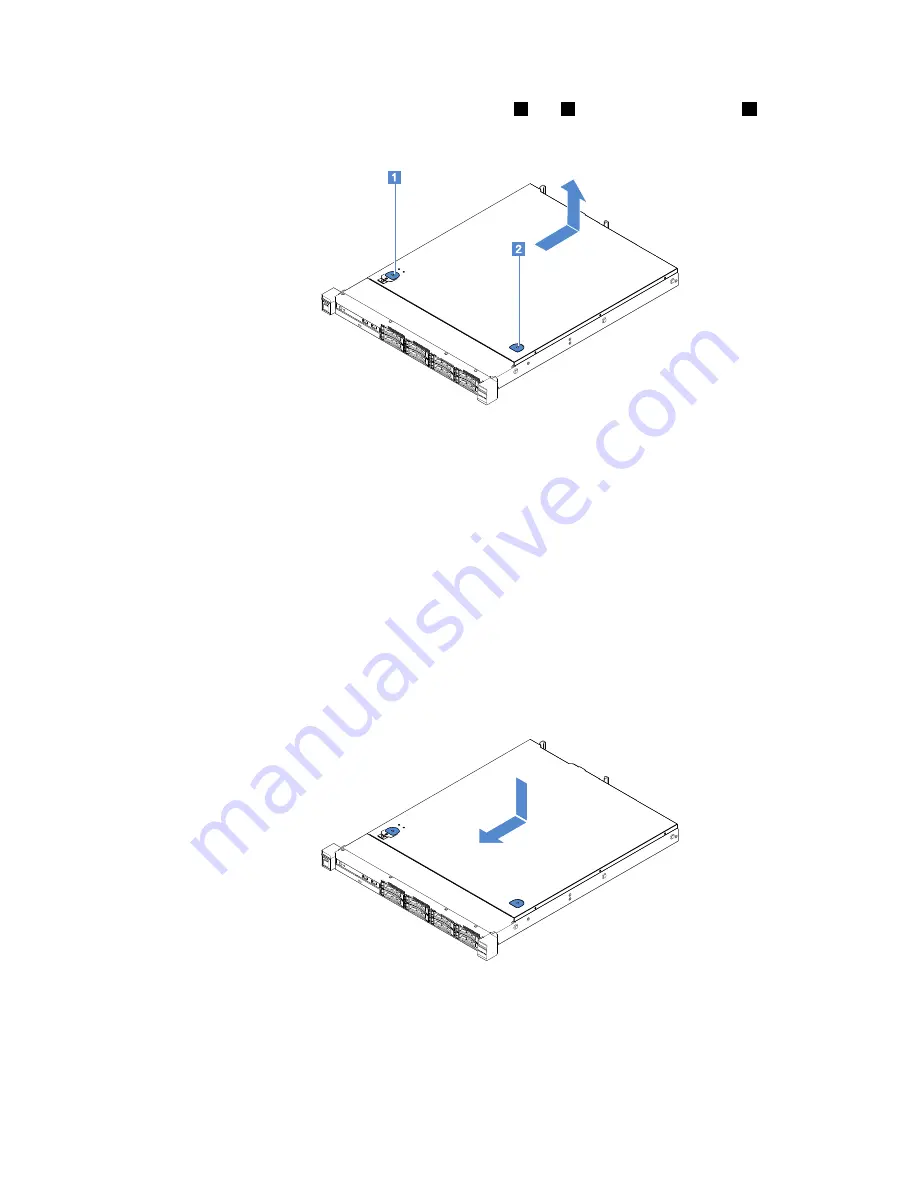
Step 4.
Put your thumbs on the blue cover-release buttons
1
and
2
. Firmly press the button
1
and slide
the server cover toward the rear of the server until the cover is disengaged from the chassis.
Figure 14. Server cover removal
Step 5.
Lift the server cover off the server and set it aside.
Attention:
For proper cooling and airflow, install the server cover before you turn on the server.
Installing the server cover
To install the server cover, do the following:
Note:
Ensure that all components have been reassembled properly and that no tools or loose screws are
left inside your server.
Step 1.
Position the server cover on top of the server.
Step 2.
Slide the server cover toward the front of the server. Make sure that the server cover properly
engages all the inset tabs on the server.
Figure 15. Server cover installation
Step 3.
Install the server into the rack. See the
Rack Installation Instructions
that comes with the server.
Step 4.
Reconnect all the external cables. Then, turn on the server and peripheral devices.
Removing and installing server components
89
Содержание x3250 m6
Страница 1: ...Lenovo System x3250 M6 Installation and Service Guide Machine Types 3633 and 3943 ...
Страница 6: ...iv Lenovo System x3250 M6 Installation and Service Guide ...
Страница 18: ...4 Lenovo System x3250 M6 Installation and Service Guide ...
Страница 60: ...46 Lenovo System x3250 M6 Installation and Service Guide ...
Страница 100: ...86 Lenovo System x3250 M6 Installation and Service Guide ...
Страница 516: ...502 Lenovo System x3250 M6 Installation and Service Guide ...
Страница 678: ...664 Lenovo System x3250 M6 Installation and Service Guide ...
Страница 685: ...Taiwan Class A compliance statement Appendix E Notices 671 ...
Страница 695: ......
Страница 696: ......


