Lenovo ThinkSystem SN550 Compute Node
Type 7X16
Quick Start
PN: SP47A10544
Printed in China
In the box
SN550 Compute Node
Printed documentation
If any item is missing or damaged, contact your place of purchase.
Ensure that you retain your proof of purchase. They might be
required to receive warranty service.
First glance
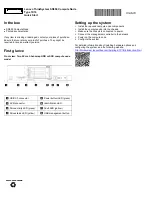
Front view: Two 2.5-inch hot-swap HDD or SSD compute node
model
USB 3.0 connector
Power button/LED (green)
KVM connector
Identification LED
Drive activity LED (green)
Fault LED (yellow)
Drive status LED (yellow)
USB management button
Setting up the system
1.
Install the required compute node components.
2.
Install the compute node into the chassis.
3.
Make sure the chassis is connected to power.
4.
Connect the management controller to the network.
5.
Power on the compute node.
6.
Configure the system.
For detailed information about installing hardware options and
configuring the system, see the following website:
http://thinksystem.lenovofiles.com/help/topic/7X16/introduction.html


