


64
Installation
e.
Repeat the above sequence of steps for the companion rail.
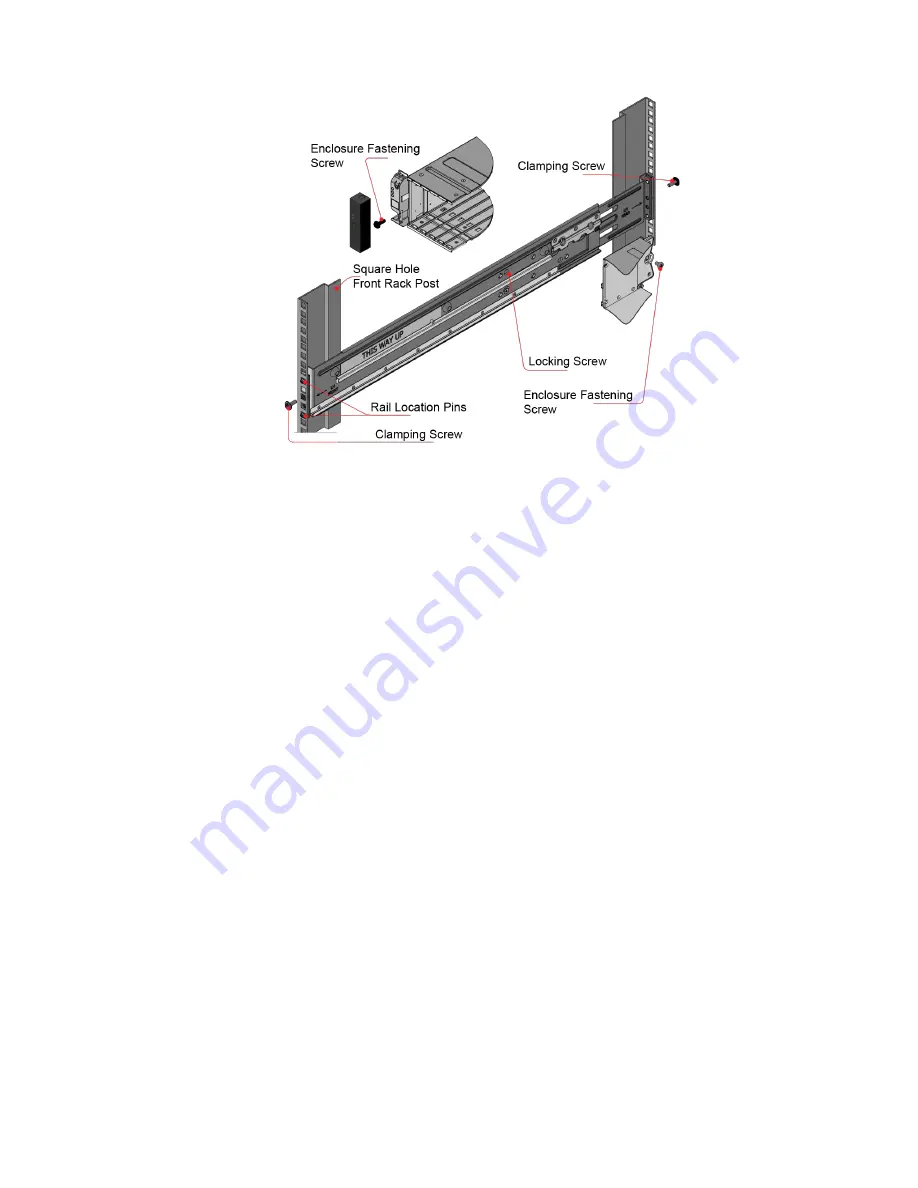
Figure 53 Securing brackets to the rail (left hand rail shown for 2U)
3.
Install the enclosure into the rack:
a.
Lift the enclosure and align it with the installed rack rails, taking care to ensure that the enclosure remains
level.
b.
Carefully insert the chassis slides into the rack rails and push fully in.
c.
Tighten the mounting screws in the rear rail kit brackets.
d.
Remove the enclosure until it reaches the hard stops—approximately 400 mm (15.75")—and tighten the
mounting screws in the front rail kit bracket.
e.
Return the enclosure to the fully home position.
Installing the 5U enclosure
The 5U84 enclosure is delivered without the disks installed. Due to the weight of the enclosure, install it into the
rack without DDICs installed, and remove the rear panel CRUs to lighten the enclosure weight.
The adjustment range of the railkit from the inside of the front post to the inside of the rear post is 660 mm – 840
mm. This range suits a one meter deep rack within Rack Specification IEC 60297.
1.
To facilitate access, remove the door from the rack.
2.
Ensure that the pre-assembled rails are at their shortest length (see also the reference label on the inside of the
rail).
Содержание ThinkSystem D3284
Страница 136: ...136 Module removal and replacement 5 Pull the DDIC upwards and out of the drawer slot Figure 96 Removing a DDIC 2 of 2 ...
Страница 145: ...Replacing an IOM 145 5 Reconnect the cables 6 See Verifying component operation page 132 ...
Страница 152: ...152 Standards and regulations Taiwan BSMI RoHS declaration ...


