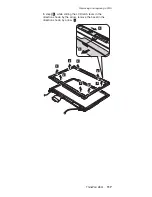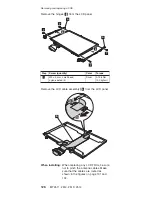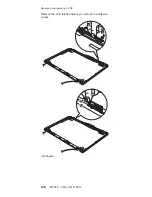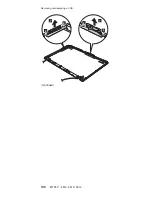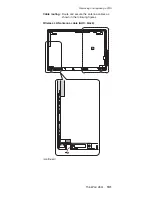
Remove
the
hinges
a
from
the
LCD
panel.
7
7
7
7
8
8
a
a
Step
Screw
(quantity)
Color
Torque
7
M2
×
3
mm,
small-head,
nylon-coated
(4)
Silver
0.196
Nm
(2.0
kgfcm)
Remove
the
LCD
cable
assembly
b
from
the
LCD
panel.
9
10
b
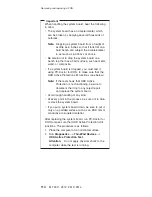
When
installing:
When
replacing
any
LCD
FRUs,
be
sure
not
to
pinch
the
antenna
cables.
Make
sure
that
the
cables
are
routed
as
shown
in
the
figures
on
page
131
and
132.
Removing
and
replacing
a
FRU
126
MT
2511,
2512,
2513,
2514
Содержание ThinkPad Z60t Series
Страница 6: ...2 MT 2511 2512 2513 2514 ...
Страница 48: ...Checkout guide 44 MT 2511 2512 2513 2514 ...
Страница 105: ...5 5 Removing and replacing a FRU ThinkPad Z60t 101 ...
Страница 129: ...3 5 4 6 continued Removing and replacing a FRU ThinkPad Z60t 125 ...
Страница 133: ...When installing Attache the latches as shown in this figure 3 4 1 2 Removing and replacing a FRU ThinkPad Z60t 129 ...
Страница 134: ...7 6 6 6 6 7 continued Removing and replacing a FRU 130 MT 2511 2512 2513 2514 ...
Страница 136: ...Wireless LAN antenna cable MAIN gray a Removing and replacing a FRU 132 MT 2511 2512 2513 2514 ...
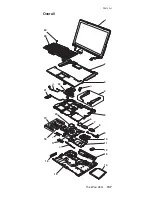
Страница 141: ...Overall 1 2 3 4 5 7 6 9 8 10 12 11 13 14 16 b 17 c 18 19 21 23 24 22 20 15 a d Parts list ThinkPad Z60t 137 ...
Страница 151: ...LCD FRUs e d a b 1 6 8 7 9 10 2 3 4 5 c Parts list ThinkPad Z60t 147 ...
Страница 165: ...Trademarks ThinkPad Z60t 161 ...
Страница 166: ...Part Number 39T6194 1P P N 39T6194 ...


