


No-beep symptoms
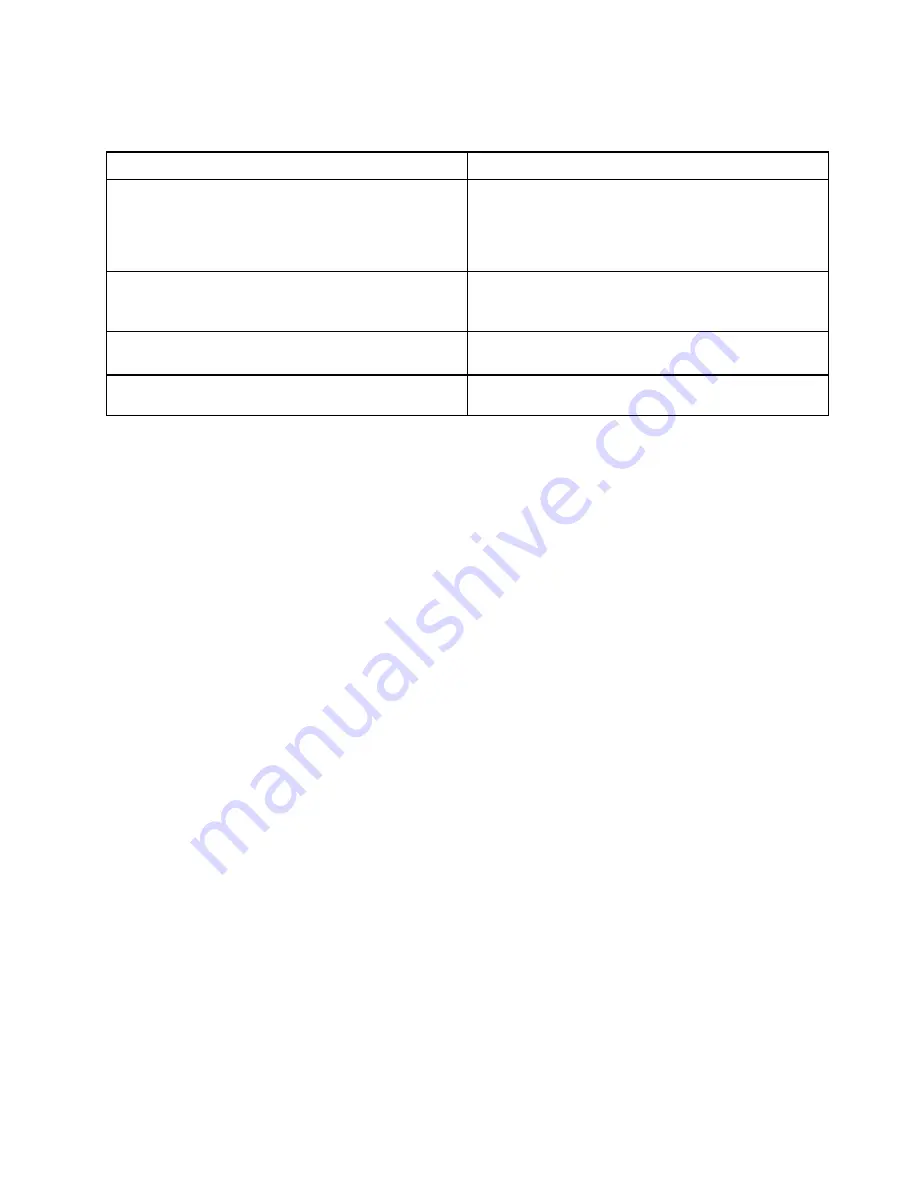
Table 4. No-beep symptoms
Symptom or error
FRU or action, in sequence
No beep, power-on indicator on, LCD blank, and no
POST.
1.
Run LCD Self Test.
2. Ensure that every connector is connected tightly and
correctly.
3. Reseat memory module.
4. Replace the system board.
No beep, power-on indicator on, and LCD blank during
POST.
1.
Run LCD Self Test.
2. Reseat memory module.
3. Replace the system board.
The power-on password prompt appears.
A power-on password or a supervisor password is set.
Type the password and press Enter.
The NVMe password prompt appears.
An NVMe password is set. Type the password and press
Enter.
LCD-related symptoms
Important:
The TFT LCD for the notebook computer contains many thin-film transistors (TFTs). The
presence of a small number of dots that are missing, discolored, or always lighted is characteristic of TFT
LCD technology, but excessive pixel problems can cause viewing concerns.
If the LCD you are servicing has two or less visible defective pixels, it should not be considered faulty.
However, if the LCD has three or more visible defective pixels, it will be deemed as defective by Lenovo and
it should be replaced.
Notes:
• This policy applies to all ThinkPad Notebooks purchased on 1 January, 2008 or later.
• Lenovo will not provide warranty replacement if the LCD is within specifications because we cannot
guarantee that any replacement LCD will have zero pixel defects.
• One pixel consists of R, G, B sub-pixels.
LCD Self Test
When you turn on the computer and the LCD goes black, run LCD Self Test to help you determine whether
the LCD functions normally.
To run LCD Self Test:
1. Ensure that the computer is connected to ac power. Then, press the power button for about seven
seconds to turn off the computer.
2. Press Fn, left Ctrl, and the power button at the same time. If the computer displays five solid colors in
sequence across the entire screen, it indicates that the LCD functions normally.
3. The test lasts for about 20 seconds and then exits automatically. You also can press the power button to
exit the test.
39
Содержание ThinkPad X13 Gen 2
Страница 1: ...T14s Gen 2 and X13 Gen 2 Hardware Maintenance Manual ...
Страница 6: ...iv T14s Gen 2 and X13 Gen 2 Hardware Maintenance Manual ...
Страница 11: ...DANGER DANGER DANGER DANGER DANGER DANGER Chapter 1 Safety information 5 ...
Страница 12: ...DANGER 6 T14s Gen 2 and X13 Gen 2 Hardware Maintenance Manual ...
Страница 13: ...PERIGO Chapter 1 Safety information 7 ...
Страница 14: ...PERIGO PERIGO PERIGO PERIGO 8 T14s Gen 2 and X13 Gen 2 Hardware Maintenance Manual ...
Страница 15: ...PERIGO PERIGO PERIGO DANGER DANGER Chapter 1 Safety information 9 ...
Страница 16: ...DANGER DANGER DANGER DANGER DANGER 10 T14s Gen 2 and X13 Gen 2 Hardware Maintenance Manual ...
Страница 17: ...DANGER VORSICHT VORSICHT VORSICHT VORSICHT Chapter 1 Safety information 11 ...
Страница 18: ...VORSICHT VORSICHT VORSICHT VORSICHT 12 T14s Gen 2 and X13 Gen 2 Hardware Maintenance Manual ...
Страница 19: ...Chapter 1 Safety information 13 ...
Страница 20: ...14 T14s Gen 2 and X13 Gen 2 Hardware Maintenance Manual ...
Страница 21: ...Chapter 1 Safety information 15 ...
Страница 22: ...16 T14s Gen 2 and X13 Gen 2 Hardware Maintenance Manual ...
Страница 23: ...Chapter 1 Safety information 17 ...
Страница 24: ...18 T14s Gen 2 and X13 Gen 2 Hardware Maintenance Manual ...
Страница 25: ...Chapter 1 Safety information 19 ...
Страница 26: ...20 T14s Gen 2 and X13 Gen 2 Hardware Maintenance Manual ...
Страница 30: ...24 T14s Gen 2 and X13 Gen 2 Hardware Maintenance Manual ...
Страница 54: ...Major FRUs and CRUs ThinkPad T14s Gen 2 a b d c 48 T14s Gen 2 and X13 Gen 2 Hardware Maintenance Manual ...
Страница 56: ...ThinkPad X13 Gen 2 a b d c 50 T14s Gen 2 and X13 Gen 2 Hardware Maintenance Manual ...
Страница 66: ...60 T14s Gen 2 and X13 Gen 2 Hardware Maintenance Manual ...
Страница 97: ...Removal steps for selected models Chapter 8 Removing or replacing a FRU 91 ...
Страница 99: ...Removal steps for selected models Chapter 8 Removing or replacing a FRU 93 ...
Страница 106: ... Type 2 1a 1b Type 3 1a 1b 100 T14s Gen 2 and X13 Gen 2 Hardware Maintenance Manual ...
Страница 109: ... Type 2 Type 3 Chapter 8 Removing or replacing a FRU 103 ...
Страница 118: ... Type 1 Type 2 112 T14s Gen 2 and X13 Gen 2 Hardware Maintenance Manual ...
Страница 120: ...114 T14s Gen 2 and X13 Gen 2 Hardware Maintenance Manual ...
Страница 124: ...118 T14s Gen 2 and X13 Gen 2 Hardware Maintenance Manual ...
Страница 125: ......
Страница 126: ...Part Number SP40T80109_01 Printed in China 1P P N SP40T80109_01 1PSP40T80109_01 ...