Chapter 1. Install the Computer
Notes:
• Before installing the computer, check the packing list to make sure all the parts are provided.
• Before installing and using the computer, carefully read this user guide.
Connect to Power
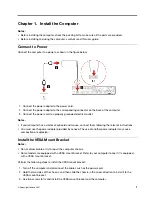
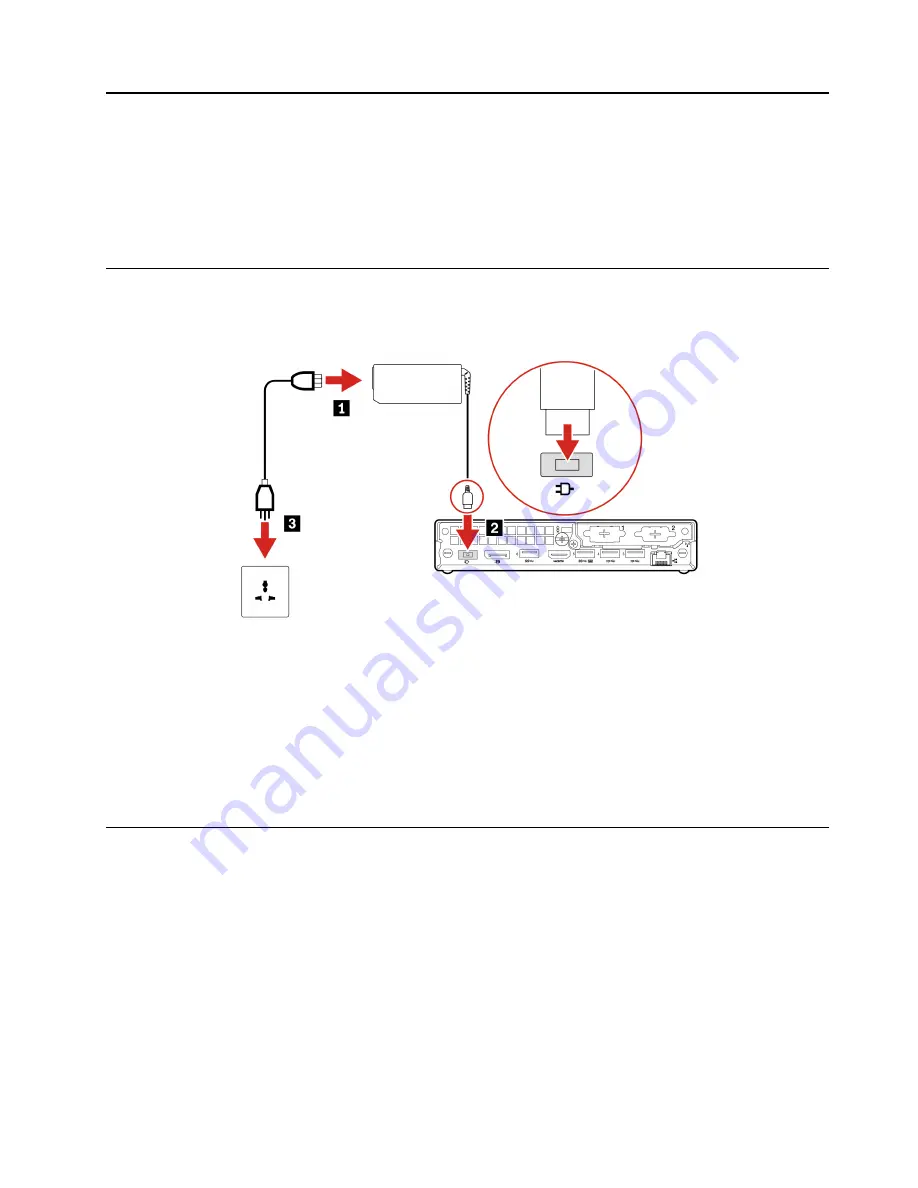
Connect the computer to a power as shown in the figure below:
1. Connect the power adapter to the power cord.
2. Connect the power adapter to the corresponding connector on the back of the computer.
3. Connect the power cord to a properly grounded electrical outlet.
Notes:
• If your computer has a wireless keyboard and mouse, connect them following the relevant instructions.
• You must use the power adapter provided by Lenovo. The use of another power adapter may cause
combustion or explosion.
Install the VESA Mount Bracket
Notes:
• Do not disassemble or try to repair the computer chassis.
• Some models are equipped with a VESA mount bracket. Refer to your computer to see if it is equipped
with a VESA mount bracket.
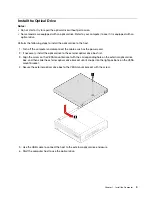
Perform the following steps to install the VESA mount bracket:
1. Turn off the computer and disconnect the cables such as the power cord.
2. Hold the two sides of the chassis, and then slide the chassis in the arrow direction to install it to the
VESA mount bracket.
3. Use two screws to fix and install the VESA mount bracket and the computer.
© Copyright Lenovo 2021
1
Содержание ThinkCentre M740q
Страница 1: ...ThinkCentre M740q User Manual V1 0 E version ...
Страница 2: ... April 2021 Copyright Lenovo 2021 ...
Страница 4: ...ii ThinkCentre M740q User Manual V1 0 E version ...
Страница 12: ...4 ThinkCentre M740q User Manual V1 0 E version ...
Страница 26: ...18 ThinkCentre M740q User Manual V1 0 E version ...


