


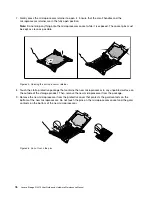

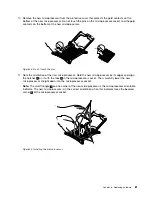


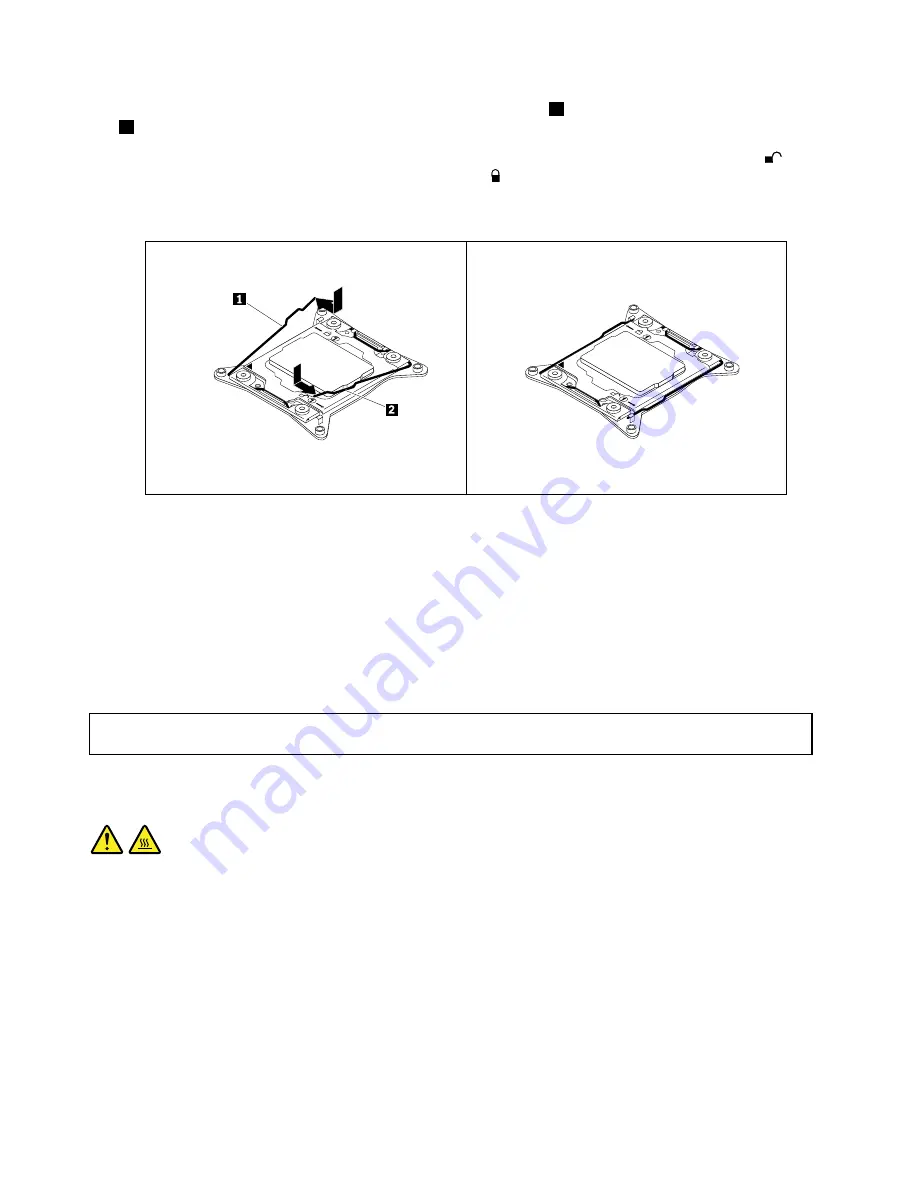
12. Close the microprocessor retainer. Then, close the small handle
1
first and then close the small handle
2
to lock the retainer into position and secure the new microprocessor in the socket.
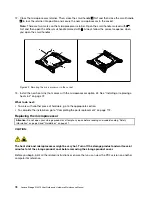
Note:
There are two marks on the microprocessor retainer. Open the small handle marked with
first and then open the other small handle marked with . Always follow the correct sequence when
you open the small handles.
Figure 49. Securing the microprocessor in the socket
13. Install the new heat sink that comes with the microprocessor option kit. See “Installing or replacing a
What to do next:
• To work with another piece of hardware, go to the appropriate section.
• To complete the installation, go to “Completing the parts replacement” on page 112.
Replacing the microprocessor
Attention:
Do not open your storage product or attempt any repair before reading and understanding “Safety
information” on page iii and “Guidelines” on page 41.
CAUTION:
The heat sink and microprocessor might be very hot. Turn off the storage product and wait several
minutes to let the storage product cool before removing the storage product cover.
Before you begin, print all the related instructions or ensure that you can view the PDF version on another
computer for reference.
78
Lenovo Storage N3310 User Guide and Hardware Maintenance Manual
Содержание Storage N3310
Страница 1: ...Lenovo Storage N3310 User Guide and Hardware Maintenance Manual Machine Types 70FX and 70FY ...
Страница 14: ...xii Lenovo Storage N3310 User Guide and Hardware Maintenance Manual ...
Страница 18: ...4 Lenovo Storage N3310 User Guide and Hardware Maintenance Manual ...
Страница 20: ...6 Lenovo Storage N3310 User Guide and Hardware Maintenance Manual ...
Страница 138: ...124 Lenovo Storage N3310 User Guide and Hardware Maintenance Manual ...
Страница 151: ......
Страница 152: ......