Managing Shares
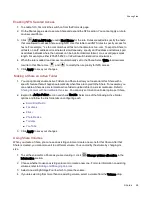
You can change Share information, change access permissions, make a Share an Active Folder, use
Share volumes, and modify a Share volume.
If available, you can also enable NFS secured access.
Changing Share Information
1. Modify the existing name for the Share.
2. Choose whether to enable media sharing. When Media sharing is enabled, the media server scans
this Share for any media content and makes it available to anyone with access to your network,
even if this Share is secured. If you do not want media content made available to anyone, do not
check this option. When Media sharing search is enabled,
displays in the Properties for that
Share.
3. To view the content of a Share, click the View Content link to open the Content Viewer.
4. Click Apply to save your changes.
Changing Access Permissions
on your px12-450r before changing access permissions.
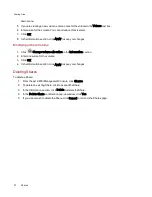
1. Expand Access Permissions to change user permissions to a Share. If your px12-450r is not
secured, all Shares that you create are unsecured, and anyone with access to your network has
read and write permissions to a Share. If your px12-450r is secured, all existing administrator users
have read and write permissions to a Share. New Shares created on a secured device will be
secured by default, so they will be accessible only by administrator users unless additional access
permissions are set. A security icon
displays in the Share's properties if that Share is secured.
2. Check Allow users to change file level security to allow file and folder permissions to be set
through other programs, such as Windows Explorer, independent of the px12-450r. Setting this
option allows users to put additional access restrictions on individual files and folders.
3. To limit access to this Share to a specific set of users, click
Add access permissions and
choose one or more users from the pop-up window. If you have created groups, you can also limit
access for them in this way.
4. In the Access Permissions section, check Read, Write, or both to set access to this Share for
each user. To remove a user, leave both Read and Write unchecked for that user. If you grant Read
and Write permissions to Everyone, the list of users is also cleared since all users will have access
to this Share. If you have created groups, you can also limit access for them in this way.
5. Click Apply to save your changes.
Sharing Files
25
Shares
Содержание PX12-450R
Страница 1: ...px12 450r Network Storage with LifeLine 4 0 User Guide ...
Страница 11: ...Setting up Your px12 450r Network Storage Setting up Your px12 450r Network Storage 1 CHAPTER 1 ...
Страница 32: ...Sharing Files Sharing Files 22 CHAPTER 2 ...
Страница 55: ...Storage Pool Management Storage Pool Management 45 CHAPTER 4 ...
Страница 67: ...Drive Management Drive Management 57 CHAPTER 5 ...
Страница 70: ...Backing up and Restoring Your Content Backing up and Restoring Your Content 60 CHAPTER 6 ...
Страница 106: ...Sharing Content Using Social Media Sharing Content Using Social Media 96 CHAPTER 9 ...
Страница 112: ...Media Management Media Management 102 CHAPTER 10 ...
Страница 124: ... Delete a torrent job Click to delete the torrent download Media Management Torrents 114 ...
Страница 133: ...Upgrading Your px12 450r Network Storage Upgrading Your px12 450r Network Storage 123 CHAPTER 12 ...
Страница 138: ...Hardware Management Hardware Management 128 CHAPTER 14 ...
Страница 150: ...Additional Support AdditionalSupport 140 ...
Страница 153: ...Legal Legal 143 ...

