Notes:
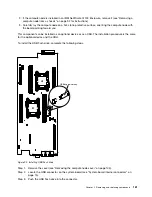
1. After you install the hard disk drive, check the disk drive status LEDs to verify that the hard
disk drive is operating correctly. If the yellow hard disk drive status LED is lit continuously, that
drive is faulty and must be replaced. If the green hard disk drive activity LED is flashing, the
drive is being accessed.
2. If the server is configured for RAID operation through an optional ServeRAID adapter, you
might have to reconfigure your disk arrays after you install hard disk drives. See the ServeRAID
documentation on the
IBM ServeRAID Support
CD for additional information about RAID
operation and complete instructions for using ServeRAID manager.
After you install the hard disk drive backplate, complete the following steps:
1. Install the cover onto the compute node (see “Installing the compute node cover” on page 107 for
instructions).
2. Install the compute node into the chassis (see “Installing a compute node in a chassis” on page 93
for instructions).
Removing a 1.8-inch hard disk drive
Use this information to remove a 1.8-inch hard disk drive.
Attention:
Static electricity that is released to internal server components when the server is powered-on
might cause the server to halt, which might result in the loss of data. To avoid this potential problem,
always use an electrostatic-discharge wrist strap or other grounding system when you work inside the
server with the power on.
To remove a 1.8-inch hard disk drive, complete the following steps.
Step 1.
Read “Safety” on page v and “Installation guidelines” on page 89.
Step 2.
If the compute node is installed in an IBM NeXtScale n1200 Enclosure, remove it (see “Removing
a compute node from a chassis” on page 92 for instructions).
Step 3.
Carefully lay the compute node on a flat, static-protective surface, orienting the compute node
with the bezel pointing toward you.
Step 4.
Remove the cover (see “Removing the compute node cover” on page 105).
Step 5.
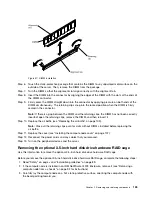
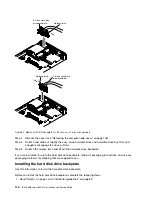
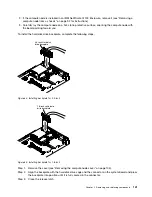
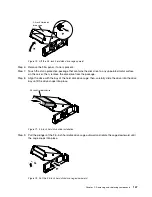
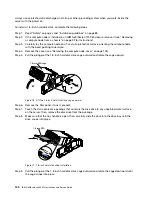
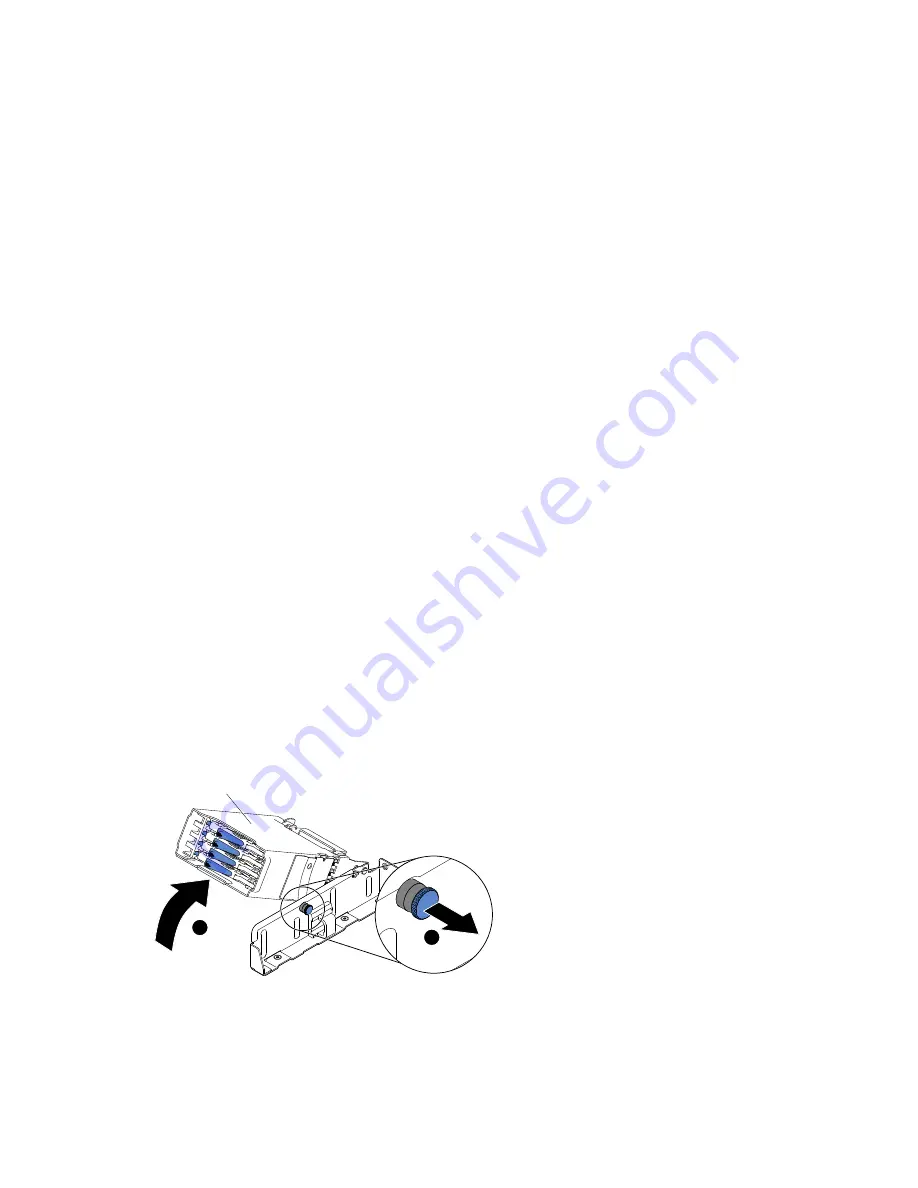
Pull the plunger of the 1.8-inch hard disk drive cage outward and rotate the cage upward.
1
2
1.8-inch SSD cage
Figure 73. Lift the 1.8-inch hard disk drive cage upward
Step 6.
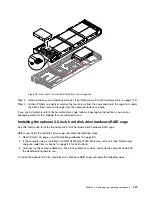
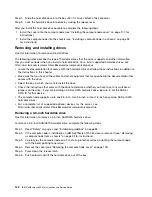
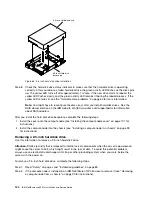
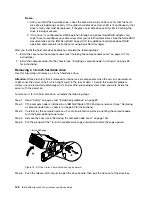
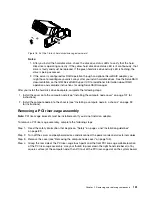
Push the release latch inward to open the drive handle; then, pull the drive out of the drive bay.
148
IBM NeXtScale nx360 M4 Installation and Service Guide
Содержание NeXtScale nx360 M4
Страница 1: ...IBM NeXtScale nx360 M4 Installation and Service Guide Machine Type 5455 ...
Страница 6: ...iv IBM NeXtScale nx360 M4 Installation and Service Guide ...
Страница 34: ...20 IBM NeXtScale nx360 M4 Installation and Service Guide ...
Страница 58: ...44 IBM NeXtScale nx360 M4 Installation and Service Guide ...
Страница 94: ...80 IBM NeXtScale nx360 M4 Installation and Service Guide ...
Страница 192: ...178 IBM NeXtScale nx360 M4 Installation and Service Guide ...
Страница 538: ...524 IBM NeXtScale nx360 M4 Installation and Service Guide ...
Страница 562: ...548 IBM NeXtScale nx360 M4 Installation and Service Guide ...
Страница 722: ......
Страница 730: ......
Страница 737: ......
Страница 738: ...Part Number 00KC216 Printed in China 1P P N 00KC216 1P00KC216 ...


