Moto G
(4th Generation)
Moto G (4th Generation)
Level 2 – Service and Repair Manual
Страница 1: ...Moto G 4th Generation Moto G 4th Generation Level 2 Service and Repair Manual ...
Страница 2: ...ing added Front Housing Cleaning updated to include steps for cleaning where the Ground Flex tabs and Display attach Display Cleaning added Affinity Side Key Assembly Tool 3 00 G6 10000 added to Tools Required for Assembly Battery Adhesive Assembly updated to include images with the steps Note added to Rear Housing Water Detection Label Assembly Side Key Assembly updated to include the Affinity Si...
Страница 3: ...moval 20 Rear Housing Removal 21 Flash Flex Removal 23 Rear Facing Imager Bezel Removal 24 Rear Facing Imager Lens Removal 25 Rear Facing Imager Flash Lens Removal 26 Secondary Microphone Mesh Removal 27 Vibrator Removal 28 Battery Removal 29 Front Facing Imager Removal 32 Headset Jack Removal 33 PCB Removal 35 Headset Jack Flex Removal 37 Loudspeaker Removal 38 Side Key Removal 39 Rear Facing Ima...
Страница 4: ...Assembly 76 Front Facing Imager Assembly 77 Battery Adhesive Assembly 78 Battery Assembly 79 Rear Thermal Spreader Assembly 82 Vibrator Assembly 83 Side Key Assembly 84 Flash Flex Assembly 85 Rear Housing Assembly 86 Rear Facing Imager Flash Lens Assembly 88 Rear Facing Imager Lens Assembly 89 Rear Facing Imager Bezel Assembly 90 Flash Flex Grommet Assembly 92 Nano SIM Adaptor Assembly 94 Rear Cov...
Страница 5: ...Moto G 4th Generation Level 2 Service and Repair Manual Motorola Mobility Confidential Restricted PAGE 5 Do not share without consent from Motorola Generic Lens Removal Fixture Manual 127 ...
Страница 6: ...ews Parts List 9 Table 2 Assembly Exploded View Parts List 10 Table 3 Subassembly Exploded View Parts List 13 TABLE OF FIGURES Figure 1 External Views 8 Figure 2 13 MP Left and 16 MP Right Rear Facing Imager Lens Options 8 Figure 3 Fingerprint Sensor FPS Options 13 MP and No FPS Left and 16 MP and FPS Right 9 Figure 4 Assembly Exploded View 10 Figure 5 Subassembly Exploded View 13 ...
Страница 7: ...med If the Battery Pack is dropped to the floor it may be internally damaged and must be scrapped Ensure all surfaces fixtures and phone components contacting the Battery are smooth and clean Ensure Battery and its insulation are not damaged e g scratched dented punctured prior to and throughout assembly Prior to assembly ensure Battery edges and surfaces are not dented or deformed and that fixtur...
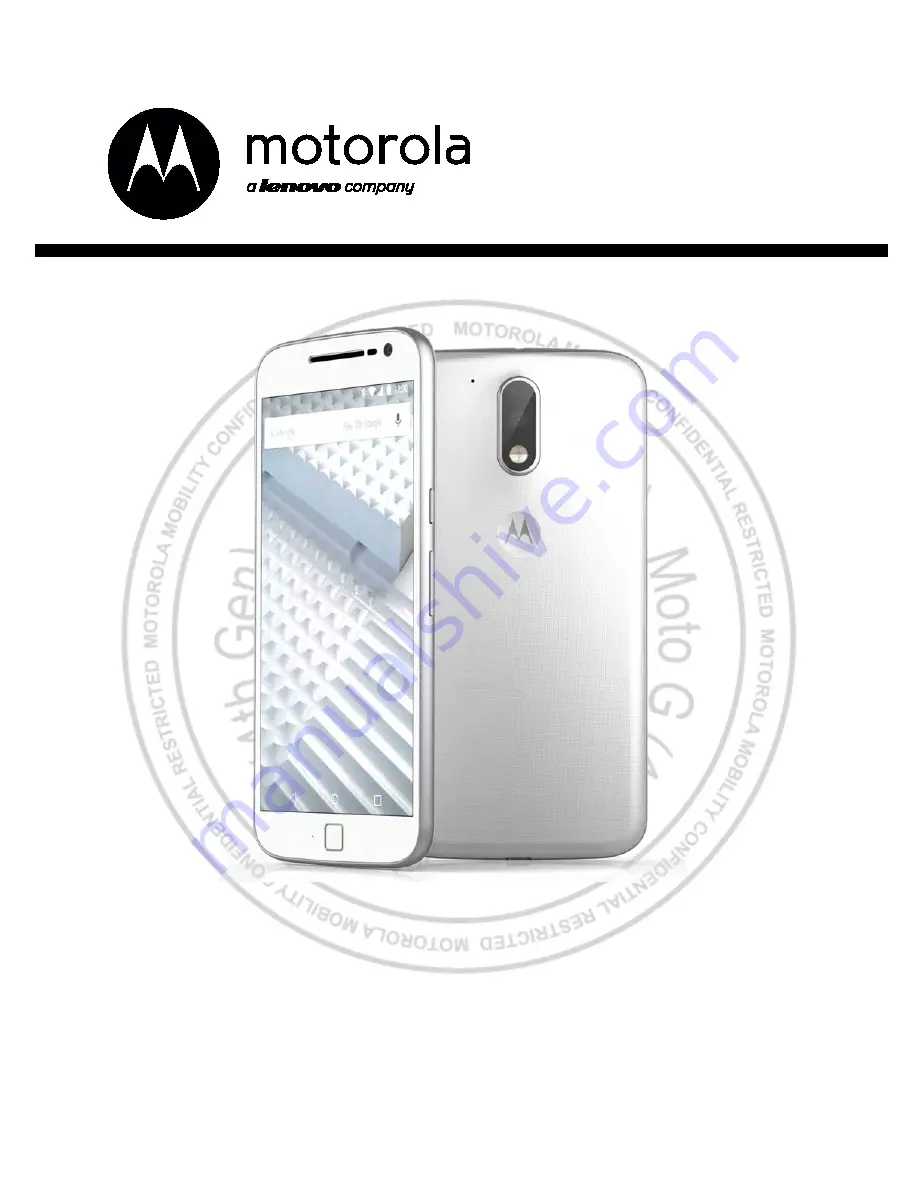
Страница 8: ...vice and Repair Manual Motorola Mobility Confidential Restricted PAGE 8 Do not share without consent from Motorola INTRODUCTION External Views Figure 1 External Views Figure 2 13 MP Left and 16 MP Right Rear Facing Imager Lens Options ...
Страница 9: ...r FPS Options 13 MP and No FPS Left and 16 MP and FPS Right Table 1 External Views Parts List Reference Description 1 Main Display 2 Earpiece Speaker 3 Front Facing Imager 4 Fingerprint Sensor 5 Rear Cover 6 Laser Focus 7 Rear Facing Imager Bezel 8 Rear Facing Imager 9 Motorola Logo 10 USB Port 11 Volume Key 12 Power Key These features are only available on the 16 MP model ...
Страница 10: ...MEA 2GB 16GB BOARD ASSY PWA ATHENE XCVR EMEA APAC 3G 32G ASSY PWA ATHENE NA 4G 64G ASSY PWA UMTS LTE BRAZIL 2GB 16GB DTV BOARD KIT ATHENE 13 ASSY PWA ATHENE XCVR NA 2G 16G ASSY PWA WE LTE NA SNGL SIM 2GB 32GB ASSY PWA WE LTE NA SNGL SIM 2GB 16GB ASSY PWA ATHENE XCVR ROLA 2G 32G ASSY PWA ATHENE XCVR BRAZIL 2G 32G ASSY PWA UMTS LTE INDIA 2GB 16GB BOARD ASSY PWA ATHENE XCVR EMEA APAC 2G 32G ASSY PWA ...
Страница 11: ... NO 16 ASSY CAMR 5MP FRONT IMGR YES 17 PAD ZIF LANDING MAIN IMGR NO 18 TAPE KAPTON DISPLAY FLX PCB EDGE NO 19 HEAT SPREADER SS1700 50UM FRNT NO 20 PAD ZIF LANDING FF CAMERA NO 21 GSKT SPKR NO 22 GSKT SPKR BCK NO 23 GROM PROX YES 24 GROM MIC PRMRY YES 25 IMGR MDL CMOS 16MP 10 5X10 5X6 0 MIPI 6P IMGR MDL CMOS 13 2MP 8 6X8 6X5 15MM MIPI YES 26 DIE CUT KAPTON UNIVERSAL 9 X 4 NO 27 DIE CUT KAPTON UNIVE...
Страница 12: ...tial Restricted PAGE 12 Do not share without consent from Motorola Reference Description Recovery Part 38 GROM FLASH_FOCUS FLEX BTB RETN YES 39 SCR HSG NO 40 SCR M1 4X 3 3 1MM ENDO YEL Zn NO Refer to this table or the latest SBOM as a reference to parts listed in the Assembly section ...
Страница 13: ... BLACK LENS DISP 5 5 FHD NO 1 2 DIE CUT ADHES MN LENS PSA NO 1 3 ASSY HSG FRNT WHT ASSY HSG FRNT YES 1 4 SCRN MESH SPEAKER NO 1 5 PAD DISPLAY TOUCH AREA NO 1 6 PAD DISP FLX BTB NO 1 7 DIE CUT ADHES DISP FLEX GROUNDING CPSA T NO 1 8 DIE CUT ADHES DISP FLX TO FRNT HSG CHAS NO 1 9 SCRN MIC MESH PRIMARY NO 1 10 BZL SPKR NO 1 11 ASSY FLXCKT FINGER PRINT SENSOR NATURAL ASSY FLXCKT FINGER PRINT SENSOR LU...
Страница 14: ...AR ASSY HSG REAR BLACK SINGLE SIM SLT YES 3 2 GSKT MN IMAGER PMT NO 3 3 PAD SIDE KEY BTB NO 3 4 SCRN MIC MESH GASKET SECONDARY NO 3 5 LENS FLSH NO 3 6 ASSY MN CAMR CVR LENS BLACK ASSY LENS MAIN IMAGER CVR NO 3 7 PAD FPS BTB PSA NO 3 8 ASSY FLXCKT PROX CAMER FLSH LED ASSY FLXCKT LSR FOCUS CAMERA FLSH LED NO Refer to this table or the latest SBOM as a reference to parts listed in the Assembly sectio...
Страница 15: ...Rear Housing SD Card Shim WDL Rear Cover PCB Front Facing Imager Vibrator WDL Rear Facing Imager Lens Rear Facing Imager Flash Lens Secondary Microphone Mesh Front Housing Headset Jack Headset Jack Grommet Headset Jack Flex Copper Tape Thermal Spreader Thermal Spreader Loudspeaker Side Keys Loudspeaker Pads USB Grommet Proximity Grommet Secondary Microphone Grommet Rear Facing Imager Bezel Flash F...
Страница 16: ... Tools Required for Disassembly The following tools are required to disassemble the Moto G 4th Generation phone Description Part Picture Drawing Blackstick 3IP Torx Bit Torque Driver Adjustable Thin Plastic Spudger 0 00 00 40826 Tweezers Plastic or Plastic Tipped Tweezers Metal ESD Mat and Wrist Strap Gloves or Finger Collets Isopropyl ISP Alcohol ...
Страница 17: ... The Rear Cover can be recovered and reused after removal 1 Starting at the cutout near the USB Connector use a fingernail to release the Rear Cover snaps from the Housing 2 Continue to release the Rear Cover snaps around the edges of the phone 3 After the Rear Cover snaps have been released lift the Rear Cover toward the top of the assembly to remove it from the Housing ...
Страница 18: ...rom Motorola Water Detection Label Inspection Inspect the Water Detection Label WDL on the lower left corner of the Rear Housing for signs of activation NOTE The WDL is located on the lower right corner of the inside of the Rear Housing Do not inspect this side of the WDL for activation the color on this side does not reflect activation ...
Страница 19: ...e without consent from Motorola Flash Flex Grommet Removal NOTE The Flash Flex Grommet can be recovered and reused after removal 1 Use the flat end of the Blackstick to pry the Flash Flex Grommet from the Rear Housing 2 Use the flat end of the Blackstick at the location shown to disengage the Flash Flex BtB Connector ...
Страница 20: ...anual Motorola Mobility Confidential Restricted PAGE 20 Do not share without consent from Motorola SD Card Shim Removal Use the Tweezers to remove the SD Card Shim from the PCB and Rear Housing NOTE After you remove the SD Card Shim you cannot reuse it ...
Страница 21: ...d and reused after removal 1 Use the Torque Driver and 3IP Torx Bit to remove the 19 3IP Machine Screws from the Rear Housing NOTE After you remove the 3IP Machine Screws you cannot reuse them 2 Use the flat end of the Blackstick to disengage the snap at the top right of the Front and Rear Housings 3 Use the flat end of the Blackstick to disengage the snap at the bottom left of the Front and Rear ...
Страница 22: ...Moto G 4th Generation Level 2 Service and Repair Manual Motorola Mobility Confidential Restricted PAGE 22 Do not share without consent from Motorola 4 Lift the Rear Housing away from the Front Housing ...
Страница 23: ... from Motorola Flash Flex Removal NOTE After you remove the Flash Flex you cannot reuse it 1 Insert the flat end of the Blackstick under the top edge of the Flash Flex 2 Slide the Blackstick downward to separate the Flash Flex Adhesive from the Rear Housing 3 Use the Tweezers to separate the Flash Flex Stiffeners from the Rear Housing ...
Страница 24: ...r Facing Imager Bezel Removal NOTE The Rear Facing Imager Bezel can be recovered and reused after removal 1 Insert the Thin Plastic Spudger between the Rear Facing Imager Bezel and the Rear Housing at the indicated recess 2 Slide the Thin Plastic Spudger around the perimeter of the Rear Facing Imager Bezel to separate the adhesive from the Rear Housing ...
Страница 25: ...g Imager Lens Removal Slide the Thin Plastic Spudger under the Rear Facing Imager Lens to separate the adhesive from the Rear Housing NOTE After you remove the Rear Facing Imager Lens you cannot reuse it TIP If this method is too difficult remove the Flash Flex and from the inside of the Rear Housing use the pointed end of the Blackstick to push the Lens out ...
Страница 26: ...E 26 Do not share without consent from Motorola Rear Facing Imager Flash Lens Removal Slide the Thin Plastic Spudger under the Rear Facing Imager Flash Lens at the indicated recess to separate the adhesive from the Rear Housing NOTE After you remove the Rear Facing Imager Flash Lens you cannot reuse it ...
Страница 27: ...Confidential Restricted PAGE 27 Do not share without consent from Motorola Secondary Microphone Mesh Removal Use the Tweezers and ISP Alcohol to remove the Secondary Microphone Mesh from the Rear Housing NOTE After you remove the Secondary Microphone Mesh you cannot reuse it ...
Страница 28: ... Motorola Vibrator Removal NOTE The Vibrator can be recovered and reused after removal 1 Use the flat end of the Blackstick to pry the Vibrator Grommet from the pocket of the Front Housing 2 Lift the USB Grommet away from the PCB 3 Use the flat end of the Blackstick to disengage the Vibrator BtB Connector 4 Remove the Vibrator from the PCB ...
Страница 29: ... e g scratched dented punctured prior to and throughout assembly Prior to assembly ensure Battery edges and surfaces are not dented or deformed and that fixtures and parts that will contact the Battery are free of foreign material Ensure screws and screwdrivers do not contact the Battery NOTE The Battery can be recovered and reused after removal 1 Use the Plastic Tweezers to slowly peel the Therma...
Страница 30: ... from Motorola 3 Use the Plastic Tweezers to pry the Battery Wire Block off the PCB 4 Use the flat end of the Blackstick to disengage the Battery Wire BtB Connector 5 Peel the Battery Tab from the Battery 6 Pull the Battery Tab toward the top of the Front Housing keeping level with the surface The adhesive releases behind the Battery ...
Страница 31: ... share without consent from Motorola 7 Insert the Thin Plastic Spudger between the top of the Battery and the Front Housing at the location shown 8 Slide the Thin Plastic Spudger toward the lower right corner of the Battery to separate the Battery Adhesive 9 Lift the Battery out of the pocket of the Front Housing ...
Страница 32: ...sed after removal 1 Use the Tweezers to remove the Kapton Tape from the Front Facing Imager ZIF Connector Door NOTE After you remove the Kapton Tape you cannot reuse it 2 Use the flat end of the Blackstick to open the Front Facing Imager ZIF Connector Door 3 Use the Tweezers to disconnect the Front Facing Imager Flex from the Front Facing Imager ZIF Connector 4 Lift the Front Facing Imager out of ...
Страница 33: ...met can be recovered and reused after removal 1 Use the Tweezers to remove the Kapton Tape from the Headset Jack ZIF Connector Door NOTE After you remove the Kapton Tape you cannot reuse it 2 Use the flat end of the Blackstick to open the Headset Jack ZIF Connector Door 3 Use the Tweezers to disconnect the Headset Jack Flex from the Headset Jack ZIF Connector 4 Use the Tweezers to remove the Heads...
Страница 34: ...4 Do not share without consent from Motorola 5 Insert the pointed end of the Blackstick into the Headset Jack hole 6 Push the Blackstick up toward the top of the Headset Jack to separate the adhesive from the Front Housing 7 Use the Tweezers to lift the Headset Jack out of the pocket of the Front Housing ...
Страница 35: ...isplay Flex BtB Connector NOTE After you remove the Copper Tape you cannot reuse it 2 Use the flat end of the Blackstick to disengage the Display Flex BtB Connector 3 Use the flat end of the Blackstick to disengage the Fingerprint Sensor Flex BtB Connector NOTE The Fingerprint Sensor is only available on the 16 MP model 4 Use the Tweezers to remove the Kapton Tape from the 3IP Machine Screw near t...
Страница 36: ... NOTE After you remove the 3IP Machine Screws you cannot reuse them 6 Lift the bottom of the PCB away from the Front Housing at an angle to disengage the snap at the top of the PCB 7 Remove the PCB from the Front Housing CAUTION Verify you did not damage the Display Flex or Fingerprint Sensor Flex while lifting the PCB NOTE After you remove the PCB replace the Loudspeaker Pads For more information...
Страница 37: ...cted PAGE 37 Do not share without consent from Motorola Headset Jack Flex Removal Slide the Thin Plastic Spudger between the Headset Jack Flex and the wall of the Front Housing pocket to separate the adhesive from the Front Housing NOTE After you remove the Headset Jack Flex you cannot reuse it ...
Страница 38: ...ual Motorola Mobility Confidential Restricted PAGE 38 Do not share without consent from Motorola Loudspeaker Removal Use the flat end of the Blackstick to pry the Loudspeaker off the Front Housing NOTE After you remove the Loudspeaker you cannot reuse it ...
Страница 39: ...la Side Key Removal NOTE After you remove the Side Keys you cannot reuse them 1 Through the openings in the back of the Front Housing use the pointed end of the Blackstick to push the Volume Key out of the Housing 2 Through the openings in the back of the Front Housing use the pointed end of the Blackstick to push the Power Key out of the Housing ...
Страница 40: ...OTE The Rear Facing Imager can be recovered and reused after removal 1 Use the Tweezers to remove the Kapton Tape from the Rear Facing Imager ZIF Connector Door NOTE After you remove the Kapton Tape you cannot reuse it 2 Use the flat end of the Blackstick to open the Rear Facing Imager ZIF Connector Door 3 Remove the Rear Facing Imager from the Rear Facing Imager ZIF Connector ...
Страница 41: ... not share without consent from Motorola Loudspeaker Pad Removal NOTE After you remove the Loudspeaker Pads you cannot reuse them 1 Use the Tweezers and ISP Alcohol to remove the Loudspeaker Pad from the front of the PCB 2 Use the Tweezers and ISP Alcohol to remove the Loudspeaker Pad from the back of the PCB ...
Страница 42: ...anual Motorola Mobility Confidential Restricted PAGE 42 Do not share without consent from Motorola USB Grommet Removal Use the Tweezers to remove the USB Grommet from the PCB and Microphone NOTE The USB Grommet can be recovered and reused after removal ...
Страница 43: ...ual Motorola Mobility Confidential Restricted PAGE 43 Do not share without consent from Motorola Proximity Grommet Removal Use the Tweezers to remove the Proximity Grommet from the PCB NOTE The Proximity Grommet can be recovered and reused after removal ...
Страница 44: ...ility Confidential Restricted PAGE 44 Do not share without consent from Motorola Secondary Microphone Grommet Removal Use the Tweezers to remove the Secondary Microphone Grommet from the PCB NOTE The Secondary Microphone Grommet can be recovered and reused after removal ...
Страница 45: ...ve the Thermal Spreader Copper Tape and Kapton Tape only if they are damaged After you remove them you cannot reuse them 1 Use the Plastic Tweezers to remove the Kapton Tape from the inner edge of the PCB near the Display Flex BtB Connector 2 Use the Plastic Tweezers to slowly peel the Copper Tape and Thermal Spreader from the PCB Start with the corner of the Copper Tape closest to the outside edg...
Страница 46: ...nual Motorola Mobility Confidential Restricted PAGE 46 Do not share without consent from Motorola PCB Water Detection Label Inspection Inspect the WDL at the location shown on the PCB Verify it is correctly placed and inspect it for signs of activation ...
Страница 47: ...ot share without consent from Motorola PARTS REFRESH Tools Required for Parts Refresh The following tools are required for parts refresh of the Moto G 4th Generation phone Description Part Image Blackstick Tweezers Plastic or Plastic Tipped ESD Mat and Wrist Strap Gloves or Finger Collets Isopropyl ISP Alcohol ...
Страница 48: ...eaning 1 Use the Blackstick and ISP Alcohol to clean any remaining adhesive from where the Rear Facing Imager Bezel Lens and Flash Lens attach 2 Use the Blackstick and ISP Alcohol to clean any remaining adhesive from where the Secondary Microphone Mesh attaches 3 Use the Blackstick and ISP Alcohol to clean any remaining adhesive from where the Flash Flex attaches ...
Страница 49: ...er and Copper Tape attach to the PCB over the Display Flex BtB Connector 2 Use the Blackstick and ISP Alcohol to remove any remaining adhesive from where the Kapton Tape attaches to the PCB Shield over the Battery Wires 3 Use the Blackstick and ISP Alcohol to remove any remaining adhesive from where the Battery Wire Block attaches to the PCB 4 Use the Blackstick and ISP Alcohol to remove any remai...
Страница 50: ...l Motorola Mobility Confidential Restricted PAGE 50 Do not share without consent from Motorola 5 Use the Blackstick and ISP Alcohol to remove any remaining adhesive from where the Thermal Spreader Copper Tape and Kapton Tape attach to the bottom of the PCB ...
Страница 51: ...nsulation are not damaged e g scratched dented punctured prior to and throughout assembly Prior to assembly ensure Battery edges and surfaces are not dented or deformed and that fixtures and parts that will contact the Battery are free of foreign material Ensure screws and screwdrivers do not contact the Battery 1 Use the Blackstick and ISP Alcohol to remove any adhesive residue from the Battery C...
Страница 52: ... Repair Manual Motorola Mobility Confidential Restricted PAGE 52 Do not share without consent from Motorola Rear Facing Imager Bezel Cleaning Use the Blackstick and ISP Alcohol to clean any remaining adhesive from the Rear Facing Imager Bezel ...
Страница 53: ...attery Rear Cover PCB Headset Jack Grommet Headset Jack Flex Front Facing Imager WDL Rear Facing Imager Vibrator Side Keys Copper Tape Thermal Spreader ZIF Pads Loudspeaker Pads USB Grommet Proximity Grommet Secondary Microphone Grommet Thermal Spreader Rear Facing Imager Bezel Rear Facing Imager Lens Rear Facing Imager Flash Lens Secondary Microphone Mesh SD Card Shim Display Flex BtB Pad Fingerp...
Страница 54: ...equired for Assembly The following tools are required to assemble the Moto G 4th Generation phone Description Part Picture Drawing Affinity PCB Assembly Fixture 3 00 F8 10000 Affinity Camera Lens and Bezel Press Tool 3 00 G3 10000 Lens and Bezel Press Head Lens and Bezel Press Fixture Affinity Side Key Assembly Tool 3 00 G6 10000 Press 19501980 Blackstick ...
Страница 55: ...la Mobility Confidential Restricted PAGE 55 Do not share without consent from Motorola Description Part Picture Drawing 3IP Torx Bit Torque Driver Adjustable Tweezers Plastic or Plastic Tipped ESD Mat and Wrist Strap Gloves or Finger Collets Isopropyl ISP Alcohol ...
Страница 56: ...r Detection Label Assembly Description Reference ASSY HSG REAR BLACK L5 SINGLE SIM SLT ASSY HSG REAR BLACK L5 3 LBL WATER DETECT DVX NOTE The color on the inside of the WDL does not reflect activation 1 Remove the WDL from the carrier 2 Place the WDL on the Rear Housing in the location shown 3 Press down on the WDL for 5 seconds to secure the WDL to the Rear Housing ...
Страница 57: ...OTE The Fingerprint Sensor is only available on the 16 MP model 1 Remove the Fingerprint Sensor BtB Pad from the carrier 2 Place the Fingerprint Sensor BtB Pad on the Rear Housing in the location shown 3 Press down on the Fingerprint Sensor BtB Pad for 5 seconds to secure the Pad to the Rear Housing 4 Remove the Display Flex BtB Pad from the carrier 5 Place the Display Flex BtB Pad on the Rear Hou...
Страница 58: ...h Assembly Description Reference ASSY HSG REAR BLACK L5 SINGLE SIM SLT ASSY HSG REAR BLACK L5 3 SCRN MIC MESH GASKET SECONDARY 3 4 1 Remove the Secondary Microphone Mesh from the carrier 2 Place the Secondary Microphone Mesh onto the Rear Housing aligning it with the etched recess 3 Press down on the Secondary Microphone Mesh for 5 seconds to secure it to the Rear Housing ...
Страница 59: ...E XCVR EMEA APAC 3G 32G ASSY PWA ATHENE NA 4G 64G ASSY PWA UMTS LTE BRAZIL 2GB 16GB DTV BOARD KIT ATHENE 13 ASSY PWA ATHENE XCVR NA 2G 16G ASSY PWA WE LTE NA SNGL SIM 2GB 32GB ASSY PWA WE LTE NA SNGL SIM 2GB 16GB ASSY PWA ATHENE XCVR ROLA 2G 32G ASSY PWA ATHENE XCVR BRAZIL 2G 32G ASSY PWA UMTS LTE INDIA 2GB 16GB BOARD ASSY PWA ATHENE XCVR EMEA APAC 2G 32G ASSY PWA UMTS LTE LATAM 2GB 16GB BOARD 2 L...
Страница 60: ... SIM 2GB 16GB ASSY PWA ATHENE XCVR ROLA 2G 32G ASSY PWA ATHENE XCVR BRAZIL 2G 32G ASSY PWA UMTS LTE INDIA 2GB 16GB BOARD ASSY PWA ATHENE XCVR EMEA APAC 2G 32G ASSY PWA UMTS LTE LATAM 2GB 16GB BOARD 2 PAD ZIF LANDING MAIN IMGR 17 PAD ZIF LANDING FF CAMERA 20 PAD ZIF LANDING HSJ 15 1 Remove the Rear Facing Imager Flex ZIF Pad from the carrier 2 Place the Rear Facing Imager Flex ZIF Pad on the PCB in...
Страница 61: ...ntial Restricted PAGE 61 Do not share without consent from Motorola 7 Remove the Headset Jack Flex ZIF Pad from the carrier 8 Place the Headset Jack Flex ZIF Pad on the PCB in the location shown 9 Press down on the Headset Jack Flex ZIF Pad for 5 seconds to secure the Pad to the PCB ...
Страница 62: ...PWA ATHENE XCVR EMEA APAC 3G 32G ASSY PWA ATHENE NA 4G 64G ASSY PWA UMTS LTE BRAZIL 2GB 16GB DTV BOARD KIT ATHENE 13 ASSY PWA ATHENE XCVR NA 2G 16G ASSY PWA WE LTE NA SNGL SIM 2GB 32GB ASSY PWA WE LTE NA SNGL SIM 2GB 16GB ASSY PWA ATHENE XCVR ROLA 2G 32G ASSY PWA ATHENE XCVR BRAZIL 2G 32G ASSY PWA UMTS LTE INDIA 2GB 16GB BOARD ASSY PWA ATHENE XCVR EMEA APAC 2G 32G ASSY PWA UMTS LTE LATAM 2GB 16GB ...
Страница 63: ...HENE XCVR EMEA APAC 3G 32G ASSY PWA ATHENE NA 4G 64G ASSY PWA UMTS LTE BRAZIL 2GB 16GB DTV BOARD KIT ATHENE 13 ASSY PWA ATHENE XCVR NA 2G 16G ASSY PWA WE LTE NA SNGL SIM 2GB 32GB ASSY PWA WE LTE NA SNGL SIM 2GB 16GB ASSY PWA ATHENE XCVR ROLA 2G 32G ASSY PWA ATHENE XCVR BRAZIL 2G 32G ASSY PWA UMTS LTE INDIA 2GB 16GB BOARD ASSY PWA ATHENE XCVR EMEA APAC 2G 32G ASSY PWA UMTS LTE LATAM 2GB 16GB BOARD ...
Страница 64: ... EMEA APAC 3G 32G ASSY PWA ATHENE NA 4G 64G ASSY PWA UMTS LTE BRAZIL 2GB 16GB DTV BOARD KIT ATHENE 13 ASSY PWA ATHENE XCVR NA 2G 16G ASSY PWA WE LTE NA SNGL SIM 2GB 32GB ASSY PWA WE LTE NA SNGL SIM 2GB 16GB ASSY PWA ATHENE XCVR ROLA 2G 32G ASSY PWA ATHENE XCVR BRAZIL 2G 32G ASSY PWA UMTS LTE INDIA 2GB 16GB BOARD ASSY PWA ATHENE XCVR EMEA APAC 2G 32G ASSY PWA UMTS LTE LATAM 2GB 16GB BOARD 2 GROM US...
Страница 65: ...S LTE BRAZIL 2GB 16GB DTV BOARD KIT ATHENE 13 ASSY PWA ATHENE XCVR NA 2G 16G ASSY PWA WE LTE NA SNGL SIM 2GB 32GB ASSY PWA WE LTE NA SNGL SIM 2GB 16GB ASSY PWA ATHENE XCVR ROLA 2G 32G ASSY PWA ATHENE XCVR BRAZIL 2G 32G ASSY PWA UMTS LTE INDIA 2GB 16GB BOARD ASSY PWA ATHENE XCVR EMEA APAC 2G 32G ASSY PWA UMTS LTE LATAM 2GB 16GB BOARD 2 IMGR MDL CMOS 16MP 10 5X10 5X6 0 MIPI 6P IMGR MDL CMOS 13 2MP 8...
Страница 66: ...idential Restricted PAGE 66 Do not share without consent from Motorola 3 Place Kapton Tape over the Rear Facing Imager ZIF Connector Door 4 Remove the Rear Facing Imager protective liner if present 5 Fold the Rear Facing Imager Flex over the Rear Facing Imager Flex ZIF Connector ...
Страница 67: ...LTE BRAZIL 2GB 16GB DTV BOARD KIT ATHENE 13 ASSY PWA ATHENE XCVR NA 2G 16G ASSY PWA WE LTE NA SNGL SIM 2GB 32GB ASSY PWA WE LTE NA SNGL SIM 2GB 16GB ASSY PWA ATHENE XCVR ROLA 2G 32G ASSY PWA ATHENE XCVR BRAZIL 2G 32G ASSY PWA UMTS LTE INDIA 2GB 16GB BOARD ASSY PWA ATHENE XCVR EMEA APAC 2G 32G ASSY PWA UMTS LTE LATAM 2GB 16GB BOARD 2 ASSY FLXCKT HSET 13 1 Insert the Headset Jack Flex into the Heads...
Страница 68: ...AZIL 2GB 16GB DTV BOARD KIT ATHENE 13 ASSY PWA ATHENE XCVR NA 2G 16G ASSY PWA WE LTE NA SNGL SIM 2GB 32GB ASSY PWA WE LTE NA SNGL SIM 2GB 16GB ASSY PWA ATHENE XCVR ROLA 2G 32G ASSY PWA ATHENE XCVR BRAZIL 2G 32G ASSY PWA UMTS LTE INDIA 2GB 16GB BOARD ASSY PWA ATHENE XCVR EMEA APAC 2G 32G ASSY PWA UMTS LTE LATAM 2GB 16GB BOARD 2 TAPE KAPTON DISPLAY FLX PCB EDGE 18 GSKT SPKR BCK 22 LBL SD CONN RAMP S...
Страница 69: ...Pad using the pins in the fixture to align it 6 Press down on the PCB for 5 seconds to secure the Copper Tape Thermal Spreader and Front Loudspeaker Pad to the PCB 7 Remove the PCB from the fixture 8 Remove the remaining liners from the Copper Tape Thermal Spreader and Front Loudspeaker Pad 9 Remove the Rear Loudspeaker Pad from the carrier 10 Place the Rear Loudspeaker Pad into the fixture using ...
Страница 70: ...Flex Kapton Tape and SD Card Shim using the pins in the fixture to align it 16 Press down on the PCB for 5 seconds to secure the Rear Loudspeaker Pad Display Flex Kapton Tape and SD Card Shim to the PCB 17 Remove the PCB from the fixture 18 Remove the remaining liners from the Rear Loudspeaker Pad and SD Card Shim 19 Wrap the Display Flex Kapton Tape around the edge of the PCB and over the Shield ...
Страница 71: ... it to the screw bosses in the Front Housing CAUTION Verify the Display Flex and Fingerprint Sensor Flex are not caught underneath the PCB The Fingerprint Sensor is only available on the 16 MP model 22 Press down on the Secondary Microphone Grommet to engage the snap in the Front Housing 23 Use the Torque Driver and 3IP Torx Bit to manually tighten the 2 3IP Machine Screws to 0 8 in lbs 0 09 N m ...
Страница 72: ...Connector to the PCB 26 Remove the Display Flex BtB Copper Tape from the carrier 27 Place the Copper Tape across the Display Flex BtB Connector over the Shields as shown Align the long edge of the tape to the long edge of the Battery pocket 28 Press down on the Copper Tape for 5 seconds to secure the Copper Tape to the Display Flex BtB Connector and Shields 29 Apply rolling pressure to connect the...
Страница 73: ...3 Do not share without consent from Motorola 30 Remove the adhesive liner from the Headset Jack Flex 31 Fold the Headset Jack Flex over the edge of the pocket of the Front Housing aligning it with the pocket wall 32 Press down on the Headset Jack Flex for 5 seconds to secure the Flex to the Front Housing ...
Страница 74: ... ASSY HSG FRNT BLK 1 DIE CUT ADHES HSJ RETN CONN JACK HEADSET 3 5 MM DIAMETER 45 11 GROM HSJ GROM RUB HSJ 12 1 Remove the adhesive liner from the Headset Jack 2 Place the Headset Jack into the pocket of the Front Housing angling the top of the jack into the pocket first 3 Press down on the Headset Jack for 5 seconds to secure it to the Front Housing 4 Verify that the Headset Jack is fully seated i...
Страница 75: ...t share without consent from Motorola 5 Remove the adhesive liner from the Headset Jack Grommet 6 Place the Headset Jack Grommet over the Headset Jack 7 Press down on the Headset Jack for 5 seconds to secure the Headset Jack Grommet 8 Verify that the Headset Jack Grommet is flush to the PCB and oriented as shown ...
Страница 76: ...escription Reference ASSY HSG FRNT WHT ASSY HSG FRNT BLK 1 TRANSDUCER OTHR 2V LOUDSPEAKER 6OHM 11 1 15 1 Remove the Loudspeaker from the carrier 2 Place the Loudspeaker into the pocket of the PCB and Front Housing 3 Verify the indicated contacts orient away from the edge of the Front Housing 4 Press down on the Loudspeaker for 5 seconds to secure it to the Front Housing ...
Страница 77: ...IMGR 16 PAD CONDUCTIVE FRONT FACING IMGR FLX SPRT FRNT FACING IMGR 1 Remove the protective liner from the Front Facing Imager if present 2 Insert the Front Facing Imager Flex into the Front Facing Imager ZIF Connector 3 Slide a fingertip across the Front Facing Imager ZIF Connector Door to close it 4 Place Kapton Tape over the Front Facing Imager ZIF Connector Door 5 Press down on the Front Facing...
Страница 78: ...ASSY HSG FRNT WHT ASSY HSG FRNT BLK 1 DIE CUT ADHES BAT PSA FRNT HSG 14 1 Remove the Battery Adhesive from the carrier 2 Place the Battery Adhesive into the pocket of the Front Housing Align the long edge of the adhesive to the long edge of the pocket and verify the cutout in the Adhesive Liner is oriented as shown 3 Apply manual pressure to the Battery Adhesive to secure it to the Front Housing ...
Страница 79: ...s CAUTION Handle the Battery Pack with care If dropped to the floor it may be internally damaged and must be scrapped Ensure Battery and its insulation are not damaged e g scratched dented punctured prior to and throughout assembly Prior to assembly ensure Battery edges and surfaces are not dented or deformed and that fixtures and parts that will contact the Battery are free of foreign material En...
Страница 80: ... Connector on the PCB 5 Press down on the Battery Wire Flex tail to engage the Battery Wire BtB Connector 6 Align the Battery Wires along the edges of the SIM trays and Shield 7 Remove the adhesive liner from the Battery Wire Block 8 Place the Battery Wire Block over the Battery Wires as shown 9 Use the flat end of the Blackstick to press down on the Battery Wire Block for 5 seconds to secure it t...
Страница 81: ...evel 2 Service and Repair Manual Motorola Mobility Confidential Restricted PAGE 81 Do not share without consent from Motorola 10 Place Kapton Tape across the Battery Wires over the Shield and lower left corner of the Battery ...
Страница 82: ...G FRNT BLK 1 HEAT SPREADER SS1700 50UM BCK 30 1 Align the Thermal Spreader over the PCB shield 2 Remove the right adhesive liner from the Thermal Spreader 3 Place the right side of the Thermal Spreader over the Battery 4 Remove the remaining adhesive liner from the Thermal Spreader 5 Place the left side of the Thermal Spreader over the PCB 6 Press down on the Thermal Spreader for 5 seconds to secu...
Страница 83: ...torola Vibrator Assembly Description Reference ASSY HSG FRNT WHT ASSY HSG FRNT BLK 1 ALERT DEVICE VIBR 1 12 1 Lift the USB Grommet away from the PCB 2 Place the Vibrator into the pocket of the Front Housing 3 Align the Vibrator Flex tail to the Vibrator BtB Connector 4 Press down on the Vibrator Flex tail to engage the Vibrator BtB Connector ...
Страница 84: ... KEY VOLUME BUTTON DARK CHRM 6 1 Place the Affinity Side Key Assembly Tool 3 00 G6 10000 on the PCB and over the side of the Housing aligning the tool with the Side Key snap holes 2 Align the buttons on the Volume Key with the holes in the side of the Housing 3 Push the Volume Key into the Housing until the buttons snap into the holes 4 Align the buttons on the Power Key with the holes in the side...
Страница 85: ...G REAR BLACK L5 SINGLE SIM SLT ASSY HSG REAR BLACK L5 3 ASSY FLXCKT PROX CAMER FLSH LED ASSY FLXCKT LSR FOCUS CAMERA FLSH LED 36 1 Remove the four adhesive liners from the Flash Flex 2 Place the Flash Flex into the Rear Housing aligning it to the five pins in the Rear Housing 3 Verify the Flash Flex is oriented as shown 4 Press down on the Flash Flex for 5 seconds to secure it to the Rear Housing ...
Страница 86: ... ASSY HSG FRNT BLK 1 ASSY HSG REAR BLACK L5 SINGLE SIM SLT ASSY HSG REAR BLACK L5 3 SPCR DIECUT NO NFC SKU SCR HSG 39 qty 19 1 Remove any remaining protective liners from the Housing PCB Rear Facing Imager and Front Facing Imager 2 Place the Rear Housing over the Front Housing 3 Engage the snap at the top right of the Front and Rear Housings 4 Engage the snap at the bottom left of the Front and Re...
Страница 87: ...otorola Mobility Confidential Restricted PAGE 87 Do not share without consent from Motorola 5 Use the Torque Driver and 3IP Torx Bit to tighten the 19 3IP Machine Screws to 0 8 in lbs 0 09 N m in the order shown 5 6 4 7 8 9 10 11 12 3 13 14 15 1 2 16 17 19 18 ...
Страница 88: ...ash Lens 2 Place the Rear Facing Imager Flash Lens into the pocket of the Rear Housing 3 Press down on the Rear Facing Imager Flash Lens for 5 seconds to secure it to the Rear Housing 4 Place the Affinity Camera Lens and Bezel Press Fixture 3 00 G3 10000 into the Press 19501980 5 Place the Affinity Camera Lens and Bezel Press Head 3 00 G3 10000 into the Press 6 Place the Housing into the Affinity ...
Страница 89: ... from the Rear Facing Imager Lens 2 Place the Rear Facing Imager Lens into the pocket of the Rear Housing 3 Press down on the Rear Facing Imager Lens for 5 seconds to secure it to the Rear Housing 4 Place the Affinity Camera Lens and Bezel Press Fixture 3 00 G3 10000 into the Press 19501980 5 Place the Affinity Camera Lens and Bezel Press Head 3 00 G3 10000 into the Press 6 Place the Housing into ...
Страница 90: ...f the Rear Facing Imager Bezel Adhesive is not already assembled to the Rear Facing Imager Bezel 1 Remove the adhesive liner from the Rear Facing Imager Bezel Adhesive 2 Place the Rear Facing Imager Bezel Adhesive onto the Rear Facing Imager Bezel aligning the notches in the Adhesive to the notches in the Bezel 3 Press down on the Rear Facing Imager Bezel Adhesive for 5 seconds to secure it to the...
Страница 91: ... seconds to secure it to the Rear Housing 7 Place the Affinity Camera Lens and Bezel Press Fixture 3 00 G3 10000 into the Press 19501980 8 Place the Affinity Camera Lens and Bezel Press Head 3 00 G3 10000 into the Press 9 Place the Housing into the Affinity Camera Lens and Bezel Press Fixture 3 00 G3 10000 10 Press the Housing for 5 seconds to secure the Rear Facing Imager Bezel to the Rear Housin...
Страница 92: ...t Assembly Description Reference ASSY HSG REAR BLACK L5 SINGLE SIM SLT ASSY HSG REAR BLACK L5 3 GROM FLASH_FOCUS FLEX BTB RETN 38 1 Press down on the Flash Flex to engage the Flash Flex BtB Connector 2 Place the Flash Flex Grommet into the Rear Housing beginning with the side opposite the curved recess 3 Press down on the Flash Flex Grommet until it snaps into place ...
Страница 93: ...G 4th Generation Level 2 Service and Repair Manual Motorola Mobility Confidential Restricted PAGE 93 Do not share without consent from Motorola 4 Verify the Flash Flex Grommet is flush with the Rear Housing ...
Страница 94: ...IM Adaptor Assembly Description Reference ASSY HSG REAR BLACK L5 SINGLE SIM SLT ASSY HSG REAR BLACK L5 3 HSG ADAPTER NANO TO MICRO SIM qty 2 1 Insert a Nano SIM Adaptor into the SIM 1 Tray Verify the Adaptor is oriented correctly and fully inserted 2 Insert a Nano SIM Adaptor into the SIM 2 Tray Verify the Adaptor is oriented correctly and fully inserted ...
Страница 95: ...VR BTDR KIT COBALT ASSY CVR BTDR KIT BAMBOO WD ASSY CVR BTDR KIT WHT 4 1 Remove the protective liner from the Rear Facing Imager Bezel if present 2 Engage the hook features in the top edge of the Rear Cover with the cutouts in the top edge of the Housing NOTE The Rear Cover must engage the Housing at an angle top edge first as shown 3 While holding the top edge of the Rear Cover in position engage...
Страница 96: ... Level 2 Service and Repair Manual Motorola Mobility Confidential Restricted PAGE 96 Do not share without consent from Motorola 5 Engage the remaining snaps around the perimeter of the phone and the Rear Facing Imager Bezel ...
Страница 97: ...s are required to remove clean and replace damaged Display parts on the Moto G 4th Generation phone Description Part Picture Drawing Pre Heat Fixture optional for use with the Generic Lens Removal Fixture if Oven is not available 3 00 A5 10000 Affinity Main Lens Alignment and Press 3 00 F9 10000 Lens Alignment Fixture Lens Press Head Affinity Speaker Bezel Press 3 00 G1 10000 Affinity Main Lens Re...
Страница 98: ...ola Description Part Picture Drawing Generic Lens Removal Fixture 4 00 X2 10000 220V 4 00 X7 10000 115V Vacuum O Ring 4 00 A2 10000 19506580 Oven optional for use if the Pre Heat Fixture and Generic Lens Removal Fixture are not available Press 19501980 Blackstick Tweezers Plastic or Plastic Tipped ESD Mat and Wrist Strap Gloves or Finger Collets ...
Страница 99: ...ISP Alcohol Cotton Swabs 3M AP 111 Adhesion Promoter Generic Lens Removal Fixtures 4 00 X2 10000 and 4 00 X7 10000 are identical tools The only difference is the voltage rating Either the 220V 4 00 X2 10000 or the 115V 4 00 X7 10000 can be used with the Affinity Main Lens Removal Fixture 3 00 G2 10000 Sets of 5 Vacuum O Rings 19506580 are available under the package part number 4 00 A2 10000 ...
Страница 100: ...lay Removal Fixture CAUTION If the Display Lens is damaged continue to Display Removal Damaged Display Lens Only on page 107 NOTE Pre Heat Method A and Pre Heat Method B are optional procedures that may be used to reduce the Display Removal process time 1 Verify that the Rear Housing and PCB have been disassembled from the Front Housing 2 Remove the Display Liner if present ...
Страница 101: ...10000 as shown NOTE The Generic Lens Removal Fixture vacuum will not perform correctly if the Vacuum O ring is not in position 2 Place the Affinity Main Lens Removal Fixture 3 00 G2 11000 into the Generic Lens Removal Fixture 3 Press the black power switch not shown on the back of the Generic Lens Removal Fixture to turn the fixture ON 4 Turn the vacuum knob circled clockwise until it stops 5 Wait...
Страница 102: ...hod B on page 103 or skip to Display Removal on page 104 2 Place the Front Housing in the Oven CAUTION Do not set the Oven temperature higher than 85 C 185 F Damage to the phone may occur 3 Wait 25 minutes for the Display to warm up 4 Remove the phone from the Oven CAUTION Wear protective gloves when handling heated phones 5 Continue to Display Removal on page 104 NOTE For phones with a damaged Di...
Страница 103: ...r skip to Display Removal on page 104 2 Press the black power switch not shown on the back of the Generic Lens Removal Fixture to turn the fixture ON 3 Wait 10 15 minutes for the Generic Lens Removal Fixture to warm up to 85 C 185 F 4 Place the Front Housing in the Pre Heat Fixture 5 Wait 3 minutes for the Display to warm up 6 Slide the lever on the Pre Heat Fixture to remove the phone from the fi...
Страница 104: ...E The Front Housing and Display can be recovered and reused after removal 1 Use the Tweezers to pry the two Ground Flex tabs from the Front Housing 2 Place the Front Housing in the Lens Removal Fixture with the Display facing down and the Headset Jack facing the front of the fixture CAUTION Do not damage the Ground Flex tabs Display Flex or the Fingerprint Sensor Flex ...
Страница 105: ...d the Lens Removal Fixture down until the gauge reaches 60 kPa When the gauge reaches 60 kPa remove your hand from the Lens Removal Fixture 5 Wait for the Lens Removal Fixture to spring up NOTE The lid on the Generic Lens Removal Fixture is spring loaded and will automatically open when the Display is separated from the Front Housing 6 Press the red button to turn off the vacuum pump 7 Turn the va...
Страница 106: ...rint Sensor Flex 9 Use the Thin Plastic Spudger to separate the remaining adhesive from the USB side of the phone CAUTION Do not insert the Thin Plastic Spudger deeper than 1 mm Deeper insertion may separate the Display and Lens and cause damage 10 Verify that no other connection exists between the Display and the Front Housing assembly 11 Lift the Display out of the Front Housing guiding all flex...
Страница 107: ...one may be pre heated before Display removal See Pre Heat Method A or Pre Heat Method B for pre heating instructions Verify the Display Liner is removed before heating CAUTION This procedure should only be performed if the Display Lens is damaged 1 Verify that the Rear Housing and PCB have been disassembled from the Front Housing 2 Use the Tweezers to pry the two Ground Flex tabs from the Front Ho...
Страница 108: ...stic Spudger around the Display insert a shim or Thin Plastic Spudger between the separated edges to prevent the Display from re adhering to the Housing 5 When the adhesive has been freed slightly lift the Display from the Housing CAUTION To avoid damage to the Ground Flex tabs Display Flex or the Fingerprint Sensor Flex do not lift the Display any higher than necessary to disconnect these flexes ...
Страница 109: ...maged and being replaced Take care not to damage the Display Flex or Fingerprint Sensor Flex 1 Use the Blackstick and ISP Alcohol to remove any remaining Battery Adhesive from where the Battery attaches to the Front Housing 2 Use the Blackstick and ISP Alcohol to remove any remaining adhesive from where the Loudspeaker attaches to the Front Housing 3 Use the Blackstick and ISP Alcohol to remove an...
Страница 110: ...Restricted PAGE 110 Do not share without consent from Motorola 4 Use the Blackstick and ISP Alcohol to remove any remaining adhesive from where the two Ground Flex tabs attach to the Front Housing 5 Use the Blackstick and ISP Alcohol to clean any remaining adhesive from the Display ledge ...
Страница 111: ... edge of the Display CAUTION Use care when cleaning the Display Do not separate the Display from the Lens Take care not to damage the Display Flex or Fingerprint Sensor Flex 2 Inspect the Display Flex to verify it is not torn creased or otherwise damaged 3 Use the Blackstick and ISP Alcohol to remove any remaining adhesive from where the Fingerprint Sensor attaches to the Display NOTE The Fingerpr...
Страница 112: ...ESH SPEAKER 1 4 SPCR TAPE KAPTON FRONT R_DFP LBL IMEI TAPE DISP FLX PROT FROM BAT WALL 1 Remove the two Ground Flex Adhesives from their carriers 2 Place the Adhesives on the Front Housing in the locations shown Align the edge of each Adhesive with the edge of the slot in the Front Housing 3 Press down on the Adhesives for 5 seconds to secure them to the Front Housing 4 Remove the Microphone Mesh ...
Страница 113: ...r NOTE The Fingerprint Sensor Spacer is only needed for the 13 MP model 11 Place the Fingerprint Sensor on the bottom of the Front Housing aligning it with the etched recess 12 Press down on the Fingerprint Sensor Spacer for 5 seconds to secure it to the Front Housing 13 Remove the Kapton Tape from the carrier 14 Place the Kapton Tape on the Front Housing Align it to the edge of the Housing and al...
Страница 114: ... Motorola 17 Remove the Display Flex Adhesive from the carrier 18 Place the Display Flex Adhesive on the Front Housing oriented as shown Align it with the holes in the Housing 19 Remove two Kapton Tape strips from the carrier 20 Place the Kapton Tape strips on the edge of the Front Housing as shown Align them to the etchings in the Housing ...
Страница 115: ...ame and Bottom Frame cleaning is critical to the phone s water resistance You must thoroughly clean the surfaces with ISP Alcohol and allow it to dry completely before applying 3M AP 111 Adhesion Promoter 2 Wait for the ISP Alcohol to dry completely CAUTION Do not use the same cotton swabs to clean with ISP Alcohol and apply 3M AP 111 Adhesion Promoter The Display will not properly adhere to the F...
Страница 116: ...that the ISP Alcohol and 3M AP 111 Adhesion Promoter have dried completely before proceeding Failure to do so can cause the Display to improperly adhere and reduce the phone s water resistance 7 Place the Front Housing into the fixture over the Display Adhesive 8 Place the Affinity Main Lens Alignment Fixture 3 00 F9 10000 into the Press 19501980 9 Place the Affinity Main Lens Alignment Press Head...
Страница 117: ...NS ASSY BLK NON MDL MDL 5 46 FHD DISP LENS ASSY WHT NON ASSY WHITE LENS DISP 5 5 FHD ASSY BLACK LENS DISP 5 5 FHD 1 1 PAD ATHENE DISP 1 Remove the protective reflective liner from the Display 2 Remove the Display Pad from the carrier 3 Place the Display Pad on the Display 4 Apply pressure at the indicated locations 5 Remove the liner from the Display Pad NOTE Slight bubbling in the center of the D...
Страница 118: ... 5 FHD 1 1 DIE CUT ADHES DISP TOUCH DESCRETES TAPE DISP FLX STIFNR TAPE 1 Fold the Display Flex over onto the Display Pad 2 Remove the Display Flex Adhesive from the carrier 3 Place the Display Flex Adhesive on the Display Flex as shown Align the adhesive to the white marks on the Display Flex 4 Remove the remaining liner from the Display Flex Adhesive 5 Fold the left edge of the Display Flex over...
Страница 119: ...tion Reference MDL MDL 5 46 FHD DISP LENS ASSY BLK NON MDL MDL 5 46 FHD DISP LENS ASSY WHT NON ASSY WHITE LENS DISP 5 5 FHD ASSY BLACK LENS DISP 5 5 FHD 1 1 BZL SPKR 1 10 1 Remove the Speaker Bezel from the carrier 2 Place the Speaker Bezel in the Affinity Speaker Bezel Press 3 00 G1 10000 3 Place the Display in the Press 4 Slide the Press arm into position over the Speaker Bezel ...
Страница 120: ...anual Motorola Mobility Confidential Restricted PAGE 120 Do not share without consent from Motorola 5 Use the Press to press down for 5 seconds to secure the Speaker Bezel to the Display 6 Slide the Press arm back and remove the Display from the Press ...
Страница 121: ...FHD ASSY BLACK LENS DISP 5 5 FHD 1 1 ASSY FLXCKT FINGER PRINT SENSOR NATURAL ASSY FLXCKT FINGER PRINT SENSOR LUNAR GR 1 11 NOTE The Fingerprint Sensor is only available on the 16 MP model 1 Remove the adhesive liner from the Fingerprint Sensor Flex 2 Place the Fingerprint Sensor Flex on the Display oriented as shown Align the Sensor to the hole in the bottom of the Display 3 Press down on the Fing...
Страница 122: ... surface The Display bonding surface is highlighted in the photo CAUTION Display bonding surface cleaning is critical to the phone s water resistance You must thoroughly clean the bonding surface with ISP Alcohol and allow it to dry completely before applying 3M AP 111 Adhesion Promoter 2 Wait for the ISP Alcohol to dry CAUTION Do not use the same cotton swabs to clean with ISP Alcohol and apply 3...
Страница 123: ...nd reduce the phone s water resistance 5 Remove the Display Adhesive liner 6 Remove all remaining liners from the Kapton Tape on the Front Housing 7 Bend the Ground Flex tabs up at a 90 degree angle from the Display Flex 8 Starting with the side closest to the Side Keys begin to lower the Display into the Front Housing 9 Guide the Display Flex BtB Connector Fingerprint Sensor Flex and two Ground F...
Страница 124: ...tial Restricted PAGE 124 Do not share without consent from Motorola 10 Lower the Display into the Front Housing 11 Verify all four flex tails are properly fed through the holes in the Front Housing 12 Press down on the Display for 10 seconds to secure the Display to the Front Housing ...
Страница 125: ...om the two Ground Flex tab adhesives 14 Fold the Ground Flex tabs over and attach them to the Front Housing 15 Remove the two Display Backer Pads from their carriers and attach them to the Ground Flex tabs 16 Place the Affinity Main Lens Alignment Fixture 3 00 F9 10000 into the Press 19501980 17 Place the Affinity Main Lens Alignment Press Head 3 00 F9 10000 into the Press ...
Страница 126: ...ir Manual Motorola Mobility Confidential Restricted PAGE 126 Do not share without consent from Motorola 18 Place the Front Housing in the Affinity Main Lens Alignment Fixture 19 Press the Housing for 18 seconds to secure the Display to the Housing ...
Страница 127: ...Moto G 4th Generation Level 2 Service and Repair Manual Motorola Mobility Confidential Restricted PAGE 127 Do not share without consent from Motorola APPENDIX Generic Lens Removal Fixture Manual ...
Страница 128: ...Moto G 4th Generation Level 2 Service and Repair Manual Motorola Mobility Confidential Restricted PAGE 128 Do not share without consent from Motorola ...