000
000
000
000
000
000
000
000
00000000000000
00000000000000
00000000000000
00000000000000
00000000000000
00000000000000
00000000000000
00000000000000
00000000000000
0
0
0
0
0
0
0
0
0
000
000
000
000
000
000
000
000
00
00
00
0
0
0
0
00
00
00
00
00
00
00
00
00000
00000
00000
00000
00000000000000
00000000000000
00000000000000
00000000000000
00000000000000
00000000000000
00000000000000
00000000000000
00000000000000
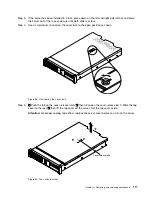
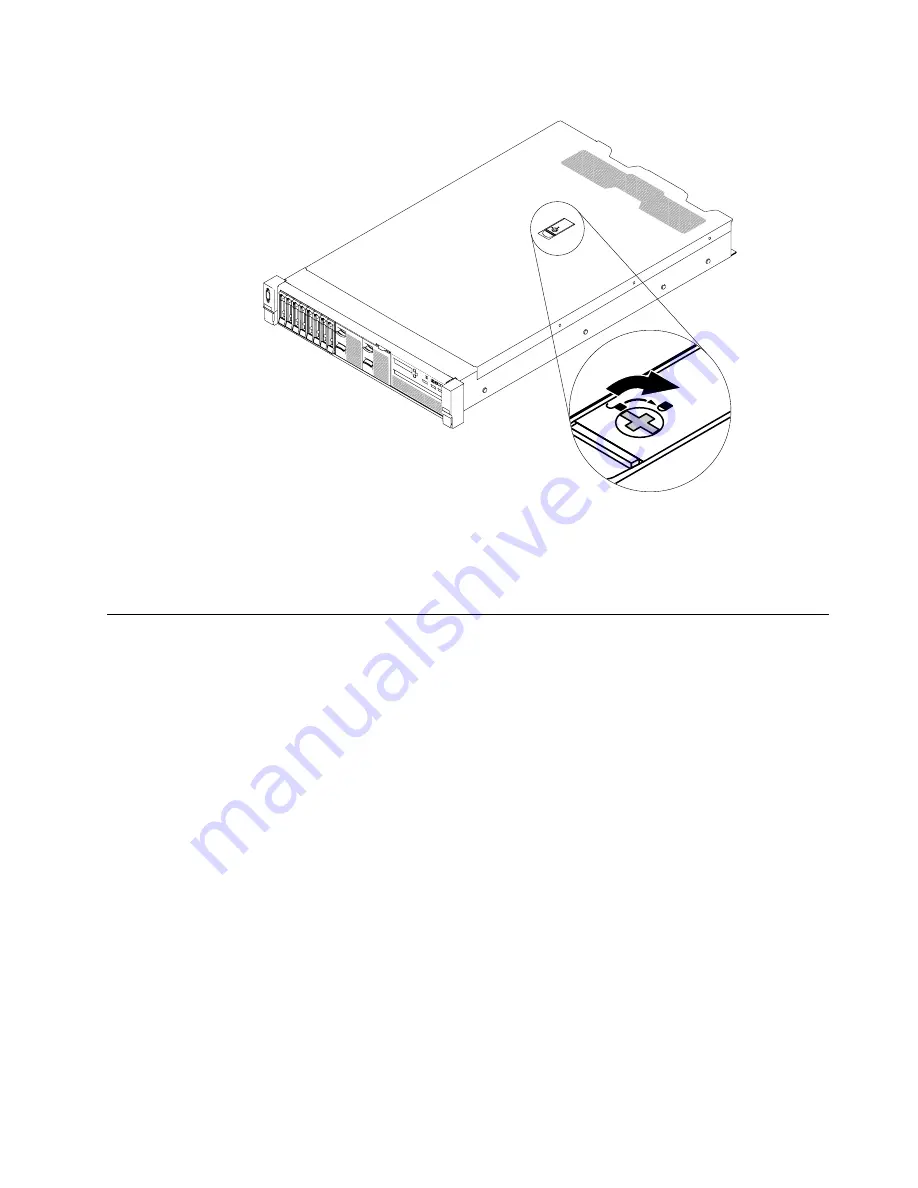
Figure 46. Closing the server cover completely
Step 7.
Slide the server into the rack.
Step 8.
Reconnect the external cables and power cords.
Removing and replacing Tier 1 CRUs
Replacement of Tier 1 CRUs is your responsibility. If Lenovo installs a Tier 1 CRU at your request, you will
be charged for the installation.
The illustrations in this document might differ slightly from your hardware.
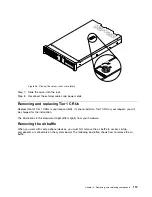
Removing the air baffle
When you work with some optional devices, you must first remove the air baffle to access certain
components or connectors on the system board. The following illustration shows how to remove the air
baffle.
.
Removing, and replacing components
119
Содержание HX3510-G
Страница 1: ...HX3510 G HX5510 HX5510 C HX7510 Installation and Service Guide Machine Type 8695 ...
Страница 6: ...iv HX3510 G HX5510 HX5510 C HX7510 Installation and Service Guide ...
Страница 62: ...50 HX3510 G HX5510 HX5510 C HX7510 Installation and Service Guide ...
Страница 102: ...90 HX3510 G HX5510 HX5510 C HX7510 Installation and Service Guide ...
Страница 112: ...100 HX3510 G HX5510 HX5510 C HX7510 Installation and Service Guide ...
Страница 1222: ...1210 HX3510 G HX5510 HX5510 C HX7510 Installation and Service Guide ...
Страница 1229: ...People s Republic of China Class A electronic emission statement Taiwan Class A compliance statement Appendix E Notices 1217 ...
Страница 1230: ...Taiwan BSMI RoHS declaration 1218 HX3510 G HX5510 HX5510 C HX7510 Installation and Service Guide ...
Страница 1238: ...1226 HX3510 G HX5510 HX5510 C HX7510 Installation and Service Guide ...
Страница 1239: ......
Страница 1240: ......

