


d. Install the backplane to the drive cage. See “Install the rear 3.5-inch drive backplane” on page
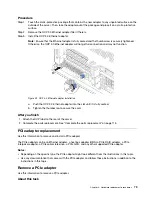
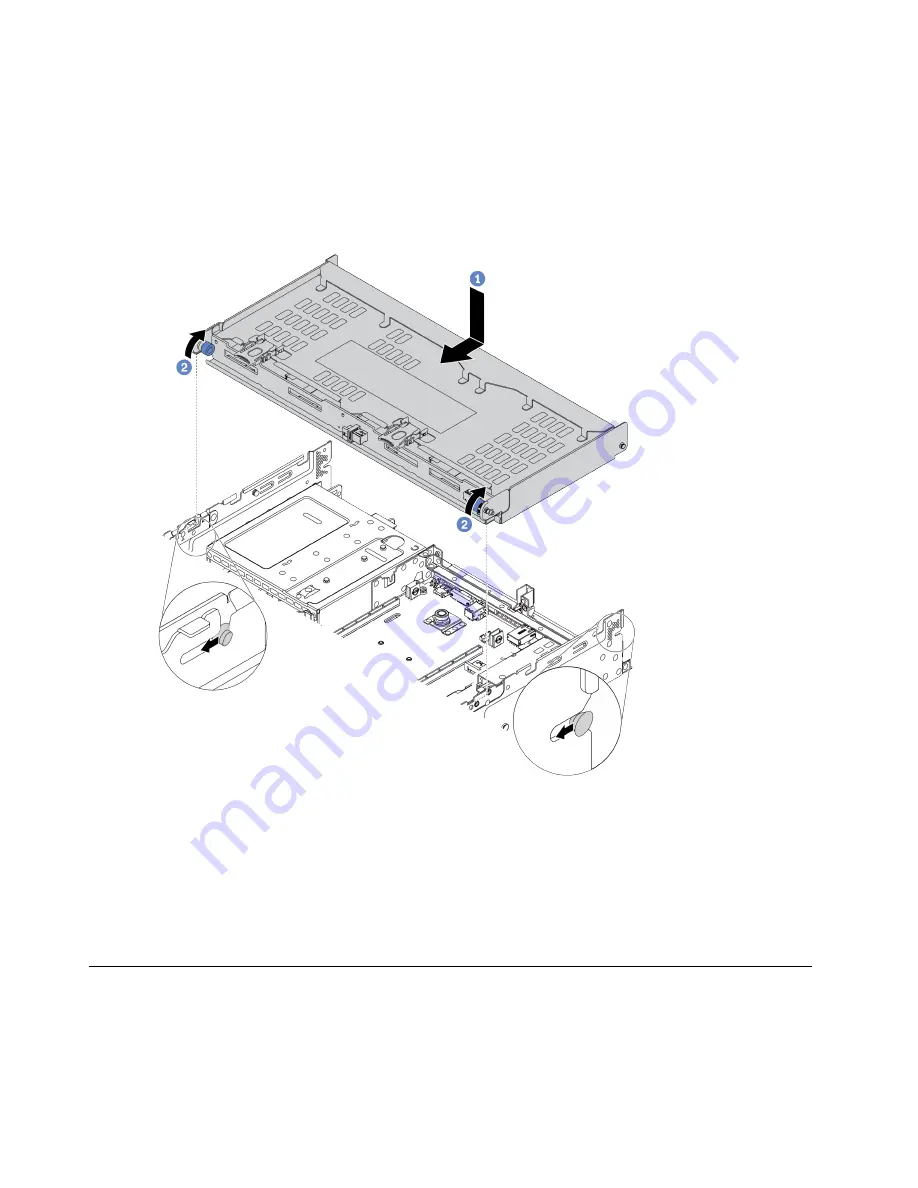
Step 2. Install the rear drive cage.
a. Align the rear drive cage with the chassis, and lower the drive cage into the chassis. Move the
rear drive cage forward until it clicks into position.
b. Twist and release the blue plunger to secure the drive cage in place.
Figure 44. Installing the 4 x 3.5-inch reard rive cage
After you finish
1. Reinstall the drives or drive fillers into the rear drive cage. See “Install a hot-swap drive” on page 29.
2. Connect cables to the rear drive backplane.
3. Complete the parts replacement. See “Complete the parts replacement” on page 113.
Rearwall bracket replacement
Use this information to remove and install a rearwall bracket.
The rearwall brackets vary by server rear configurations. This topic uses the bracket on the right of the
configuration with 7 PCIe slots as an example for replacement illustration. The replacement procedure is the
same for other brackets.
68
HR650X V2 User Guide
Содержание HR650X V2
Страница 1: ...HR650X V2 User Guide Machine Types 7D4D ...
Страница 8: ......
Страница 14: ...6 HR650X V2 User Guide ...
Страница 30: ...22 HR650X V2 User Guide ...
Страница 122: ...114 HR650X V2 User Guide ...
Страница 152: ...144 HR650X V2 User Guide ...
Страница 176: ...168 HR650X V2 User Guide ...
Страница 182: ...174 HR650X V2 User Guide ...
Страница 186: ...178 HR650X V2 User Guide ...
Страница 190: ...182 HR650X V2 User Guide ...
Страница 191: ......
Страница 192: ......