background image


B-3  P40w-20 Curved Panel Monitor User’s Guide 

Tips for healthy work habits 

Long exposures to computer screens may cause eye strain. Symptoms include headache, 

burning eyes, blurred vision and discomfort. To minimize eye strain, computer users can 

adjust working habits to let their eyes relax and recover. 


Break Times 

Computer users should take some time away from the screen especially if working for 

prolong hours. Generally, it is recommended to take short breaks (5 – 15 mins) after 1 –2 

hours of continuous computer works. Taking short and frequent breaks is more advised 

than longer breaks. 


Looking at Distant Objects 

Users often blink less when in front of monitor screen. To minimize eye strain and dryness, 

users should rest the eye periodically by focusing on objects that are far away. 


Eye and Neck Exercises 

Certain exercise reduces eye strain and prevent early onset of musculo-skeletal disorders. It 

is recommended to repeat these exercises often. However, should symptoms persists it is 

recommended to consult a physician. 
Exercises for the eye: 
1.


Alternate looking up and looking down while keeping the body and head upright. 

2.


Slowly roll your eyes to look to the left and right. 

3.


Roll eyes to look at objects on the upper right corner and then on lower right. Do same 

thing to look at objects on the upper left and lower left. 

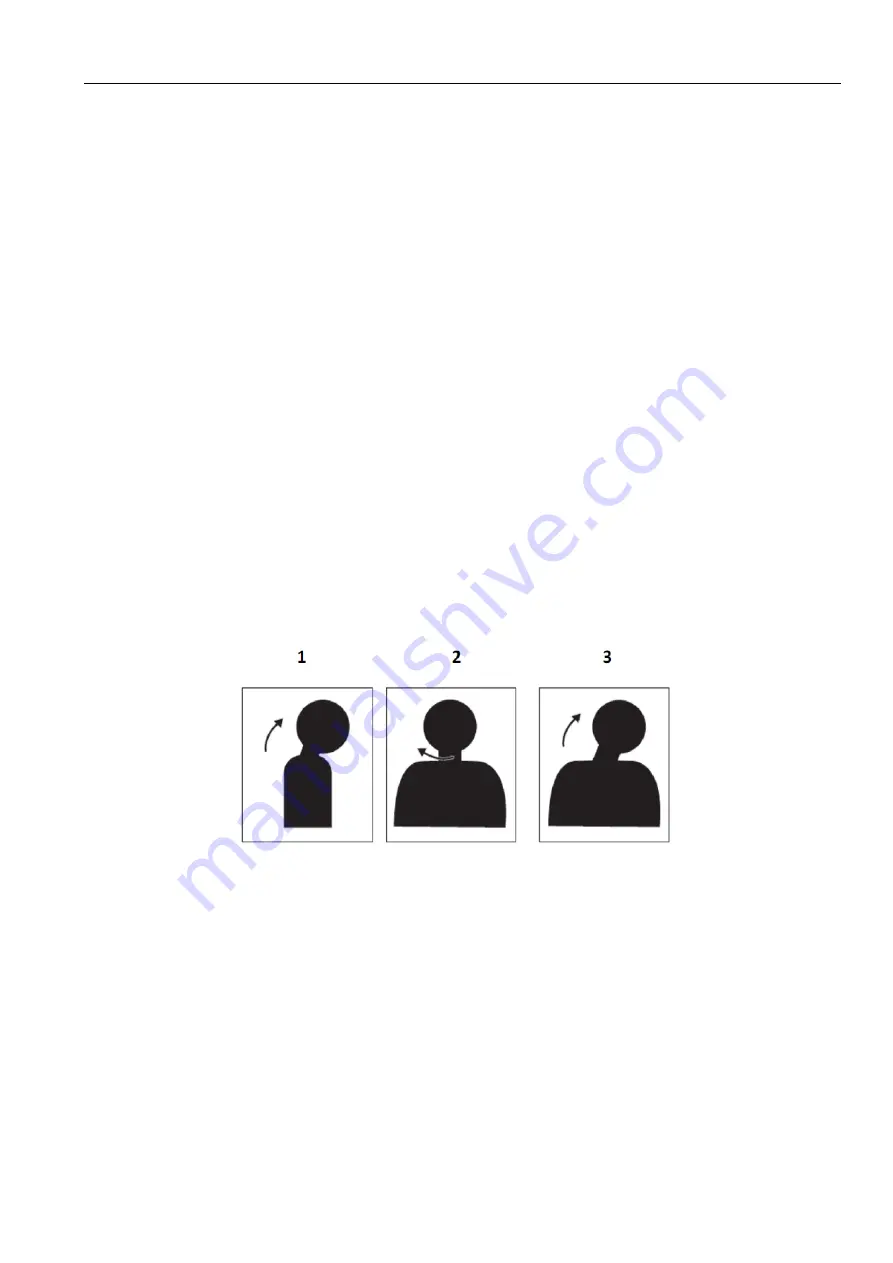
Exercises for the neck: 
1.


Relax arm at the side. Bend head forward to slightly stretch the neck. Hold for 5 seconds. 

2.


Relax arm at the side. Turn head to the right. Hold for 5 seconds. Then turn head to the 

left. 

3.


Relax arm at the side. Swing head to the left. Hold for 5 seconds. Then swing head to the 

right. 


Working Posture   

Appropriate working position helps minimize eye discomfort. Seating position and ideal 

placement of monitor are essential for a comfortable working experience. 


Seating Position 

Placing the monitor too far or too close may lead to eye strain. Far viewing distance causes 

users to lean forward to see small texts, which strain the eyes and torso. Close viewing 

distance, on the other hand, strains the eye resulting from exerting more effort to focus and 

also causes the user to sit in awkward body posture (i.e. tilting the head, typing with 

outstretched arms, etc.) 
Recommended viewing distance between the eye and the monitor screen is 1.5 x the diagonal 

of the screen. Solutions in meeting this required distance in cramped office situations include 

pulling desk away from wall or divider to make room for monitor, using flat panel or compact 

displays placing the monitor in the desk corner, or placing the keyboard in an adjustable 

drawer to create a deeper working surface.     

Содержание 62C1

Страница 1: ...P40w 20 WUHD Curved Panel Monitor User s Guide Machine Type 62C1 ...

Страница 2: ... at private expense and are sold to governmental entities as commercial items as defined by 47 C F R 2 101 with limited and restricted rights to use reproduction and disclosure LIMITED AND RESTRICTED RIGHTS NOTICE IF products data computer software or services are delivered pursuant a General Services Administration GSA contract use reproduction or disclosure is subject to restrictions set forth i...

Страница 3: ...justments 1 21 Usercontrols 1 22 Cablelockslot 1 22 Featuresandspecs 1 23 Chapter 2 Explore your monitor 2 1 Quickaccesscontrols 2 1 OSDcontrols 2 2 Maximumresolutions 2 5 Imagerotation 2 5 Driver optional 2 6 Understandingpowermanagement 2 7 Caringforyourmonitor 2 7 Detachingthemonitorstand 2 8 WallMounting Optional 2 8 Chapter 3 Troubleshooting 3 1 Appendix A Important safety information A 1 Saf...

Страница 4: ...netechnicalsupport C 1 Worldwidetelephonelist C 1 Serviceinformation C 4 Appendix D Compliance information D 1 Recyclinginformation D 1 CollectingandrecyclingadisusedLenovocomputerormonitor D 1 DisposingofLenovocomputercomponents D 1 Turkishstatementofcompliance D 2 UkraineRoHS D 2 IndiaRoHS D 2 Powercordsandpoweradapters D 2 TCOCertified D 3 Appendix E Notices and trademarks E 1 Trademarks E 2 ...

Страница 5: ...Monitor Monitor Stand Monitor Base Power Cord USB B A Cable optional Thunderbolt 4 Cable DP 1 4 Cable optional Note To achieve 5K daisy chain at 60Hz on P40w 20 monitor a 40G Thunderbolt 4 cable is required Depending on many factors such as the processing capability of peripheral devices file attributes and other factors related to system configuration and operating environments the actual transfe...

Страница 6: ...r excessive pressure 1 Take out the Top cushion and accessories 2 Mounting the stand to monitor s recess Insert the three tabs on the upper part of the stand to the groove on the back of the monitor Press the stand down till it snaps into place 3 Insert the base towards the stand and tighten the thumbscrew 4 Stand up the monitor with both hands carefully Note To attach a VESA mount please see Deta...

Страница 7: ...off your computer and all attached devices and unplug the computer power cord 2 Connect the cables according to below icon indication Input Connectors Rear view 1 x HDMI 2 0 HDCP 2 2 1 x DisplayPort 1 4 HDCP 2 2 1 x Thunderbolt 4 full function downstream port with 27W PD output 1 x Thunderbolt 4 full function upstream port with typical 65W PD output 1 x USB 3 2 Gen 1 Type B upstream 3 x USB 3 2 Ge...

Страница 8: ... 20 Curved Panel Monitor User s Guide Input Connectors Front view 1 x Audio Out 1 x USB 3 2 Gen1 Type A downstream 1 x USB 3 2 Gen 1 Type C data only downstream with 27W PD output for charging phone USB SPK etc ...

Страница 9: ...urchase the Lenovo DisplayPort to DisplayPort cable 0A36537 For more information go to the following www lenovo com support monitor accessories 4 Connect one end of the HDMI 2 0 cable to the HDMI connector on the back of the computer and the other end to the HDMI connector on the monitor Lenovo recommends that customers who require to use the HDMI input on their monitor purchase the Lenovo HDMI to...

Страница 10: ...of the monitor and connect the other end of the USB cable to an appropriate USB port on your device Note 1 The USB downstream port does not provide power while the monitor is switched off 2 Power output for USB A 5V 0 9A and USB C 5V 5A 9V 3A 12V 2 25A If there are any tag you can consult the comments on page 1 1 ...

Страница 11: ...itor power cord and the computer cord into grounded electrical outlets Note A certified power supply cord has to be used with this equipment The relevant national installation and or equipment regulations shall be considered A certified power supply cord not lighter than ordinary polyvinyl chloride flexible cord according to IEC 60227 designation H05VV F 3G 0 75mm or H05VVH2 F2 3G 0 75mm shall be ...

Страница 12: ... 2 is Thunderbolt 4 upstream port is Thunderbolt 4 downstream port Note 3 Thunderbolt upstream port supports output typical power 65W 20V 3 25A 15V 4 3A 9V 5A 5V 5A maximum 96W 20V 4 8A if Smart Power enabled and the other downstream ports are not in charging mode Note 4 To enable Smart Power please see Table 2 2 OSD functions on page 2 3 Note 5 Thunderbolt downstream port supports output power 27...

Страница 13: ...ld be input of DisplayPort HDMI or Thunderbolt notebook the right screen PC2 would be rest input The Layout of PbP is always 5 5 of which is for the best experience and highest working efficiency best resolution for each sub screen is 2560x2160 60hz PiP As same to PbP the PiP Picture in Picture function can receive two different video sources too The best resolution of foreground PC2 is 1920x1080 ...

Страница 14: ...B Speed 2nd monitor P40w 20 2nd monitor Supported USB Speed Thunderbolt 4 DP 1 4 5120x2160 75hz USB 3 2 Gen 1 5120x2160 75hz USB 3 2 Gen 1 Thunderbolt 3 Alt Mode DP 1 4 DP 1 4 5120x2160 60hz USB 3 2 Gen 1 5120x2160 30hz USB 3 2 Gen 1 Thunderbolt 3 Alt Mode DP 1 2 DP 1 4 5120x2160 50hz USB 3 2 Gen 1 5120x2160 50hz USB 3 2 Gen 1 Thunderbolt 3 Alt Mode DP 1 2 DP 1 2 4096x2160 60hz USB 3 2 Gen 1 4096x...

Страница 15: ... independent displays Step 1 Connect your PC to monitor thru the Thunderbolt or DisplayPort Step 2 Enable True Split in OSD Step 3 Press Win P to select Extend mode in Windows 10 Note On Window control panel 2 and 3 indicate your P40w 20 monitor screen 1 indicate your notebook screen You can layout all the screens appropriately ...

Страница 16: ...P 1 2 DP 1 4 2560x2160 60hz 2560x2160 30hz USB 3 2 Gen 1 DP 1 2 2560x2048 60hz 2560x2048 60hz USB 3 2 Gen 1 USB C Gen 1 Alt Mode DP 1 2 DP 1 2 2560x2048 60hz 2560x2048 60hz USB 2 0 DP 1 4 2560x2160 60hz 2560x2160 30hz USB 2 0 USB C Gen 2 Alt Mode DP 1 4 DP 1 4 2560x2160 60hz 2560x2160 60hz USB 2 0 DP 1 2 2560x2048 60hz 2560x2048 60hz USB 2 0 DisplayPort 1 2 DP 1 2 2560x2048 60hz 2560x2048 60hz USB...

Страница 17: ...itch give user to operate two PC which connecting USB Type B and Type C upstream ports also user can use USB keyboard or USB mouse to reach the same function called eKVM How to enable KVM and or eKVM Option 1 The hotkey of KVM locate on the specific button of front bezel ...

Страница 18: ...or User s Guide Option 2 Keyboard hotkey double click Shift function key in 0 5s Option 3 Mouse hotkey press and hold 3s of left right button of mouse Mouse or Keyboard must be plug on specific USB port on the back for option 2 or 3 ...

Страница 19: ...g option 2 or option 3 and if the USB device is working on data transferring the port icon will be red not blue There will be a pop up message for the risk alert of data losing possibility After OSD disappears USB device will not be switched to another upstream port If you still want to switch USB devices operate option 2 or option 3 again before OSD disappears Remarks eKVM functionality may vary ...

Страница 20: ...ru Thunderbolt port Rather than regular Ethernet it support Intel vPro managed network on Thunderbolt port vPro function support by selected ThinkPad models with Intel CPU Gen 11th Tiger Lake platform PXE boot MAC address pass through MAPT This monitor support MAPT from the S0 on S3 Sleep S4 Hibernate S5 Off by selected ThinkPad models Wake on LAN WoL This monitor support WoL from the S3 Sleep S4 ...

Страница 21: ...to monitor automatically When plug off the earphone the PC will not delivery the audio signal to monitor it will delivery to other speakers connecting to PC internal or external speakers of PC It means user don t need to select audio device in Windows manually During the earphone plug on off the screen will be reset seconds the period time is depending on the PC you used ...

Страница 22: ...ing below resolution for your PC PC Monitor OSD setting HDMI 1 4 HDMI 2 0 HDMI 2 0 5K HDMI 1 4 2560x1600 60hz 2560x1600 60hz 2560x1600 60hz HDMI 2 0 2560x1600 60hz 4096x2160 60hz 5120x2160 50hz PC Monitor OSD setting DP 1 2 DP 1 4 DP 1 2 4096x2160 60hz 5120x2160 50hz DP 1 4 4096x2160 60hz 5120x2160 60hz ...

Страница 23: ...olt 3 Alt Mode DP 1 4 4096x2160 60hz 5120x2160 60hz USB 3 2 Gen 1 Thunderbolt 3 Alt Mode DP 1 2 4096x2160 60hz 5120x2160 50hz USB 3 2 Gen 1 USB C Gen 1 Alt Mode DP 1 2 4096x2160 60hz 5120x2160 50hz USB 2 0 USB C Gen 2 Alt Mode DP 1 4 4096x2160 60hz 5120x2160 60hz USB 2 0 Above tables is based on HDR setting off in Windows OS The best resolution is depending on your PC too ...

Страница 24: ...t Please take a few moments to register your product and provide us with information that will help Lenovo to better serve you in the future Your feedback is valuable to us in developing products and services that are important to you as well as in developing better ways to communicate with you Register your option on the following Web site http www lenovo com register Lenovo will send you informa...

Страница 25: ...ser controls and using the cable lock slot Types of adjustments Tilt Please see the illustration below for an example of the tilt range Swivel With the built in pedestal you can tilt and swivel the monitor for the most comfortable viewing angle Height Adjustment After pressing the top of the monitor you can adjust the height of the monitor ...

Страница 26: ...ide which are used to adjust the display For information on how to use these controls please see Explore your monitor on page 2 1 Cable lock slot Your monitor is equipped with a cable lock slot located on the rear of your monitor Please follow the instructions that came with the cable lock to attach it ...

Страница 27: ... Supply voltage 100 240 VAC 60 50 Hz current 3 0A Thunderbolt upstream port PD Function Supply voltage Watt 5V 9V 15V 20V 65 W Typical 96 W Max in Smart Power Mode Thunderbolt downstream port PD Function Supply voltage Watt 5V 9V 15V 27W Max USB Type C PD Function Supply voltage Watt 5V 9V 12V 27W Max Power consumption Note Power consumption figures are for the monitor and the power delivery toget...

Страница 28: ...ommunications VESA DDC CI Altitude Test Operation 5000 m 16404 ft Supported Display Modes VESA Standard modes between noted ranges Horizontal frequency 30 kHz 170 kHz Vertical frequency 50 Hz 75 Hz Native Resolution 5120x2160 at 60 Hz Temperature Operating 0 to 40 C 32 F to 104 F Storage 20 to 60 C 4 F to 140 F Shipping 20 to 60 C 4 F to 140 F Humidity Operating 8 to 80 Storage 5 to 95 Shipping 5 ...

Страница 29: ...e DDC CI function 2 Input change Switches the video input source Up Increase Press to move lighting indicator on main menu up from active item to last one Press to increase current values on adjustment bar 3 Brightness Direct access to Brightness adjustment Down Decrease Press to move lighting indicator on main menu down from active item to next one Press to decrease current values on adjustment b...

Страница 30: ...Use or to make adjustments Press to save 3 Press to move backwards through the sub menus and exit from the OSD 4 Press and hold for 10 seconds to lock the OSD This will prevent accidental adjustments to the OSD Press and hold for 10 seconds to unlock the OSD and allow adjustments to the OSD 5 Enables DDC CI by default Use OSD Exit Key press and hold the buttons for 10 seconds to disable enable DDC...

Страница 31: ...tion of red in the image Green Increases or decreases the saturation of green in the image Blue Increases or decreases the saturation of blue in the image Scenario Modes Panel Native Image Creation Digital Cinema Video Creation Aspect Ratio Selects type of scaled image Full Screen Expand image to full screen Original AR Ratio with input signal Port Setting Input Signal This monitor can accept vide...

Страница 32: ...ny software running on the computer Menu Time Out Sets the length of time the OSD will remain active after the last time a button is pressed Menu Horizontal Changes the horizontal position of the OSD Menu Vertical Changes the vertical position of the OSD Transparency Choose the transparency of OSD Factory Reset Resets monitor to the original factory settings Yes No The ENERGY STAR Logo means reset...

Страница 33: ...1600x900 60Hz 1680x1050 60Hz 1920x1080 60Hz 1920x1200 60Hz 2560x1080 60Hz 2560x1440 60Hz 3840x2160 60Hz Note1 4096x2160 60Hz 5120x2160 30Hz 5120x2160 60Hz Note2 5120x2160 75Hz Note1 3840x2160 60Hz is HDMI 2 0 native resolution Note2 5120x2160 60Hz is DisplayPort 1 4 DP 1 4 native resolution Image rotation Before rotating the monitor you should set up your computer to rotate the image Rotating the ...

Страница 34: ...tings button 8 Click the Monitor tab 9 Click the Properties button 10 Click the Driver tab 11 Click Update Driver then click Browse the computer to find the driver program 12 Select Let me pick from a list of device drivers on my computer 13 Click the Have Disk button By clicking the Browse button browse and point to the following path X Monitor Drivers Windows 10 where X indicates the folder in w...

Страница 35: ... document is informational only and reflects laboratory performance Your product may perform differently depending on the software components and peripherals you ordered and shall have no obligation to update such information Accordingly the customer should not rely upon this information in making decisions about electrical tolerances or otherwise No warranty as to accuracy or completeness is expr...

Страница 36: ...e base mounting kit 1 Place the monitor face down in the original packing 2 Remove the stand 3 Attach the mounting bracket from the wall mounting kit to the monitor 4 Mount the monitor on the wall by following the instructions that come with the base mounting kit NOTE For use only with UL and GS Listed Wall Mount Bracket with minimum weight load bearing capacity of 12 0 kg In order to fulfil TCO C...

Страница 37: ...ed display mode for your computer If these options do not work contact the Customer Support Centre Maximum resolutions on page 2 5 The image quality is unacceptable The video signal cable is not connected with the monitor or system completely Be sure the signal cable is firmly plugged into the system and monitor Connecting and turning on your monitor on page 1 3 The image quality is unacceptable T...

Страница 38: ...stem Display Properties setting have not been optimized Adjust the resolution settings on your system to match the native resolution for this monitor 5120 x 2160 at 60 Hz Maximum resolutions on page 2 5 Your system Display Properties setting have not been optimized When working in the native resolution you may find additional improvements by adjusting the Dots Per Inch DPI setting on your system S...

Страница 39: ...General Safety guidelines For tips to help you use your computer safety go to http www lenovo com safety Before installing this product read the Safety Information This equipment is not suitable for use in locations where children are likely to be present avoid hurting your child when machine falling down ...

Страница 40: ...ampere rating Amps or A for each device Install your monitor near a power outlet that you can easily reach Disconnect the monitor by grasping the plug firmly and pulling it from the outlet Never disconnect the monitor by pulling the cord Do not allow anything to rest on the power cord Do not walk on the cord While using VESA mount application the AC Inlet must face to down side Do not face any oth...

Страница 41: ... or chair position Use a viewing distance that is most comfortable for you Monitor height Position the monitor so your head and neck are in a comfortable and neutral vertical or upright position If your monitor does not have height adjustments you might have to place books or other sturdy objects under the base of the monitor to achieve the desired height A general guideline is to position the mon...

Страница 42: ...urce that is causing the glare b Fitting the light sources with appropriate diffusers or lampshade c Using curtains or blind on windows to minimize glare from direct sunlight d Adjusting monitor position to be perpendicular to the source of light or windows e Using an anti glare screen ThinkVision monitors have anti glare surface treatment that scatters light for a reflection free work usage Light...

Страница 43: ...jects on the upper right corner and then on lower right Do same thing to look at objects on the upper left and lower left Exercises for the neck 1 Relax arm at the side Bend head forward to slightly stretch the neck Hold for 5 seconds 2 Relax arm at the side Turn head to the right Hold for 5 seconds Then turn head to the left 3 Relax arm at the side Swing head to the left Hold for 5 seconds Then s...

Страница 44: ...t is caused by several factors including but not limited to voltage fluctuations Reducing flicker minimizes eye strain and headaches ThinkVision monitors allow users to use high frequency display modes that can effectively reduce flicker Low Blue Light Concerns on blue light affecting eye health have risen over the years Blue light have wavelength between 300 nm to 500 nm The monitors under defaul...

Страница 45: ... Support Center will be withdrawn or made available for a fee at Lenovo s discretion 90 days after the option has been withdrawn from marketing Additional support offerings including step by step installation assistance are available for a nominal fee To assist the technical support representative have available as much of the following information as possible Option name Option number Proof of pu...

Страница 46: ...44 Arabic English El Salvador 800 6264 Spanish Estonia 372 66 0 800 Estonian Russian English Finland Warranty service and support 358 800 1 4260 Finnish France Warranty service and support hardware 0810 631 213 French Germany Warranty service and support 0800 500 4618 toll free German Greece Lenovo Business Partner Greek Guatemala Dial 999 9190 wait for operator and request to reach 877 404 9661 S...

Страница 47: ...herlands 020 513 3939 Dutch New Zealand 0508 770 506 English Nicaragua 001 800 220 2282 Spanish Norway 8152 1550 Norwegian Panama Lenovo Customer Support Center 001 866 434 Toll Free Spanish Peru 0 800 50 866 OPCION 2 Spanish Philippines 1 800 8908 6454 GLOBE subscribers 1 800 1441 0719 PLDT subscribers Tagalog English Poland Laptops and tablets branded with logo Think 48 22 273 9777 ThinkStation ...

Страница 48: ... burned on to the screen of a CRT monitor Burned image is preventable by utilizing a moving screen saver or power management Physical damage to covers bezel base and cables Scratches or punctures on monitor screens Getting further help If you still can t solve your problem please contact the Customer Support Centre For more information on contacting the Customer Support Centre please see Appendix ...

Страница 49: ...ent In accordance with the Law for Promotion of Effective Utilization of Resources Lenovo Japan provides through its PC Collecting and Recycling Services for the collecting reuse and recycling of disused computers and monitors For details visit the Lenovo Web site at https www lenovo com jp ja services_warranty recycle pcrecycle Pursuant to the Law for Promotion of Effective Utilization of Resourc...

Страница 50: ...us Substances in Electrical and Electronic Equipment EEE Lenovo and the Lenovo logo are trademarks of Lenovo in the United States other countries or both Ukraine RoHS India RoHS RoHS compliant as per E Waste Management Handling Rules 2011 Power cords and power adapters Use only the power cords and power adapters supplied by the product manufacturer Do not use the ac power cord for other devices ...

Страница 51: ...D 3 P40w 20 Curved Panel Monitor User s Guide TCO Certified ...

Страница 52: ...Appendix D Compliance information D 4 ...

Страница 53: ...ies One way to achieve this goal is to use management to reduce energy consumption when products are not in use The default settings for monitors conform to Energy Star certification Any changes by users for more features and functionalities may increase power consumption which will exceed the limitation of Energy Star s standard If the user changes the options related to energy efficiency when us...

Страница 54: ...ll be incorporated in new editions of the publication Lenovo may make improvements and or changes in the product s and or the program s described in this publication at any time without notice The products described in this document are not intended for use in implantation or other life support applications where malfunction may result in injury or death to persons The information contained in thi...

Страница 55: ...demarks of Lenovo in the United States other countries or both Lenovo The Lenovo logo ThinkCentre ThinkPad ThinkVision Microsoft Windows and Windows NT are trademarks of the Microsoft group of companies Other company product or service names may be trademarks or service marks of others ...

Отзывы: