3.
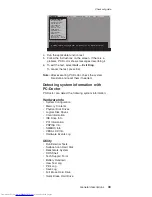
Double-click
Start
setup
utility
.
Enter
SVP.
4.
Select
Security
,
using
the
cursor
keys
to
move
down
the
menu.
5.
Select
Password
.
6.
Select
Hard-disk
x
password
,
where
x
is
the
letter
of
the
hard
disk
drive.
A
pop-up
window
opens.
7.
Select
Master
HDP
.
8.
Enter
the
master
HDP;
then
leave
the
New
Password
field
blank
and
press
Enter
twice.
9.
Press
F10.
10.
Select
Yes
in
the
Setup
Configuration
window.
Both
user
HDP
and
master
HDP
will
have
been
removed.
For
MT2672-3xx,
5xx,
MT2673-5xx,
MT2884-6xx,
7xx,
MT2885-6xx,
7xx
in
X31
series,
and
for
X32
series:
1.
Turn
on
the
computer;
then,
while
the
“To
interrupt
normal
startup,
press
the
blue
Access
IBM
button”
message
is
displayed
at
the
lower-left
of
the
screen,
press
the
Access
IBM
button.
The
Rescue
and
Recovery
screen
opens.
For
models
supporting
the
Passphrase
function,
press
F1
while
HDP
icon
is
appearing
on
the
screen;
then
enter
the
master
HDP.
For
the
other
models,
enter
the
master
HDP.
Note:
To
check
whether
the
ThinkPad
computer
supports
the
Passphrase
function,
the
BIOS
Setup
Utility
and
go
to
Security
-->
Password
.
If
Using
Passphrase
item
is
displayed
in
the
menu,
this
function
is
available
on
the
ThinkPad
computer.
2.
Click
Access
BIOS
.
The
system
Restart
Required
window
is
displayed.
3.
Click
Yes
.
The
computer
restarts,
and
the
BIOS
Setup
Utility
screen
opens.
4.
Select
Security
,
using
the
cursor
directional
keys
to
move
down
the
menu.
5.
Select
Password
.
6.
Select
Hard-disk
x
password
,
where
x
is
the
letter
of
the
hard
disk
drive.
A
pop-up
window
opens.
7.
Select
Master
HDP
.
8.
Type
the
current
master
HDP
in
the
Enter
Current
Password
field.
then
leave
the
Enter
New
Password
field
blank,
and
press
Enter
twice.
9.
Press
F10.
10.
Select
Yes
in
the
Setup
Configuration
window.
Related
service
information
36
MT
2672,
2673,
2884,
2885
Содержание 2672PXU - THINKPAD X31 PM-1.6G 40GB
Страница 6: ...2 MT 2672 2673 2884 2885 ...
Страница 130: ...3 4 6 5 continued Removing and replacing a FRU 126 MT 2672 2673 2884 2885 ...
Страница 133: ...3 4 6 9 8 7 continued Removing and replacing a FRU ThinkPad X30 X31 X32 129 ...
Страница 143: ...v Make sure that the release button works correctly Removing and replacing a FRU ThinkPad X30 X31 X32 139 ...
Страница 144: ...4010 ThinkPad Dock II PCI cover 1 2 1 Bottom view Removing and replacing a FRU 140 MT 2672 2673 2884 2885 ...
Страница 174: ...LCD FRUs 12 1 in XGA TFT 1 3 6 2 4 5 7 Parts list 170 MT 2672 2673 2884 2885 ...
Страница 195: ...Trademarks ThinkPad X30 X31 X32 191 ...
Страница 196: ...Part Number 39T6189 1P P N 39T6189 ...


