


LABvault-SD
Web Interface
Page 13
2018-06-08
SETTING UP FILE TRANSFER DESTINATION(S)
Easily control where your recorded files are sent by clicking the “Destinations” button and using the “File
Destinations” screen tabs. Recorded files may be automatically or manually transferred to a NEXUS series
server/controller, LEIGHTRONIX streaming VOD Web site, LGX-SVOD, and/or third party server with FTP
capabilities, as outlined below.
The settings apply to each recording session until you change them.
NOTE:
If no destinations are enabled, the LABvault-SD will record and store your files on its internal hard
drive. Refer to ““Managing Files” on page 20
for instructions on transferring and deleting files off
the internal hard drive.
NEXUS Series Server (NEXUS/UltraNEXUS/UltraNEXUS-SDI)
Send your LABvault-SD files to any of the storage volumes attached to your NEXUS series server. Enter your NEXUS
server’s IP address, username, and password along with the name of the volume that you want to store the files. The
names of your storage volumes can be viewed in the WinLGX “Storage Manager” window. Complete the remaining
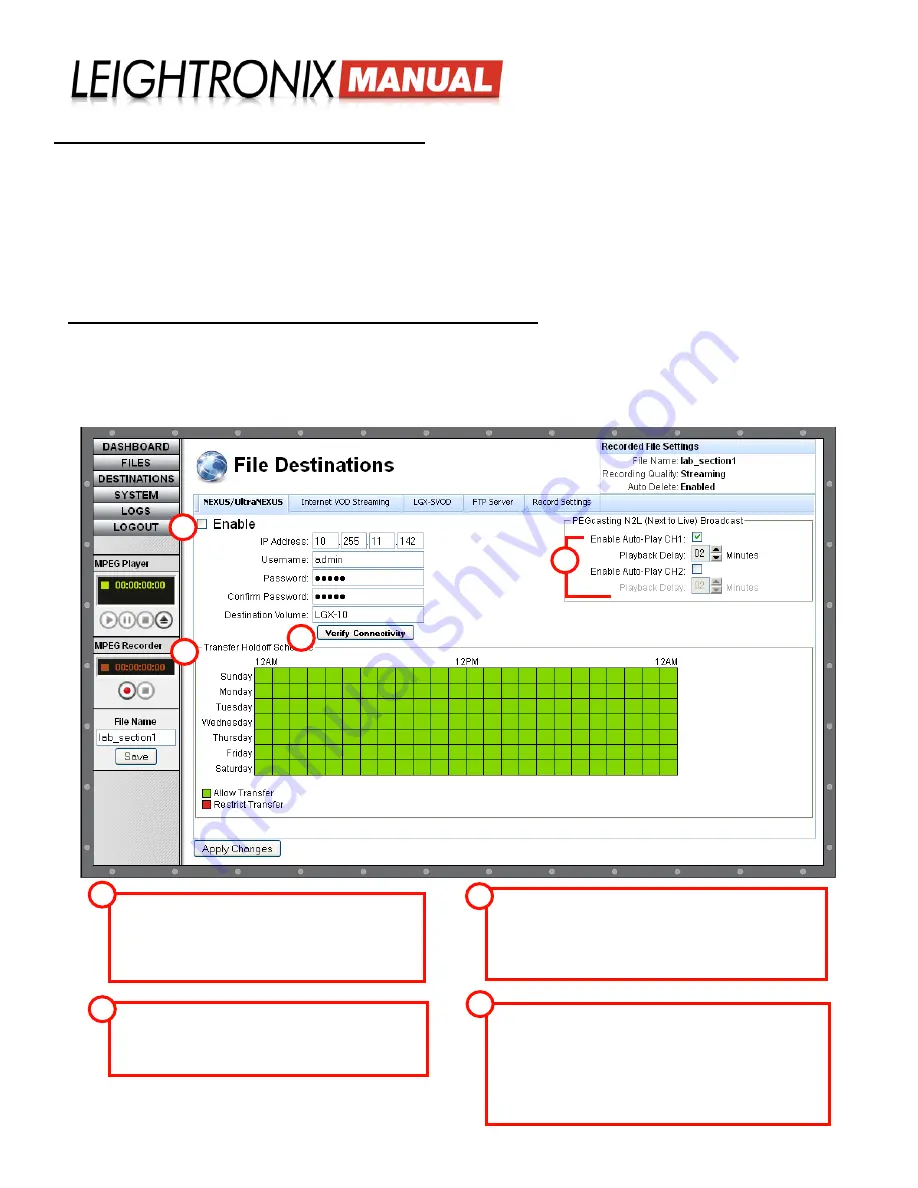
settings according to the labeled illustration below and click the “Apply Changes” button when you have finished.
“NEXUS/UltraNEXUS” Tab on “File Destinations” Web Interface Screen
“Enable”:
check to select your NEXUS series system
as an automatic file transfer destination for file
recordings initiated from the LABvault-SD Web interface
as well as the manual file transfer destination for files
recorded from an external control system.
“Verify Connectivity”:
after entering your NEXUS
series unit’s IP address, username, and password, click
the “Verify Connectivity” button to ensure your LABvault-
SD can connect to the server.
“Transfer Holdoff Schedule”:
24-hour timeline
allows you
to decide which hours of the day your LABvault will transfer
files to your NEXUS series system. Single click each hour
segment on the timeline to toggle transfer capabilities on or
off (green = on, red = off).
“Enable Auto-Play CH”:
if you have selected the
“PEGcasting” option on the “Settings” tab, you may choose to
have the transferring file stream automatically begin playing
on your NEXUS series system’s MPEG Player 1 and/or 2.
Select a “Playback Delay” of 2-60 minutes to specify how
long after the file stream is transferred that it should begin
playing on the selected channel(s).
1
1
2
2
3
3
4
4


