


Chapter 7: Using the Web Interface
368
Tip: If any user blocking event occurs, you can unblock that user manually by
using the "unblock" CLI command over a local connection. See
Unblocking a
User
(on page 703).
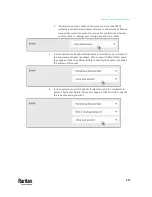
To set limitations for login timeout and use of identical login names:
1.
In the "Idle timeout period" field, type a value or click
to select a
time option. This setting determines how long users are permitted to stay
idle before being forced to log out.
▪
If you type a value, the value must be followed by a time unit, such as
'4 min.' See
Time Units
(on page 214).
▪
Keep the idle timeout to 20 minutes or less if possible. This reduces the
number of idle sessions connected, and the number of simultaneous
commands sent to the PX3TS.
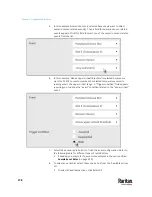
2.
Select the 'Prevent concurrent login with same username' checkbox if
intending to prevent multiple persons from using the same login name
simultaneously.
3.
Click Save.
Configuring Password Policy
Choose Device Settings > Security > Password Policy to open the Password
Policy page, where you can:
•
Force users to use strong passwords.
•
Force users to change passwords at a regular interval -- that is, password
aging.
Use of strong passwords makes it more difficult for intruders to crack user
passwords and access the PX3TS.
To configure password aging:
1.
Select the 'Enabled' checkbox of Password Aging.
2.
In the 'Password aging interval' field, type a value or click
to select a
time option. This setting determines how often users are requested to
change their passwords.
▪
If you type a value, the value must be followed by a time unit, such as
'10 d.' See
Time Units
(on page 214).
3.
Click Save.
To force users to create strong passwords:
1.
Select the 'Enabled' checkbox of Strong Passwords to activate the strong
password feature. The following are the default settings:
Содержание Raritan PX3TS
Страница 4: ......
Страница 6: ......
Страница 20: ......
Страница 52: ...Chapter 3 Initial Installation and Configuration 32 Number Device role Master device Slave 1 Slave 2 Slave 3...
Страница 80: ...Chapter 4 Connecting External Equipment Optional 60...
Страница 109: ...Chapter 5 PDU Linking 89...
Страница 117: ...Chapter 5 PDU Linking 97...
Страница 440: ...Chapter 7 Using the Web Interface 420 If wanted you can customize the subject and content of this email in this action...
Страница 441: ...Chapter 7 Using the Web Interface 421...
Страница 464: ...Chapter 7 Using the Web Interface 444...
Страница 465: ...Chapter 7 Using the Web Interface 445 Continued...
Страница 746: ...Appendix A Specifications 726...
Страница 823: ...Appendix I RADIUS Configuration Illustration 803 Note If your PX3TS uses PAP then select PAP...
Страница 824: ...Appendix I RADIUS Configuration Illustration 804 10 Select Standard to the left of the dialog and then click Add...
Страница 825: ...Appendix I RADIUS Configuration Illustration 805 11 Select Filter Id from the list of attributes and click Add...
Страница 828: ...Appendix I RADIUS Configuration Illustration 808 14 The new attribute is added Click OK...
Страница 829: ...Appendix I RADIUS Configuration Illustration 809 15 Click Next to continue...
Страница 860: ...Appendix J Additional PX3TS Information 840...
Страница 890: ...Appendix K Integration 870 3 Click OK...
Страница 900: ......


