1
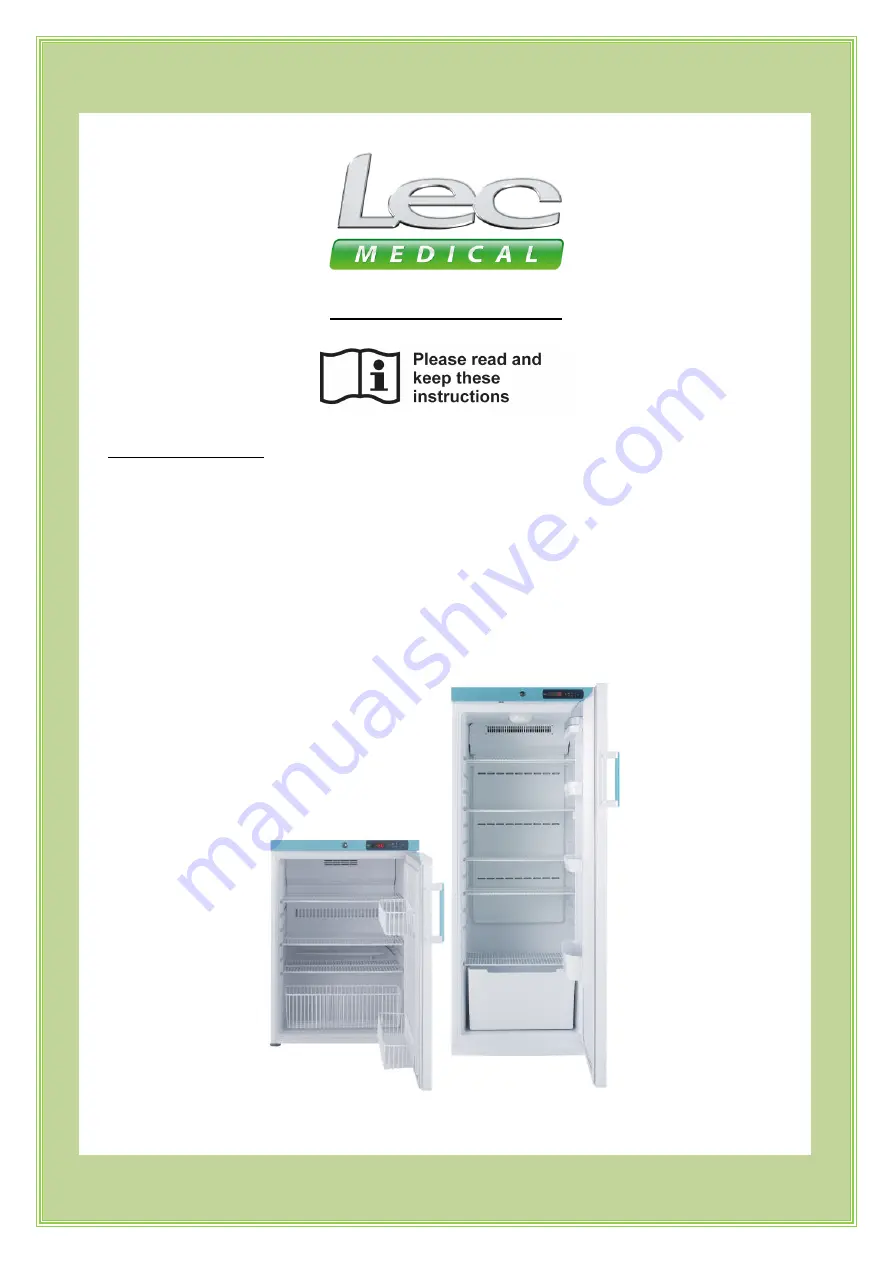
Ward Refrigerator Range
Applicable models:
WSR288WSR151
USER MANUAL
Страница 1: ...1 Ward Refrigerator Range Applicable models WSR288 WSR151 USER MANUAL...
Страница 2: ...4 Product details 5 Controller overview 6 Viewing and resetting minimum and maximum temperatures 7 Changing the factory set point 8 Changing the temperature scale 8 Alarms 9 Maintenance and Servicing...
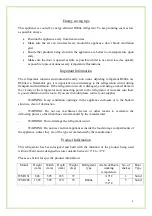
Страница 3: ...l ventilated site away from heat sources The appliance must be placed on a level surface If necessary adjust the feet on the product so the appliance remains level during operation The appliance shoul...
Страница 4: ...gerator and connecting power to the refrigerator Also make sure there is good ventilation in the room If you are in doubt please contact your supplier WARNING Keep ventilation openings in the applianc...
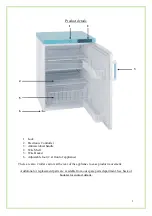
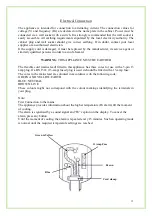
Страница 5: ...Shelf 5 Wire Basket 6 Adjustable foot 2 at front of appliance There are also 2 roller castors at the rear of the appliance to ease product movement Additional or replacement parts are available from...
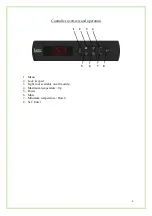
Страница 6: ...6 Controller overview and operation 1 Menu 2 Lock keypad 3 Light not available on all models 4 Maximum temperature Up 5 Power 6 Mute 7 Minimum temperature Down 8 Set Enter 1 2 3 4 5 6 7 8...
Страница 7: ...7 Viewing resetting minimum and maximum temperatures...
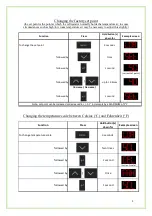
Страница 8: ...e the set point 3 seconds followed by Once followed by 1 second current set point followed by Increase Decrease up to 10 times followed by 1 second Note set point can be increased or decreased in 0 1...
Страница 9: ...ture goes outside the set parameters either too high or too low Should one of these alarms occur this can be muted by pressing on the controller The load temperature is a simulated temperature which i...
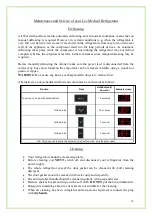
Страница 10: ...WARNING Do not use any knives or sharp metallic objects to remove frost Alternatively a non scheduled defrost can sometimes be carried out as follows Cleaning Your refrigerator should be cleaned regu...
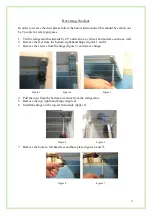
Страница 11: ...as a wall 2 Remove the feet from the bottom right hand hinge figures 1 and 2 3 Remove the screws from the hinge figure 3 and remove hinge 4 Pull the door from the bottom to remove from the refrigerato...
Страница 12: ...Remove the plastic cover figures 1 and 2 2 Unscrew and remove the light bulb figures 3 and 4 3 Replace with a similar 15W bulb 4 Replace the plastic cover Replacement light bulbs are available from o...
Страница 13: ...APPLIANCE MUST BE EARTHED The flexible cord mains lead fitted to this appliance has three cores for use with a 3 pin 13 amp plug If a BS 1363 13 amp fused plug is used it should be fitted with a 13 am...
Страница 14: ...ains insulation gases and refrigerant and must be disposed of in the appropriate manner Please contact the manufacturer or local authority for advice on how best to dispose of this product A relevant...
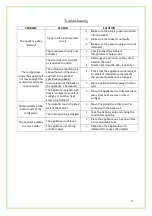
Страница 15: ...k that the appliance is operating at an ambient temperature that meets the product specification on page 4 Air circulation at the back of the appliance is hampered 1 Move appliance further away from t...
Страница 16: ...48 Marketing Enquiries email marketing gdpa co uk tel 0844 248 4661 Spares and After Sales Service email info gdha com tel 0844 815 3755 fax 0844 248 4123 Address Lec Medical Stoney Lane Prescot Merse...