Lean Cars JT5158 Скачать руководство пользователя страница 1

Owner’s Manual 

with Assembly Instructions

Styles and colo(u)rs may vary.

Made in China.

The owner’s manual contains important safety information as well as assembly, use and 

maintenance instructions.

The Ride-on Car must be assembled by an adult who has read and understands the 

instructions in this manual.

Keep the package away from children and dispose of properly before use.

Keep this manual for future reference.

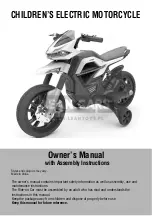
CHILDREN’S ELECTRIC MOTORCYCLE

Содержание JT5158

Страница 1: ...nt safety information as well as assembly use and maintenance instructions The Ride on Car must be assembled by an adult who has read and understands the instructions in this manual Keep the package a...

Страница 2: ...ly and keep it for future reference Follow the recommendations in this manual they are designed to improve the safety and operation of your ride on car and it s rider Battery Charger 6V4AH 1 6V500mA S...

Страница 3: ...PART NO REMARKS PART NAME Q ty pcs Vehicle body Seat Front fork Face guard Front fender Absorber tube Side wheel Front wheel Wheel cover Brake Foot plate Foot plate axle Front axle 4x12 screw 10 lock...

Страница 4: ...1 15 17 18 19 15 15 15 16 16 11 6 8 9 9 20 21 22 10 13 10 7 6 11 12 14 14 14 15 4 5 3 2 HINT Some parts shown are assembled on both sides of vehicle Parts Diagram 3...

Страница 5: ...ged Rechargeable batteries are only to be charged under adult supervision Different types of batteries or new and used batteries are not to be mixed Batteries are to be inserted with the correct polar...

Страница 6: ...the front fork tubes 2 Insert four 4x12 screws and tighten the screws with a screwdriver 3 Fit the front fender to the front fork 4 Insert a 4x12 screw through the front fender and into the front for...

Страница 7: ...1 1 2 2 Attach the shock absorber tubes brakes 6 1 Slide the absorber tubes onto the front fork tubes 2 Slide the brakes to the front fork tubes Front Fork Tubes...

Страница 8: ...l cover to the front axle 4 Slide a front wheel onto the front axle 5 Slide a wheel cover onto the front axle 6 Pushing the front alxe until it pass through the hole on the other side of the front for...

Страница 9: ...1 2 2 Attach the Side Wheel 8 Bottom View Spanner Turn the vehicle body downside up 1 Fit the side wheel to the vehicle body 2 Tighten two 8 lock nuts to secure it with a spanner...

Страница 10: ...ate inserted into the groove on the vehicle 3 Slide a foot plate onto the foot plate axle from the other side of vehicle body 4 Tighten a 10 lock nut to the end of the foot plate axle with a socket sp...

Страница 11: ...o each other Plug the power supply connectors into each other 2 Fit the handle bar assembly to the vehicle body 3 Insert the M10x190 bolt through the hole on handbar assembly the hole on vehicle body...

Страница 12: ...t the Power Supply 11 1 Remove the screw on the top of the seat with a screwdriver and lift to remove it 2 Plug the red wire connector on the vehicle body into the terminal on battery Replace the seat...

Страница 13: ...imum user weight is 30kg This toy has no brake Rules for Safe Riding Keep Children within Safe Riding Areas Never use in roadway near motor vehicles on lawn space on or near steep inclines or steps sw...

Страница 14: ...learning mode C Storytelling mode D Nursery rhyme singing mode E Increase volume F Decrease volume G TF Micro SD card slot Allow the audio from your TF card to be played through the vehicle speakers M...

Страница 15: ...cancer and reproductive harm Wash hands after handling Do not open the battery Battery contains lead acid and other materials that are toxic and corrosive Do not open the charger Exposed wiring and ci...

Страница 16: ...BATTERY MAGNITUDEOFVOLTAGE BATTERY STATE 1 Plug the charger port into the input socket the socket is on the MP3 player 2 Plug the charger plug into a wall outlet The battery will begin charging WARNI...

Страница 17: ...d Disposal The battery will eventually lose the ability to hold a charge Depending on the amount of use and varying conditions the battery should operate for one to three years Follow these steps to r...

Страница 18: ...connection and the vehicle needs repair Contact your distributor please Attempting to shift while the vehicle is motion Completely stop the vehicle and shift see Use Your Ride On Check that the batte...

Страница 19: ...and heaters Plastic parts may melt Recharge the battery after each use Only an adult can handle the battery Recharge the battery at least once a month when the vehicle Raider is not being used Do not...

Страница 20: ...Our products are suitable for ASTM F963 GB6675 EN71 and EN62115 standard...

Отзывы: