
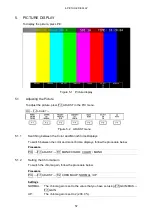


5. PICTURE DISPLAY
66
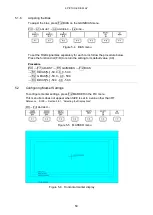
5.3.3
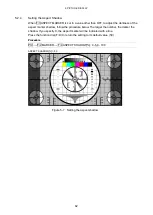
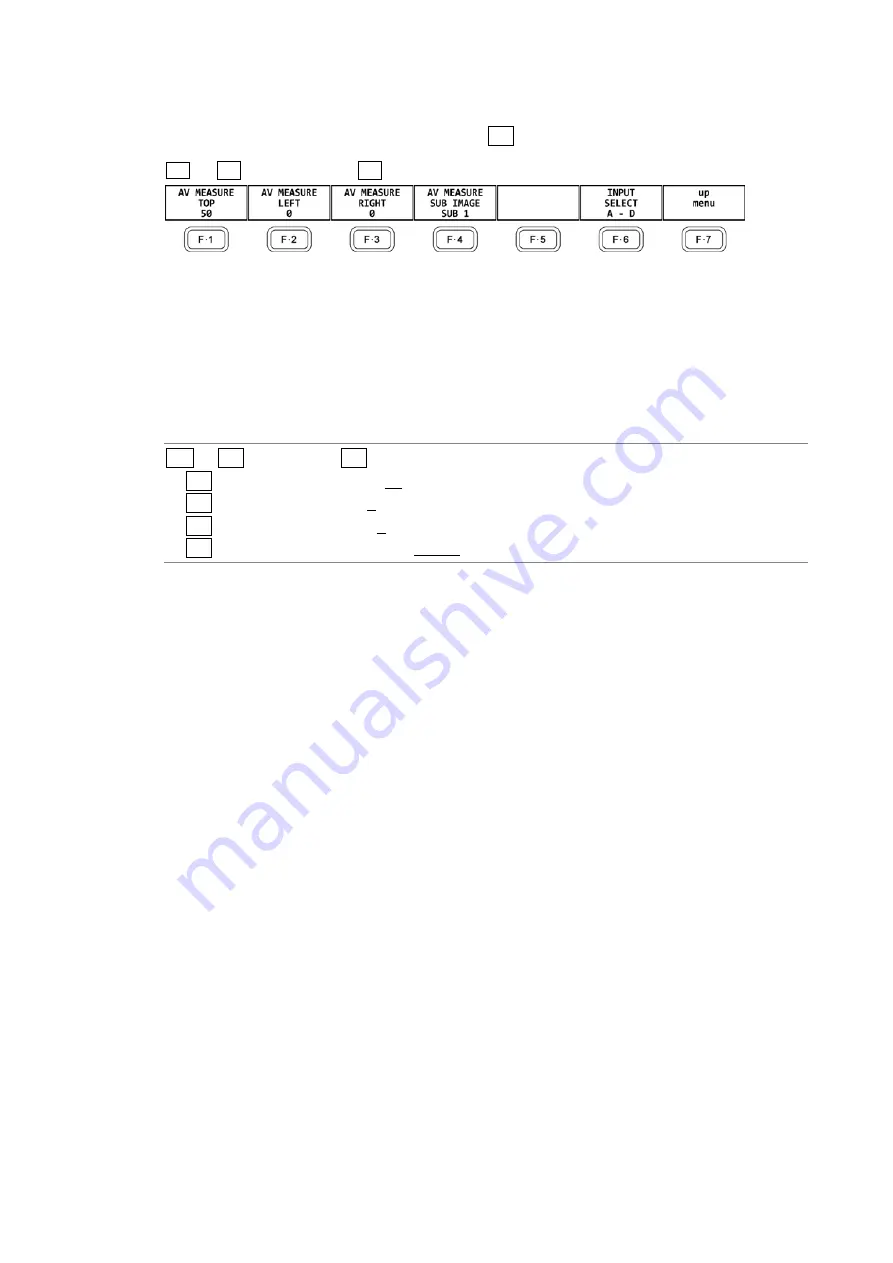
Setting the Lip Sync Measurement Range (SER03)
To set the lip sync measurement range, press F•3 AV PHASE on the LINE SELCT menu.
PIC
→
F
・
3 LINE SELECT
→
F
・
3 AV PHASE
→
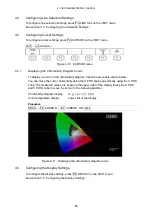
Figure 5-12 AV PHASE menu
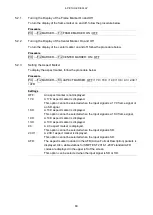
To set the lip sync measurement range, follow the procedure below. Markers are displayed
at the specified lines.
You can also set these using AV PHASE SETUP of the STATUS menu, but here you can set
them while viewing the picture. For details on the settings, section 8.7.3, “Setting the
Measurement Range.”
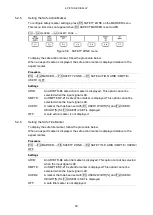
Procedure
PIC
→
F•3
LINE SEL →
F•3 AV PHASE
→
F•1 AV MEASURE TOP: 0 - 50 - 100
→
F•2 AV MEASURE LEFT: 0 - 99
→
F•3 AV MEASURE RIGHT: 0 - 99
→
F•4AV MEASURE SUB IMAGE: SUB 1 / SUB 2 / SUB 3 / SUB 4
Содержание LV 5480
Страница 15: ...2 VIDEO SIGNAL WAVEFORM DISPLAY 7 SCALE UNIT HDV SDV SCALE UNIT HD SD SCALE UNIT 150 ...
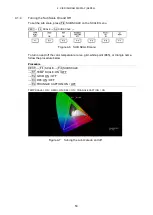
Страница 38: ...2 VIDEO SIGNAL WAVEFORM DISPLAY 30 COLOR MATRIX XYZ COLOR MATRIX GBR COLOR MATRIX RGB ...
Страница 98: ...5 PICTURE DISPLAY 90 STATUS INFO ON Figure 5 34 Turning the information on and off ...
Страница 119: ...7 AUDIO DISPLAY 111 DISPLAY MODE METER DISPLAY MODE SURROUND DISPLAY MODE STATUS Figure 7 8 Selecting the display mode ...
Страница 163: ...8 STATUS DISPLAY 155 DISPLAY SERIAL DISPLAY COMPO DISPLAY BINARY Figure 8 10 Selecting the display format ...
Страница 202: ...9 EYE PATTERN DISPLAY SER02 SER09 194 SWEEP 2UI SWEEP 16UI Figure 9 9 Selecting the sweep time ...