background image

diamond - User Manual

Version: 8.0.0/1

Exported on: 24 October, 2023

186

 /  

228

7.4  diamond VX - Channel Strip Page

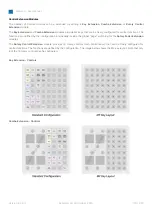
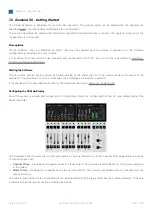
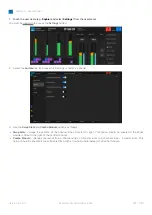
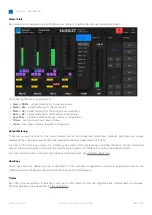
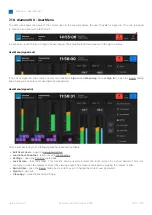
The 'Channel Strip' page is divided into 8 vertical strips that provide an extension of the surface controls.

Two types of strip are supported: channel strips (above the faders) and master slots (above the central controls).

In the example below, there are 4 channel strips (on the left) and 4 master slots (on the right). If your surface is fitted with a 
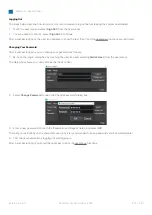
Combo  module,  or  the  faders  are  on  the  right  of  the  central  controls,  then  the  layout  can  be  modified  using  the 

Combo 

Module

 and 

Swap Slots 

options (in the 'Settings

 → 

Surface' dialog box).

Channel Strip Elements

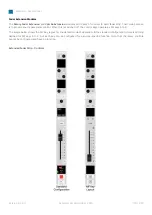
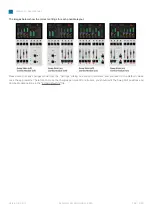
Each channel strip provides visual feedback for the source assigned to the fader.

Working  from  top  to  bottom,  there  are  four  areas:  input  metering,  processing,  bus  routing  and  the  source  name /  user 
labels. For security reasons, it is not possible to change settings from these elements. For example, you cannot turn off an 
EQ by touching its icon.

Input Metering

This area provides dedicated input metering for every fader strip. The user can decide to show peak metering, momentary 
loudness or both using the 

Channel Strip

 option (in the 'Settings

 → 

Meters' dialog 

box). 

For more information about the metering scales and characteristics, see diamond - Metering.

Содержание diamond

Страница 1: ...Version 8 0 0 1 Exported on 24 October 2023 To obtain the latest documentation for Lawo products please visit https docs lawo com diamond User Manual...

Страница 2: ...arks belong to their respective owners It cannot be guaranteed that all product names products trademarks requisitions regulations guidelines specifications and norms are free from trade mark rights o...

Страница 3: ...tion Instructions 37 4 2 diamond Unpacking 38 4 3 diamond Installing the Frame 39 4 4 diamond Mounting the VX Modules 40 4 5 diamond Exchanging a Control Surface Module 43 4 6 diamond Wiring 45 4 7 di...

Страница 4: ...wing Angle 179 7 2 diamond VX Getting Started 180 7 3 diamond VX Operating Principles 183 7 4 diamond VX Channel Strip Page 186 7 5 diamond VX Playout Page 190 7 6 diamond VX Browser Page 191 7 7 diam...

Страница 5: ...diamond User Manual Version 8 0 0 1 Exported on 24 October 2023 5 228 This user manual describes all aspects of the diamond console It contains information for users technicians and system integrators...

Страница 6: ...d on 24 October 2023 6 228 1 diamond General Information Before you start working with diamond please read the following information diamond About this Documentation diamond Important Safety Instructi...

Страница 7: ...ng weights and dimensions are available from the Lawo Download Center after login We also recommend that you carefully observe the release notes for your product system Lawo User Registration For acce...

Страница 8: ...t Safety Instructions When working with our hardware components please read and observe all of the instructions provided in the General Safety Information for Lawo Equipment booklet delivered with you...

Страница 9: ...ol cannot be given Our front panels and operational surfaces are not entirely approved for treatment with chemical cleaning agents and disinfectants Component surfaces buttons and electronics can be p...

Страница 10: ...ober 2023 10 228 2 diamond Getting Started If you are new to diamond then please read the following topics to get started diamond Powering On diamond Fader Strip Control diamond Central Controls diamo...

Страница 11: ...bes the diamond frame and its hardware components diamond Surface Description diamond Frame Expansion diamond Mounting Options diamond Control Surface Modules diamond Virtual Extension diamond Power S...

Страница 12: ...certain frame widths 2 ME 4 ME 6 ME or 8 ME The images in the next topic show the frame expansion stages Each frame is available in one of two versions to support different mounting options either ta...

Страница 13: ...tober 2023 13 228 3 2 diamond Frame Expansion This topic explains how a diamond frame can be expanded 1 The minimum width 2 faders 2 The width increases in 2 fader steps by adding standard modules 3 T...

Страница 14: ...0 0 1 Exported on 24 October 2023 14 228 4 The Virtual Extension VX can be added to both standard and extended frames It occupies the space above two modules and so is only available for certain frame...

Страница 15: ...convert the frame later The Tabletop version is designed for tabletop placement This version includes a leather hand rest and stylish side rear profiles The Countersunk version is designed to fit flus...

Страница 16: ...onal Central and Combo modules run in monitor mode For extension modules the following rules apply Up to 15 Rotary Fader Extension Modules in slots 33 to 47 Up to 4 Combo Extension Modules in slots 44...

Страница 17: ...rs 4 x rotary encoders 8 x TFT displays 36 control keys Central Module 711 20 6 x rotary encoders 6 x TFT displays 78 control keys 2 x ambient light detectors Combo Module A 711 21 2 x 100mm faders 6...

Страница 18: ...16 x rotary controls with control keys Key Extension Module 64 programmable control keys Combo Extension Module 8 x rotary controls with control keys 32 programmable control keys Blind Plate half hei...

Страница 19: ...ed frame Specifications for the Physical Controls The following general information applies to the physical controls All rotary encoders are touch sensitive and include an LED indicator ring for color...

Страница 20: ...s by the user For instructions please see diamond VX Changing the Viewing Angle Host PC Requirements The VX software runs on a Windows PC that must be supplied by the customer A license to run the sta...

Страница 21: ...ust be ordered separately The image below shows the rear of a VX display with the cable cover fitted VX Module Specifications Frames ordered with the Virtual Extension option come with special side pr...

Страница 22: ...a new system the power supplies are included with the frame s To order a spare part please use the part numbers listed above Specifications For dimensions weight and electrical specifications please r...

Страница 23: ...l power sources to completely disconnect power from the system e g before you open the unit for maintenance and service Take care that the protective earth PE connection of each PSU is individually co...

Страница 24: ...ovided on the connector board on the underside of the frame Use the M4x10 screw to fasten the grounding cable to the housing You should use a Torx T20 driver for this purpose If the frame includes mor...

Страница 25: ...connects to Power Core via IP and the second part daisy chains to the first using an external CAN bus cable Usually this is the preferred option Each part of the frame connects individually to Power C...

Страница 26: ...amond User Manual Version 8 0 0 1 Exported on 24 October 2023 26 228 For more information about how to configure the communication modes and the IP connection to Power Core see the System Setup chapte...

Страница 27: ...nder The maximum number of physical faders must not exceed 60 and any additional central controls must follow the maximum slot allocations described earlier The two frames can connect individually to...

Страница 28: ...Group 1 only and not Access Groups 2 to 4 This affects the dynamic signal level visualizations on the GUI such as the bouncing balls in the Dynamics Source Parameter dialog box So in the example above...

Страница 29: ...extended frame 711 60 0x yy standard frame with Virtual Extension 711 61 0x yy extended frame with Virtual Extension x the module width from 1 to 8 ME yy the frame version either 10 for tabletop or 20...

Страница 30: ...2 fader Combo 711 50 06 yy 5 x Fader 1 x Combo 24 fader Central 711 50 07 yy 6 x Fader 1 x Central 26 fader Combo 711 50 07 yy 6 x Fader 1 x Combo 28 fader Central 711 50 08 yy 7 x Fader 1 x Central 3...

Страница 31: ...1 x Key Extension Lower 2 x Fader 1 x Central 10 fader Combo Extended 711 51 03 yy Upper 2 x Rotary Extension 1 x Combo Extension Lower 2 x Fader 1 x Combo 12 fader Central Extended 711 51 04 yy Uppe...

Страница 32: ...n Lower 7 x Fader 1 x Central 30 fader Combo Extended 711 51 08 yy Upper 7 x Rotary Extension 1 x Combo Extension Lower 7 x Fader 1 x Combo Central Extender 711 51 01 yy Upper 1 x Key Extension Lower...

Страница 33: ...ntral with VX 711 60 02 yy 1 x VX 1 x Fader 1 x Central 6 fader Combo with VX 711 60 02 yy 1 x VX 1 x Fader 1 x Combo 12 fader Central with VX 711 60 04 yy 2 x VX 3 x Fader 1 x Central 14 fader Combo...

Страница 34: ...VX 8 x Fader Extended Frame Variants with Virtual Extension 711 61 0x yy Extended Frame with VX Part Number Modules Fitted 4 fader Central Extended with VX 711 61 02 yy 1 x VX Upper 1 x Rotary Extensi...

Страница 35: ...otary Extension 1 x Combo Extension Lower 5 x Fader 1 x Combo 28 fader Central Extended with VX 711 61 08 yy 4 x VX Upper 7 x Rotary Extension 1 x Key Extension Lower 7 x Fader 1 x Central 30 fader Co...

Страница 36: ...nstallation Instructions diamond Unpacking diamond Installing the Frame diamond Mounting the VX Modules diamond Exchanging a Control Surface Module diamond Wiring diamond MF Key Labels To install a co...

Страница 37: ...e tasks in the following order Unpack Install the Frame Mount the VX Modules if applicable Rearrange the Surface Modules if applicable Connect the Cables Exchange the MF Key Labels if applicable If yo...

Страница 38: ...label the MF Keys 1 x tool case tools for performing service procedures 1 x USB memory card containing the latest software and configuration files For extender frames a suitable CAN bus cable is also...

Страница 39: ...as described earlier The external connections for the surface are described in diamond Wiring In particular each diamond frame must be properly grounded If the Virtual Extension is included then each...

Страница 40: ...screw and bolt for each side Once the VX module is installed the viewing angle can be adjusted to one of three positions by loosening the two fastening screws and gently tilting the display This allow...

Страница 41: ...Raise the VX module slightly and push the second liner from the back into the outer channel on one of the side profiles Then repeat for the other side The image below shows the right side 5 Raise the...

Страница 42: ...r of the frame and prevent any downward movement of the VX module 8 Check the movement of the VX module when the viewing angle is adjusted and adjust the spring loaded bolts and knurled head screws if...

Страница 43: ...t loosen the fixing screw s lift out the module and unplug the connectors Then fit the replacement module in the reverse order Once the new module is in place it is important to remember to tighten th...

Страница 44: ...e not to crush any of the cables 4 Remove the three connectors 1 x power and 2 x CAN bus taking note of which cables are the CAN in and CAN out 5 Fit the replacement module in the reverse order Take c...

Страница 45: ...re via IP If your surface consists of multiple frames then this port must connect to the network Power Core via IP on the main frame AND on any additional frames that also connect via IP If a frame is...

Страница 46: ...cabling can be performed while the frames are powered 12V In Kycon The 12V IN port connects to the external DC power supply to power the frame See diamond Power Supplies M4x10 Grounding Screw The M4 g...

Страница 47: ...CAN bus cable length equals 4 403m x 2 8 806m A safe length for the external CAN bus cable 4m Example 2 two diamond frames 1 x 5ME and 1 x 3ME Both frames are standard depth without extension modules...

Страница 48: ...ond_project_key_labels xlsx spreadsheet and attach it in an email to tastenschilder lawo com Please remember to add the Customer name Project name and shipping details The spreadsheet can be opened or...

Страница 49: ...hardware components are installed diamond Setup Quick Start diamond Configuration Tools diamond Opening a Web UI Session diamond Control Network Requirements diamond Network Settings diamond Configur...

Страница 50: ...re the system the following connections must be made The diamond frame must be grounded The diamond frame must be connected via Ethernet to the network Power Core Both components must be powered Once...

Страница 51: ...IP address 192 168 101 241 Log in as either Supervisor or Administrator The default passwords are orion for Supervisor and hydra for Administrator Open the Network tab and enter the required network s...

Страница 52: ...ter module must show as CAN IP or IP if the frame has only one module All of the slave S modules must be set to CAN If you need to reset a module s communication mode then this can be done from the su...

Страница 53: ...e frame has only one module The Target IP address determines the IP address scheme To use Multicast the Target IP Addresses in Power Core and diamond must be identical So enter a suitable IP address g...

Страница 54: ...diamond User Manual Version 8 0 0 1 Exported on 24 October 2023 54 228 If everything is correctly connected and configured the surface synchronizes to Power Core once the IP connection is made...

Страница 55: ...onents If upgrades are required run the Software Update Wizard until all surface components are shown in green Next Steps Once you have completed the steps above the system is ready for operation You...

Страница 56: ...xplorer is used to check and update the firmware for all hardware components Host PC Requirements To install and run the ON AIR Designer your PC must meet the following requirements Windows 10 or 11 o...

Страница 57: ...i e the first three fields must match You can check the current network settings for Power Core on its front panel display and those for diamond from the surface displays during boot up The default IP...

Страница 58: ...ead only with no editable fields Supervisor default password orion Allows pertinent fields to be edited such as the IP settings in the System Network Devices tab Administrator default password hydra A...

Страница 59: ...roadcast facility Routers are permitted as long as the minimum requirements of the network interfaces are met By using routers or similar devices the latency of the communication will increase The dia...

Страница 60: ...check the current network settings as follows For Power Core the dwc0 settings are shown on is front panel display For diamond the IP module ETHERNET port settings are shown on the surface displays du...

Страница 61: ...in the new value s and click Apply to save the changes IP address changes are made immediately and so you will lose your browser connection once settings are applied It is recommended to check the co...

Страница 62: ...the IP Address Network Mask and Gateway Remember to click Apply to save any changes and re open the Web UI to check a change of IP address The configuration of the diamond control port is now complet...

Страница 63: ...ways The first diamond frame connects to Power Core via IP and the second frame is daisy chained to the first using an external CAN bus cable CAN A Each diamond frame connects individually to Power C...

Страница 64: ...er Core is configured using the Control Interface parameters stored on each device To check or edit the settings open a Web UI connection to both the diamond frame and Power Core and log in as either...

Страница 65: ...he Control Interface settings then you must reboot the device s The screenshots below shows an example of a multicast configuration using the default multicast IP address group If everything is correc...

Страница 66: ...This includes the module above the second connector board on the right of the frame The IP connection to Power Core is also configured in the same way as for a single frame console so configure the C...

Страница 67: ...tings must be identical Take care to check all of the diamond IP frames and Power Core For the example above open three Web UI sessions one for Power Core and one for each diamond frame and remember t...

Страница 68: ...Address Target port number and Interface Mode sets the communication mode for the surface connection There are three possible options CAN IP CAN or IP The default setting is CAN IP In this mode Power...

Страница 69: ...g if the frame is daisy chained to another frame via CAN Choose IP if the frame consists of a single module that communicates with Power Core via Ethernet In this instance there are no other modules...

Страница 70: ...d surface For simplicity it is recommended to use dwc0 If you wish to configure a different network interface then work through the following steps Start by connecting via dwc0 to access the Power Cor...

Страница 71: ...orts CAN only and not IP Choose this mode for all modules that connect to an IP module via CAN either internally or externally IP supports IP only and not CAN This option can be used if the frame incl...

Страница 72: ...ersion 8 0 0 1 Exported on 24 October 2023 72 228 The communication modes are shown on the surface displays during boot up In the example below the frame s IP module is the upper Fader Extension modul...

Страница 73: ...module can be reset to either IP or CAN using the following key combinations while the module is booting Reset to IP To reset a module s communication mode to IP and IP address to the default 192 168...

Страница 74: ...ommunication mode to CAN and slot ID to 0 press and hold the 2 upper left keys during boot up The images below show the correct key combinations Reset to CAN IP The mode CAN IP can be assigned to an I...

Страница 75: ...he Control Interface settings either CAN IP or IP if the frame has only one module Reboot the IP module frame using the Reboot System button in the System Control tab Select the Network tab and enter...

Страница 76: ...bo Modules In our example the studio 1 console controls faders 1 to 24 in two layers via IDs 1 to 3 and belongs to Access Group 1 via ID 16 studio 2 controls faders 97 to 100 and belongs to Access Gro...

Страница 77: ...Dflt default value or temporarily by loading one of the alternate mappings Map 1 to 4 Editing the Default Slot IDs During the initial setup you should use the Dflt value to assign the correct slot ID...

Страница 78: ...ted values and Set Slot Map Data button highlight in magenta To save all of the changed values press the Set Slot Map Data button Or to cancel all changes press Cancel Slot Map Changes To load a mappi...

Страница 79: ...software runs on a Windows PC that must be supplied by the customer A single PC can support multiple displays depending on its specification For information about the host PC requirements please read...

Страница 80: ...iple Display Port and USB connections 4 On the host PC you must install the VisTool software and generate a runtime session from either the standard configuration vis_diamond_SC or a custom project Pl...

Страница 81: ...nctions diamond Central Controls diamond Powering On diamond Fader Strip Assign diamond Input Gain and Pan diamond Auto Gain diamond Stream Selection diamond Bus Assign diamond Source Parameters diamo...

Страница 82: ...defined by the system configuration This is stored on Power Core and read during boot up A standard configuration is included with every console The configuration can be edited using the ON AIR Design...

Страница 83: ...can be disabled by the configuration 5 Central Rotary Controls four sets of rotary controls that are dual purpose When all Function Keys 6 are off the controls are configurable The functionality is d...

Страница 84: ...there is some reduction in functionality The Combo Module can be specified in either Fader A or Fader B versions The fader strip version has no effect on the central controls Virtual Extension VX The...

Страница 85: ...tary Fader Extension module then this adds 4 extra rotary controls to the fader strip The operation of these controls is described later See Working with Extension Modules Controls Overview Each fader...

Страница 86: ...sign mode The operation is as follows Press Access once full white to place the source in access The Source Parameter Control keys in the centre section update accordingly and the Source Parameter dia...

Страница 87: ...fader strip its input level and color In the standard configuration the following options can be enabled or disabled from the Settings Surface dialog box on the GUI Show Icons in Fader Displays shows...

Страница 88: ...figured for the same function for all sources The exception is if the surface supports more than one operating station In this instance each frame can be labeled differently and have access to a diffe...

Страница 89: ...diamond User Manual Version 8 0 0 1 Exported on 24 October 2023 89 228 MF keys for Fader A with extension module...

Страница 90: ...ed on more than one source the mix levels are adjusted automatically The AMix key has two possible states The colors used can be modified by the ON AIR Designer The following colors are used in the st...

Страница 91: ...fade the level in or out move the fader the channel ON key indicates the on off status PFL Pre Fader Listen This key assigns the source to the PFL bus It can be used to listen to a source before open...

Страница 92: ...eduction in functionality The Combo Module can be specified in either Fader A or Fader B versions The fader strip version has no effect on the central controls If the frame is fitted with additional C...

Страница 93: ...tectors 2 4 x small rotary controls with label displays Each control has 4 x small MF keys 2 x small rotary controls with label displays Each control has 4 x small MF keys 3 16 x function keys 16 x fu...

Страница 94: ...diamond User Manual Version 8 0 0 1 Exported on 24 October 2023 94 228 Standard Configuration for Central module...

Страница 95: ...ry Controls Each of the upper rotary controls comes with a display and four small MF keys The controls are labeled by the display and have two modes of operation When all Function Keys 3 are off the c...

Страница 96: ...a VCA assign page Setup press Setup to adjust the surface setup options Save Load press and hold Unlock Save or Load to save or load a system snapshot memory 4 MF Keys Rotary Controls The remaining MF...

Страница 97: ...ule includes another 16 MF keys that can be configured for other functions Unless otherwise specified these keys are left undefined and come with blank labels On a Combo module all of the MF keys are...

Страница 98: ...up information please read the FAQs below 3 At the end of the boot up Power Core loads the latest settings stored at shut down This is known as the warm start data On the surface the Lawo logos are r...

Страница 99: ...activate your license If the license is installed onto a USB dongle then check that the dongle is connected to the host PC The message Not Connected appears on the GUI display s This message appears...

Страница 100: ...llows Power Core to boot To get the system operational you will need to upload the standard configuration or a custom configuration using the ON AIR Designer Q Why does the message System has been res...

Страница 101: ...uccession double press The Access key lights full yellow the fader strip switches into strip assign mode and the Assign Source dialog box appears on the GUI In the standard configuration the available...

Страница 102: ...ut of strip assign mode without changing the current assignment 3 Once an assignment is made the fader strip updates and you should see the new source name label icon in the Source Display The fader s...

Страница 103: ...ain ranges and other input parameters are described later See Input Pan Parameters Operation The steps below describe how to adjust input gain and pan from the fader strip rotary control 1 Turn the fa...

Страница 104: ...ain feature 1 Start by asking the talent to speak and then turn on Auto Gain for the Mic source The simplest method is to use the AGn soft key on the source s fader strip Alternatively you can put the...

Страница 105: ...reams cannot be named using the above convention it is possible to map specific streams to pre configured labels In this instance the list of streams presented to the operator is fixed and is independ...

Страница 106: ...Ravenna input Pending Appears if the connected stream is not available In this instance the console will wait for the stream announcement to appear on the network and then automatically initiate the s...

Страница 107: ...e Once the subscription is successful the name of the connected stream is displayed On rare occasions the following error messages may also appear PoolErr Appears if there is a problem connecting to t...

Страница 108: ...ments to the four main buses PGM 1 to 3 REC Page 2 Aux handles the assignments to the four auxiliary buses Aux 1 to 4 The assignments can be either pre or post fader for Aux 1 to 4 and post fader only...

Страница 109: ...ter dialog box by pressing a fader strip Access key and choose the Input page 1 Use the buttons under Routing to change the bus assignments 2 If a bus supports both pre and post fader assignments then...

Страница 110: ...rsion 8 0 0 1 Exported on 24 October 2023 110 228 3 4 Under Destinations select an output category e g Ravenna Outputs and choose an output e g Rav Out 02 the selection flashes in blue Press Connect t...

Страница 111: ...to insert an external device This works by assigning one of the 16 available inserts defined by the configuration Thus at any one time up to 16 external inserts are possible Every source channel also...

Страница 112: ...viewed page opens automatically 2 Choose the parameters you wish to adjust by pressing a Central Function Key on the surface or a page button on the GUI For example press Input to adjust the input and...

Страница 113: ...ection has a master on off key then this also appears here Applies to all DSP functions except Input If there is more than one page of parameters then a dot appears below the source name This indicate...

Страница 114: ...box either left right or up down Or use the on screen and buttons If an option is greyed out then the parameter is not available For example the stereo input options are not available for a mono sourc...

Страница 115: ...ss Save press to open the Save Snapshot dialog box Load press to open the Load Snapshot dialog box When using Copy and Paste note that all of the parameter sections are included and not just the one i...

Страница 116: ...l off point can be set to 40Hz 80Hz or 140Hz In the digital domain you can adjust Phase phase reverse Gain channel gain from 30dB to 18dB Pan left right panning onto the stereo buses Stereo Sources Fo...

Страница 117: ...position F B Pan front back pan position Slope from 0 0 to 1 0 LFE low frequency effect subwoofer level from 120 to 9 dB The Slope adjusts signals feeding the discrete center channel within the surro...

Страница 118: ...rface There are two pages of parameters one for the input section and one for pan The example below shows the parameters for a mono mic source Press down on the left master rotary control to toggle be...

Страница 119: ...24 October 2023 119 228 When a stereo source is in access the parameters are as follows For the Gain Basis control turn to adjust channel Gain press down and turn to adjust Basis width To change the...

Страница 120: ...e for a mono source For convenience the page includes input and pan parameters plus the following functions Auto Gain on off Insert on off and send level VCA Group assign Conference enable Codec Retur...

Страница 121: ...n When disabled the mix level is adjusted manually from the source fader Weight sets the weighting factor of the source from 9 to 9 with a default midpoint 0 Speed sets the smoothness of the automixin...

Страница 122: ...omix group Enable the AMix soft key to turn on the automixing Turn the Weight and Speed rotary controls to adjust the behavior On the GUI All of the parameters are shown on a single page Press the and...

Страница 123: ...Shelving EQ For the 2 band filters each band can operate either as a fixed slope filter High Pass Low Pass or as a shelving EQ Low Shelf High Shelf In High Pass Low Pass mode the filter slope is fixe...

Страница 124: ...ff for the complete section 3 band parametric EQ 2 band filters This key appears in the same position on both pages For the Gain Freq controls turn to adjust Gain press down and turn to adjust Frequen...

Страница 125: ...if the processing is turned on or off Curve filled EQ on Curve not filled EQ off To adjust each of the five bands you can either touch and drag a numbered point on the EQ curve or touch and drag the...

Страница 126: ...ording to the input signal level and not around a fixed threshold This allows the ratio to adapt without having to change the level considerably Expander The following parameters are available for the...

Страница 127: ...the master on off for the complete section This key appears in the same position on all pages The Comp Exp and Gate soft keys allow you to enable or disable each individual processor For a processor...

Страница 128: ...represents the output level of the de esser The balls can be extremely helpful when adjusting parameters as you can see which part of the curve is active as the signal level changes The Dynamics butto...

Страница 129: ...le Each option is optimized for either female or male voices Operation To access the parameters press an Access key on the fader strip followed by De Esser on the Central Function Keys and or GUI Then...

Страница 130: ...ters are shown on a single page Enable the De Esser button to turn on the processing Touch and drag the Type parameter to set the voice type Touch and drag the Reduction parameter to increase or decre...

Страница 131: ...ion Keys and or GUI Then adjust the parameters from either the surface or GUI On the surface There is one page of parameters Enable the Limiter soft key to turn on the processing Turn the rotary contr...

Страница 132: ...s changes dynamically as the signal level varies The ball can be extremely helpful when adjusting parameters as you can see which part of the curve is active as the signal level changes Enable the Lim...

Страница 133: ...ou should choose an RSL of 38dBFS This will ensure that your working point or 0dBr is at 20dBFS This will also ensure that the level of the internal tone generator is set to 0dBR 20dBFS For Europe if...

Страница 134: ...e adjusted as follows Delay time in ms 0 to 5300 Delay time in meters 0 to 1749 Delay time in frames 0 to 132 Operation To access the parameters press an Access key on the fader strip followed by Dela...

Страница 135: ...parameters are shown on a single page Press the Delay button to switch the prepared delay time in or out of circuit Touch and drag any of the three parameter values or use the on screen and buttons t...

Страница 136: ...system configuration using the ON AIR Designer under Sum Bus Parm Depending on the license up to 32 DSP blocks EQ Dyn Lim and Delay are supported Signal Flow The signal flow is identical to that of a...

Страница 137: ...e metering defined in the standard configuration The operation may vary if the configuration is customized Metering on the Surface 1 Fader Strip Meters diamond includes a signal present meter in the S...

Страница 138: ...el Strip page can be assigned to an output meter This allows you to meter the main bus outputs and or a monitoring section For the bus outputs the metering point comes after all processing including t...

Страница 139: ...ing conforming to the ITU R BS1770 There are two types of measurement momentary and integrated In the standard configuration both measurements are shown for all outputs while momentary loudness can be...

Страница 140: ...LUFS value on any meter for more than one second Compliance with Metering Standards Version 1 0 of the diamond standard configuration is compliant with EBU meters and levels Other variants will follo...

Страница 141: ...ols Overview The standard configuration provides five stereo monitor outputs that are controlled from the surface as follows Central Module Combo Module The two main monitor outputs are for the speake...

Страница 142: ...the Routing page Under Sources select the Monitor Outputs tab and choose a monitor section e g Mon PFL the selection flashes in blue Under Destinations select an output category e g Slot 1 and choose...

Страница 143: ...lection lights in cyan for CR and green for HP The first six sources can be selected directly from the surface PGM 1 PGM 2 PGM 3 Rec Aux 1 and On Air On a Combo module for the CR output this drops to...

Страница 144: ...display shows the control s function and current value plus a media icon to help with identification output metering pre volume and the current monitor source e g PGM 1 For the CR output Press Mode t...

Страница 145: ...ress the Mode key to open the mode options on the GUI 2 Choose an option using the on screen buttons and then touch X to close the window The selected Modes for CR and HP are stored in the system s wa...

Страница 146: ...talk to the monitor output The selected monitor source is dimmed by 20dB while talkback is active Press Mute to mute the Studio output The output mutes automatically when the Mic Open status is activ...

Страница 147: ...you can configure independent PFL outputs from each set of faders The PFL mode defines how the surface keys operate as PFL AFL or a combination The PFL mode can be changed by an operator from the Set...

Страница 148: ...elow the sources Mic 02 and Play 1 are in PFL active while Cdc 1 is in PFL Prepare Fader Overpress Backstop PFL The fader overpress can be enabled or disabled from the Setup menu When enabled the oper...

Страница 149: ...L is switched to both outputs HP and CR The Mon PFL output can be connected to a separate PFL speaker either by editing the default audio connections using ON AIR Designer or by making a connection fr...

Страница 150: ...fader In this mode you must turn off PFL by deselecting the PFL key 5 PFL A Known as PFL Always Identical to SUM mode except that sources are always put into PFL Active even if their faders are close...

Страница 151: ...latching While talkback is active the main signal can be either dimmed or muted The rest of this topic describes how talkback is defined in the standard configuration The operation may vary if the co...

Страница 152: ...press and hold for as long as you wish to speak In each case the main signal is dimmed by 20dB while talkback is active Each talkback key has two possible states The colors used can be modified by the...

Страница 153: ...re they go on air The rest of this topic describes the N 1s and conference system defined in the standard configuration The operation may vary if the configuration is customized Operation In the stand...

Страница 154: ...and Tone The on screen meter can be used to confirm that signal is present On the surface The Conf key assigns a source onto the conference bus What the source receives depends on the status of the s...

Страница 155: ...hone in guest to continue their off air conversation At any time you can close the Mic 1 fader so that the host can rejoin the off air conference If you open the Mic 1 host and Mic 2 studio guest fade...

Страница 156: ...A group to any fader strip in the usual manner see Fader Strip Assign Once assigned the fader strip Source Display updates to show the name and icon defined in the configuration In the standard config...

Страница 157: ...open the VCA assign overlay 3 Touch a button to toggle the assignments on off Yellow assigned on Grey not assigned off 4 Touch X to close the VCA Assign overlay The button under VCA Group updates to s...

Страница 158: ...ck key is configured to prevent accidental save or load snapshot operations The GUI snapshots are managed by the Lawo application VisTool Two types of snapshot are supported full snapshots to save all...

Страница 159: ...happens when a snapshot loads They can be used to protect fader levels isolate fader strips or make the loading of source parameters dependent on the fader status All options apply to both the system...

Страница 160: ...hen the Enable Load Groups Logic option is ticked all snapshot loads become dependent on the fader status By default all parameters load if source faders are closed and do not load if source faders ar...

Страница 161: ...is option can be disabled by editing the configuration via the System Definition Parameter Snapshots branch of the Tree Definition In the examples below it is assumed that Snap Unlock is enabled Savin...

Страница 162: ...magenta to indicate a successful operation and the console resets according to the snapshot recall options described earlier Clearing a Snapshot Memory The steps below describe how to clear a system...

Страница 163: ...shots to save settings for the source in access The operation is determined by the configuration Optionally the User Access Rights system can be used to manage the snapshot access for different users...

Страница 164: ...e Snapshots dialog box 3 Enter a snapshot name and optionally a comment Then select OK The dialog box closes and the settings are saved If you enter the same name as an existing snapshot then a confir...

Страница 165: ...ot groups then these can be selected via the more button top right The Type column shows the type of snapshot either Full or Source 2 Select a full snapshot and select OK The dialog box closes and the...

Страница 166: ...to save The Source Parameter dialog box opens on the GUI 2 Select Save from the top row of buttons to open the Save Access dialog box 3 Enter a snapshot name and optionally a comment Then select OK T...

Страница 167: ...ings to the Source in Access 1 On the surface press a fader strip Access key to select the source you wish to reset The Source Parameter dialog box opens on the GUI 2 Select Load from the top row of b...

Страница 168: ...oad Snapshot from the user menu to open the Load Snapshots dialog box 2 Select a source snapshot and select OK In this instance there is no source in access and so the snapshot settings are loaded to...

Страница 169: ...Speed This option sets the speed at which the faders move in response to a snapshot load or external control signal such as a fader start Only the physical movement of the faders is affected and not t...

Страница 170: ...In this mode you must turn off PFL by deselecting the PFL key 3 PFL Identical to SUM mode but the PFL keys inter cancel This means that only one source can ever be in PFL Active or PFL Prepare 4 PFL...

Страница 171: ...he operation of the PFL keys from pre fader listen to after fader listen In this mode multiple AFLs can be selected AFL must be turned off by deselecting the AFL key 10 AFL PFL Combines AFL and PFL op...

Страница 172: ...ader Module Key Extension above Central Module Combo Extension above Combo Module Rotary Central Extension above Central Module in monitor mode Key Extension Modules stacked vertically Physically the...

Страница 173: ...to provide source parameter control When this is switched off the control keys operate as MF keys 6 to 9 The image below shows the MF Key layout for the default mode of operation In the standard confi...

Страница 174: ...ely configured for central functions The functions are defined by the configuration and usually include the global page switching for the Rotary Fader Extension modules The Rotary Central Extension mo...

Страница 175: ...n Any MF key on the surface or GUI can be configured as a page key the mapping of parameters within each page is system defined This means that the number and location of the page keys may vary while...

Страница 176: ...der strip work independently and can be adjusted at the same time The operation varies slightly depending on the selected page In general The upper soft key and rotary control are used for the master...

Страница 177: ...er Extension controls return to their default functions Note that in the standard configuration the controls go blank as MF keys 6 to 9 have no function Source Parameter Control Pages The page keys ar...

Страница 178: ...can learn more about how to customize the GUI using VisTool Editor in the VisTool User Guide available here diamond VX Changing the Viewing Angle diamond VX Getting Started diamond VX Operating Princ...

Страница 179: ...sonal preference 1 From the rear of the frame loosen the two fastening screws by turning them in an anticlockwise direction 2 Gently pull the display towards you or push the display away from you 3 On...

Страница 180: ...double clicking on the start script icon The session loads and connects to the hardware Providing there are no error messages the VX displays are ready for operation If the displays do not look operat...

Страница 181: ...rface options 3 Use the Swap Slots and Combo Module options as follows Swap Slots swaps the position of the channel strips from left to right This option should be enabled if the Fader module is fitte...

Страница 182: ...for each possible layout Please note that any changes made from the Settings dialog box are not persistent and are reset to the default values once the app restarts Therefore to make the changes perm...

Страница 183: ...ime and date running on the host PC This can be transferred to Power Core using SoP Explorer as described later Mic Timer optional for information only The indicator lights in red and counts up from 0...

Страница 184: ...rop down menu There are four available pages as follows Channel Strip visual feedback for the sources assigned to the fader strips and or central functions Playout a specific web page Browser web brow...

Страница 185: ...Assign a source to a fader strip Press a fader strip Access key twice in quick succession Load Save Snapshot Load or Save a GUI snapshot Select Load or Save Snapshot from the GUI user menu Select Mon...

Страница 186: ...d using the Combo Module and Swap Slots options in the Settings Surface dialog box Channel Strip Elements Each channel strip provides visual feedback for the source assigned to the fader Working from...

Страница 187: ...gnments to the 8 summing buses defined in the standard configuration The icons are color coded to indicate the current status Unlit source is not assigned off Yellow source is assigned post fader Red...

Страница 188: ...ers and so both peak and momentary loudness bargraphs are always displayed The numerical readout shows the integrated loudness measurement in LUFS For each of the main bus outputs the metering point c...

Страница 189: ...sion 8 0 0 1 Exported on 24 October 2023 189 228 Video The four video thumbnails are defined by the configuration In the standard configuration nothing is assigned and so each preview must be configur...

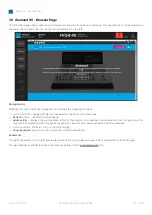
Страница 190: ...ays a specific web page where the web address is defined by the configuration Typically it is used to access the studio s playout server An example is shown below Playout Sessions It is possible to de...

Страница 191: ...rd or backward to the next or previous page Refresh button reloads the current page Address Bar displays the web address URL of the page A new address can be entered from the keyboard For touch screen...

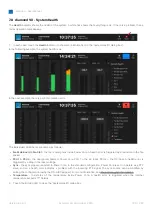
Страница 192: ...stinations select an output category e g Ravenna Outputs If a destination is connected then the source name appears below the output For example PGM1 is connected to Rav Out 01 If a destination has no...

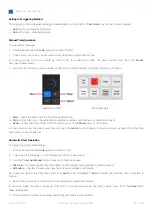
Страница 193: ...side Power Core A health error is triggered by a reduction in the fan speed PSU 1 PSU 2 the dual power feeds to Power Core PSU 1 the AC input PSU 2 the DC input A health error is triggered by a drop i...

Страница 194: ...ion in the Settings Timer dialog box There are two possibilities Mic Only the timer counts only when a Mic source fader is open applies to all Mic sources All Faders the timer counts when any fader is...

Страница 195: ...mer running Count down Mode In count down mode the timer counts down from a starting value called the Preset time and turns red once a mid point the Alarm time is reached If the count down reaches 00...

Страница 196: ...tober 2023 196 228 To set the Preset and Alarm times touch the current time value to open the Timer Properties Type a number into the minute and second fields or touch the and buttons to increase and...

Страница 197: ...arted or reset Reset resets the timer either to 00 00 count up or to the Preset time count down In count down mode the timer value turns red once the Alarm time is reached If the count down reaches 00...

Страница 198: ...our example Mic Only is selected in step 3 and so the timer starts automatically when a Mic source fader opens If another Mic source fader opens then the timer continues to run The timer stops once al...

Страница 199: ...Sign In to open the Login dialog box where you can enter your username and password User Menu signed in After a successful login the following functions become available Edit User Labels open the user...

Страница 200: ...itial administrator username admin and password default Logging In The steps below describe how to log in When a new user logs in for the first time the password 0000 1 Touch the user icon and select...

Страница 201: ...ng Your Password After a successful login you can change your password as follows 1 Re open the Login dialog box by touching the user icon and selecting Switch User from the user menu The dialog box s...

Страница 202: ...hoose to show or hide the two user label lines by changing the Show Userlabels option in the Settings Surface dialog box The image below shows how the editor s text fields are displayed on the surface...

Страница 203: ...ws To overwrite the current text touch or click once and then start typing To edit the existing text touch or click twice in quick succession Press Enter or select another field to confirm the current...

Страница 204: ...8 0 0 1 Exported on 24 October 2023 204 228 Saving Loading User Labels The contents of the editor are saved and loaded by all snapshots This allows you to save different sets of labels for different...

Страница 205: ...on 24 October 2023 205 228 7 13 diamond VX Load Snapshot and Save Snapshot The Load Snapshot and Save Snapshot buttons in the user menu can be used to load or save a full snapshot These functions are...

Страница 206: ...con and select Settings from the user menu You must be logged in to access the Settings button 2 Use the tabs on the left to select a page of settings 3 To close the dialog box select the X icon top r...

Страница 207: ...s using the side panel tabs On both sides you can page through the available options using the up down arrows beside Page x of y To interrogate the existing connections Under Destinations use the up d...

Страница 208: ...ips from left to right This option should be enabled if the Fader module is fitted to the right of the central controls Combo Module changes the layout from 4 channel strips 4 master slots to 6 channe...

Страница 209: ...u can use any suitable text editor to edit the file The example below shows how to define the bookmarks on the Browser page The tables below describe the available parameters Boolean Parameters String...

Страница 210: ...ing 6 Bookmark 03 Label gpio String 7 Bookmark 04 URL gpio String 8 Bookmark 04 Label gpio String 9 Bookmark 05 URL gpio String 10 Bookmark 05 Label gpio String 11 Bookmark 06 URL gpio String 12 Bookm...

Страница 211: ...32 Default Slot 04 06 HP Meter gpio String 33 to 39 gpio String 40 I O Information for Routing Page Slot 01 NO DEFAULT this information is written to the routing page of other sessions Not available f...

Страница 212: ...4 October 2023 212 228 8 diamond Configuration The operation of the diamond console can be customized using the ON AIR Designer Lawo s configuration tool for radio on air systems Please refer to the O...

Страница 213: ...8 0 0 1 Exported on 24 October 2023 213 228 9 diamond Software Tools and Diagnostics This chapter describes the tools available for fault finding and diagnostics diamond Software Revisions and Updati...

Страница 214: ...components including the control surface modules are running the correct firmware For information about the current release including the release notes and installers please see Radio Products Softwar...

Страница 215: ...opened a connection and logged in you will see the available pages tabs In the current release there are six pages tabs System Information System Control Statistics Network Surface Modules Module Tes...

Страница 216: ...The System Information tab is the first tab to be shown following a successful login It displays basic information about the frame such as the serial number software firmware version numbers and speed...

Страница 217: ...lect a different Access Level and enter the Password User no password required Supervisor default password orion Administrator default password hydra Now re select the System Control tab to return to...

Страница 218: ...L is shown Any changes take affect after a refresh of the browser page Edit Access Passwords In Administrator mode the Edit Access Passwords section becomes visible This area can be used to edit the p...

Страница 219: ...istics The Statistics tab shows information about the CAN bus It can be used to analyse the number of messages sent and received and if there are any TX or RX problems To reset all of the message erro...

Страница 220: ...or Gateway If any settings are changed you must click Apply to save the changes IP Address changes are made immediately and so you will lose your browser connection once the settings are applied To c...

Страница 221: ...e modules connected internally or externally via CAN Act Slot shows the module s active slot ID This is important as it determines the functionality of the module as described earlier The active slot...

Страница 222: ...o start the auto test sequence TFT Displays click on an option to display an image on the module s displays Faders choose either From Panel or To Panel to set the direction and then perform the test F...

Страница 223: ...e there are no specific service procedures for the diamond control surface Should you require assistance the Lawo Support Department can be contacted by email at support lawo com or by telephone durin...

Страница 224: ...er contains data to work with such as specifications drawings and schematics diamond Part Numbers diamond SC Specification Mechanical drawings and data sheets including weights and dimensions are avai...

Страница 225: ...ith Virtual Extension 711 61 0x yy x module width from 1 to 8 ME yy frame version either 10 for tabletop or 20 for countersunk Modules Fader Module A 711 10 Fader Module B 711 12 Central Module 711 20...

Страница 226: ...be replaced with the 710 41 AES3id I O 710 42 as for 710 41 but with HD BNCs MADI I O 710 50 2 x MADI ports 64 I O channels per port can be configured for dual redundant operation MADI SRC I O 710 60...

Страница 227: ...on is compliant with EBU meters and levels Other variants will follow to support SMPTE and other regions The table below describes the relevant parameters diamond Standard Configuration Europe North A...

Страница 228: ...ond User Manual Version 8 0 0 1 Exported on 24 October 2023 228 228 MF Key Labels Standard Modules Fader A Fader B Combo A Combo B Central Extension Modules Rotary Extension Combo Extension Key Extens...

Отзывы: