V1.0
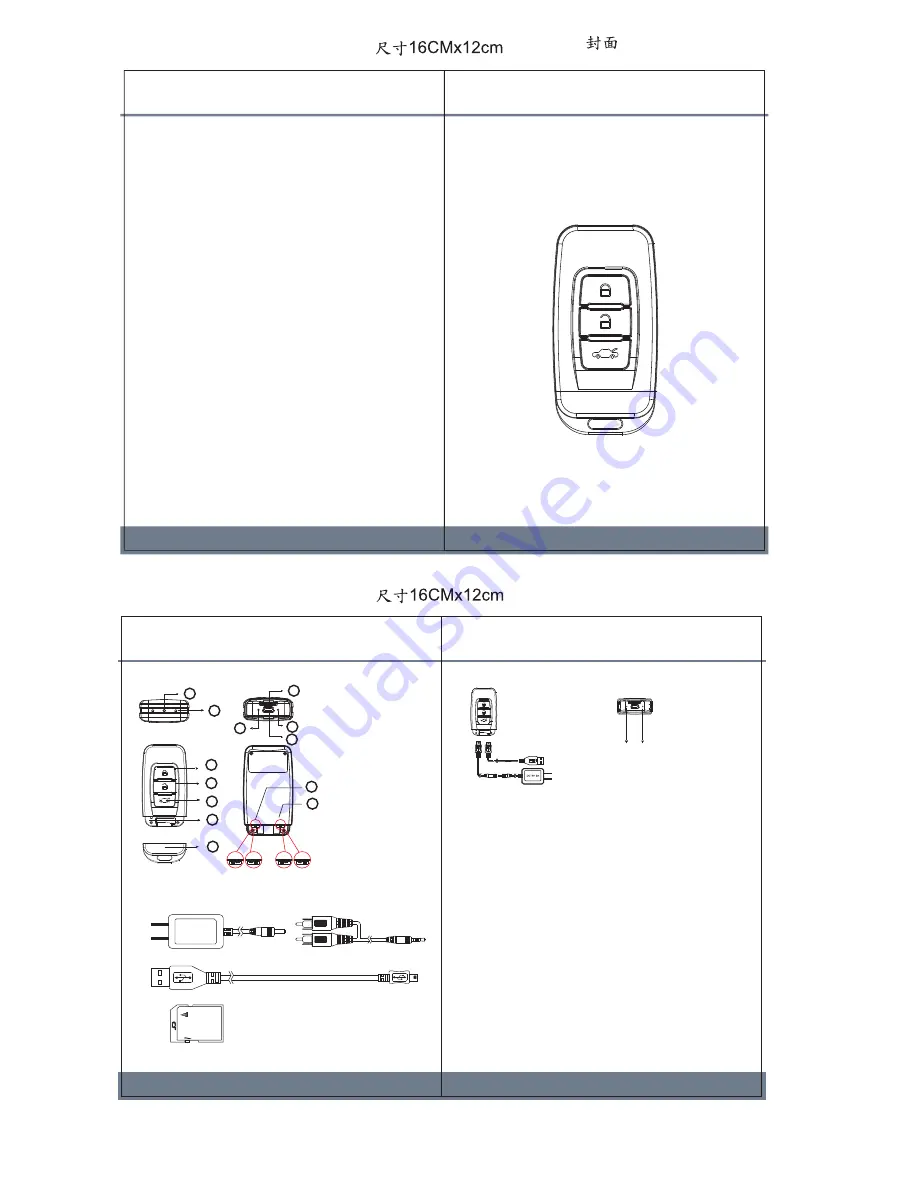
1. Names and Parts
VGA
HD
Key Chain Digital Video Recorder
Operation Manual
Law Enforcement Products Manufacturer
LawMate
PV-RC200HD
1. With microSD card inserted, connects PV-RC200HD to computer
without turning it on using USB cable to establish computer
connection.
2. After connection is established, turn on PV-RC200HD.
3. PV-RC200HD is read as “removable drive”. Then, user can
copy/paste files as it is an external drive/folder.
ON
OFF
1. Right-click on Windows desktop. Choose Notepad to
create a *.txt (text) file. Then double-click the text file.
2. If current time is
2009, March 9th, 14:00
. Enter date
time information as
2009.03.09 14:00
exactly as
indicated. A space mush be present in between date
and hour and time must be in 24-hour format.
3. Name the file as
settime.txt
exactly as indicated.
Save and store in the external drive directory.
4. Power on again and connect it to the computer.
5. Paste the settime.txt file to the root directory of DVR.
Then disconnect the DVR. Power on the DVR, then
power off the DVR. The date and time setting is
completed now.
1
2
3
4
5
6
7
8
9
10
11
12
13
1. Lens
2. Microphone
3. Power on/Record
4. Power Off
5. Snapshot
6. Reset
7. Covert Cap
8. MicroSD Card
Slot
9. Power/Rec
/Snapshot LED
10. Charging LED
11. USB Port
12. Vibration Switch
13. Resolution Switch
2. Package Content
USB Cable
5V DC Adapter
DC 5V 2A
MicroSD Card
Lock
A/V Out Cable
Power on LED(Blue)
Rec/Photo LED(Red)
Charge LED(Green)
When fully charged,
LED will go o
USB to PC
Connect to Charger
3. Charging
1. Without microSD card inserted, connect PV-RC200HD to
computer with USB cable.
2. Turn on PV-RC200HD.
3. Turn on installed AMCap and access web cam function.
1. With microSD card inserted, turn on PV-RC200HD without
cable connection.
2. Connect PV-RC200HD with USB cable.
3. Turn on installed AMCap and access web cam function.
4. Retrieving Video File
Option with USB Cable
5. Accessing Web Cam Function
Option (1)
Option (2)
6. Date and Time Setting (Windows Computer)
7. Operation
1. Power on the DVR by pressing Power button. Blue LED
lights. Switch vibration ON/OFF. Switch resolution
HD/VGA.
2. To record, press Power button again. Red LED lights.
3. To stop, press Power button again. Red LED go off.
4. To take snapshot, press Snapshot button. Red LED blink.
5. Press Power-off button to turn off DVR. Blue LED go off.

