20 of 49
June 2012
Timebase (Horizontal Scale) setting
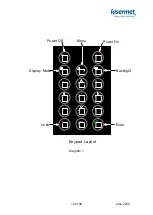
Press the left arrow (4) button to reduce the timebase speed. Press the right
arrow button (6) to increase the timebase speed.
The timebase can also be set by pressing Menu, scrolling down to X Scale
and pressing
to select, then choosing the desired timebase setting.
The available timebases are dictated by the type of head connected.
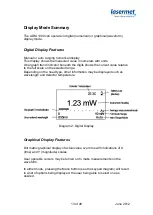
The chosen setting is displayed on the screen and represents the time
between each division on the horizontal axis.
Start Acquisition
To stop and start the acquisition, press the ACQ (0) button. When the
acquisition is stopped, cursors are provided which can be moved to perform
various calculations on the displayed waveform, see
Cursor Function.
Rolling Display
At slow timebases (<500ms/div) the trace will travel across the display until it
reaches the right hand side, whereupon the waveform will start scrolling to
the left as new data is added to the right (Stripchart mode). Press the Acquire
button (0) to manually start/stop the stripchart display.
Y-scale (Range) setting
Press the down arrow (2) button to increase the sensitivity (make the
waveform taller). Press the up arrow (8) button to decrease the sensitivity.
The Y-Scale can also be set by pressing Menu, scrolling down to Y Scale and
pressing
to select, then choosing the desired sensitivity.
The chosen setting is displayed on the screen and represents the magnitude
per division on the vertical axis.
The available ranges are dictated by the type of head connected.

