background image


QUICK OPERATION GUIDE     

MID-742


10 


To enter the photo playback mode and photo tools, tap the TOGGLE image at the top right corner 
of the screen. (This button is used to toggle between image capture mode and the playback 
screen.)   

To connect through to your GOOGLE account, press 

, or 

  to continue through to the 

main image preview screen. Alternatively tap the image on the screen. 
 
From the main image preview screen, SWIPE the screen left or right to review images or use the 
thumbnail images at the bottom of the screen to see previous.   
 

Note: Tap the screen if the image tools icon disappears.   

 
To delete an image, press the rubbish bin icon at the top of the screen. To access the menu screen 
tap the menu shortcut button. Choose between the options: slideshow, edit, rotate left, rotate 
right, crop, set picture as, details. 


File manager         

File manager provides an overview of all files on your MID-742 or an external storage device. Use 
the tabs at the top of the screen to view files on your MID-742; built-in memory, SD card or USB.   
 

Note: The last two tabs (developer tab)s may not be visible depending on your user settings 


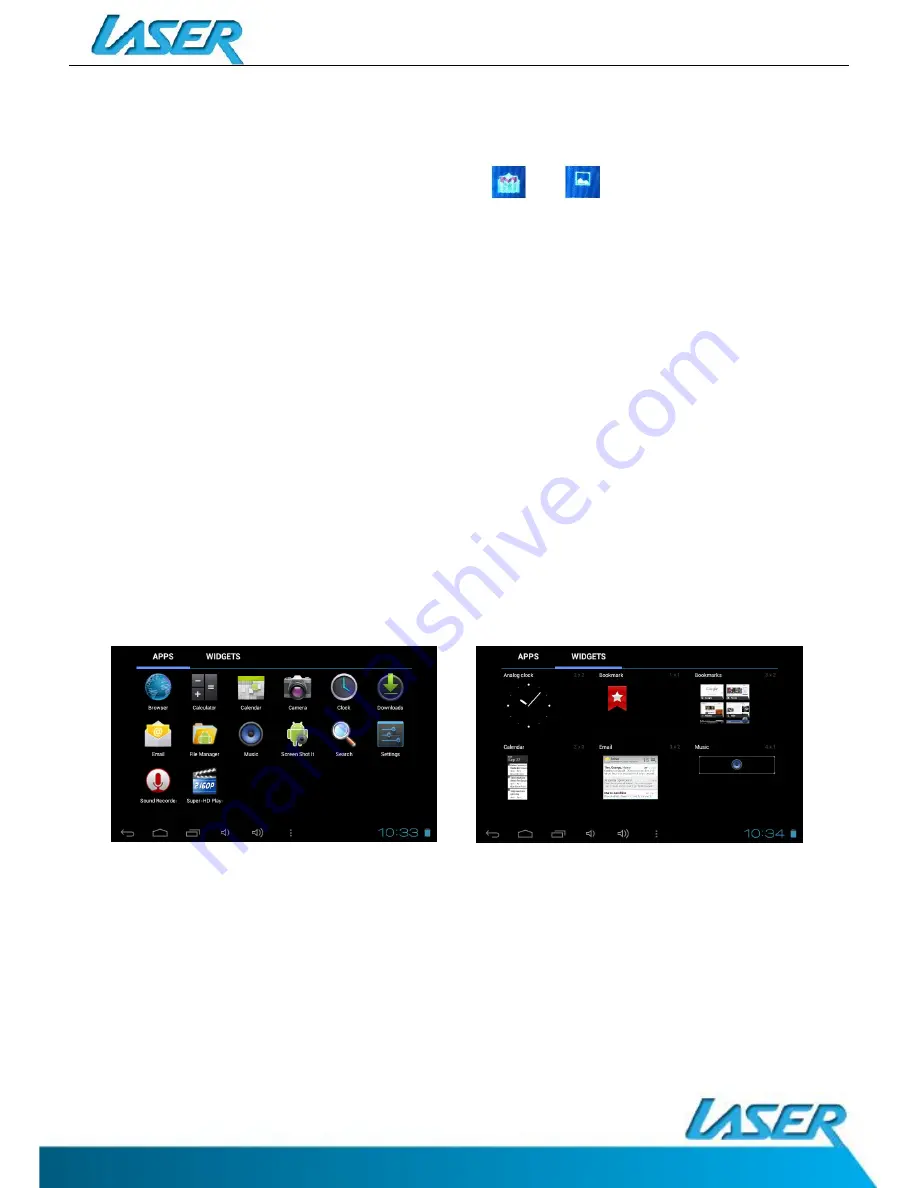
App and Widget icons 


Users can add or remove Apps and Widgets program icons (shortcuts) from the desktop as well as 
move them to different desktop screens. The icons can be dragged within the desktop, or 
between the desktop and the shortcut bar. 
 
To add an icon tap and hold the App or Widget, then drag and drop it to the desired position on 
the desktop. 
To delete an icon, press and hold the icon until the trash bin icon appears at the top of the screen. 
Then drag the icon on top of the bin icon and release.   
 

Содержание MID-742

Страница 1: ...QUICK OPERATION GUIDE MID 742 1...

Страница 2: ...E 5 LOCK UNLOCK 6 CHANGING WALLPAPER 6 HOME SCREEN ICONS 6 DESKTOP MENU BARS 7 APPS AND WIDGETS 8 FURTHER APP INFORMATION 9 CALENDAR 9 CAMERA 9 FILE MANAGER 10 APP AND WIDGET ICONS 10 SETTINGS WI FI 1...

Страница 3: ...water or moisture ingress exposure to prolonged extreme heat or cold excessive humidity dust or sandy It is recommended to thoroughly charge the device for the first time overnight Subsequent charges...

Страница 4: ...2 ON OFF Power Button 3 Stereo Earphone Socket 3 5mm Jack 4 Micro USB interface Data Transfer Charging USB Storage flash drive 5 Charging Socket DC 5V 2 5 amp 6 Volume button Decrease Volume 7 Micro...

Страница 5: ...g has begun The MID 742 can be used during charging however this may increase the time needed to fully charge the battery RUN TIME Run time of portable devices such as this MID 742 can be extended by...

Страница 6: ...ease Note some of the following images may be different from the actual product supplied CHANGING WALLPAPER TAP and HOLD the current wallpaper from the main screen The wallpaper option window will app...

Страница 7: ...on Programming interface only Time display Battery status Enter Wallpaper Manage applications System settings shortcut DESKTOP MENU BARS The desktop includes two separate menu bars 1 APPS MENU BAR Top...

Страница 8: ...GLE account is required Camera Take and view pictures and video Clock Access alarm clock settings and time display Downloads Manage downloaded content E mail Setup e mail accounts File Manager Access...

Страница 9: ...ncing connection issues Once complete your settings will be saved and the application will automatically close Re open the application then set the current date and time where required Note The first...

Страница 10: ...utton Choose between the options slideshow edit rotate left rotate right crop set picture as details File manager File manager provides an overview of all files on your MID 742 or an external storage...

Страница 11: ...or all available WiFi networks Tap the desired NETWORK name If this NETWORK connects successfully Connected 1 will appear If the NETWORK is encrypted enter the password then tap Connect Your MID 742 w...

Страница 12: ...are using the correct MICRO USB cable supplied The USB connected icon 1 will then appear TAP the icon to show the connection window and then TAP USB connected 2 to enter the final connection screen TA...

Страница 13: ...up your FREE account Upon purchasing or borrowing an eBook using ADE it will then need to be transferred to your MID 742 From Adobe Digital Editions right click the eBook you wish to transfer and sele...

Страница 14: ...ng it Then contents will appear on the right side of the Windows Explorer screen Right click this section and select paste The file has now been transferred Disconnected the MID 742 open the ALDIKO Ap...

Страница 15: ...nt and follow the set up steps View our product training videos at http www laserco net products e readers MID 742 SPECIFICATIONS Operation System Android 4 0 Size 192x 117 x 11 2mm CPU processor spee...

Страница 16: ...tation of screen Sleep Font size Screen adaption Storage Media scan Enable media scanning on SD Enable media scanning on USB Internal storage 1 Total space Apps Available Internal storage 2 Total spac...

Страница 17: ...evice administrators Unknown sources Credential storage Trusted credentials Install from SD card Clear credentials Language and input Language Spelling correction Personal dictionary Keyboard and inpu...

Страница 18: ...ll web scripts Developer options USB debugging Development device id Stay awake Allow mock locations HDCP checking Desktop backup password User interface Strict mode enabled Pointer location Show touc...

Страница 19: ...is use or while charging 1 Some applications can consume more power than others causing the MID 742 to become warm while in use or if used for extended amounts of time This is normal and won t affect...

Страница 20: ...he nature of the fault and refund or replace the product as per their store refund or warranty policy Step 2b If your place of purchase cannot be contacted then you can contact Laser Customer Service...

Отзывы: