The Victorian Gazebo II Assembly Instruction
By Laser Dollhouse Designs
Страница 1: ...The VictorianGazebo II Assembly Instruction By Laser DollhouseDesigns ...
Страница 2: ...e Rails roof frames Base support frames roof base support frames Turretrings numbered 0 20 Notein 1 48 only Numbered from 1 10 StairsAssembly Chair Assembly 8 Roof rail frames Lower and mid Roof supports Upper and lower base ...
Страница 3: ...s seen in Figure 1 and flip upside down Position the single notch facing toward you Figure 1 Step 2 Take the base support with the engraved companyname and insert to the rear Make sure single tab is facing up see figure 2 Figure 2 ...
Страница 4: ... the front as seen in figure 3 Step 4 Place the remaining base supports into the outer slots making sure that the center tab only side faces up See figure 4 Figure 3 Figure 4 Step 5 Place the bottom base by aligningslot openings to base support tabs See figure 5 Figure 5 ...
Страница 5: ...Figure 7 Step 7 Insert gazebo frame rails as seen in figure 7 Step 6 Flip completedbase right side up See figure 6 Figure 6 ...
Страница 6: ...Step 8 Installlower roof support ring as seen in figure 8 Figure 9 Figure 8 Step 9 Installroof railsand mid roof support as seen in figure 9 ...
Страница 7: ...Step 10 Add gazebo turret ring T0 as seen in figure 10 Note this is T1 in 1 48 scale Figure10 Step 11 Installcenter guide into turret ring as seen in figure 11 Figure11 ...
Страница 8: ...the remaining rings by following the numbers or make yourown design See figures 12 Figure13 Figure12 Step13 Cut excess of remainingunused center guide with a knife Once cut sand point to desired length See figures 13 ...
Страница 9: ...Step 14 Installroof alignment guide frames as seen in figure 14 Figure14 Step 15 Continuewith supports until all eight are in place as seen in figure 15 Figure15 ...
Страница 10: ...Step 16 Installroof base support frames wider end faces up as seen in figure 16 Figure16 Figure17 Step 17 Continuewith supports until all eight are in place as seen in figure 17 ...
Страница 11: ...Figure18 Step 18 Installstairs as seen in figure 18 Figure19 Step 19 Assemble chair lower section as seen in figure 19 ...
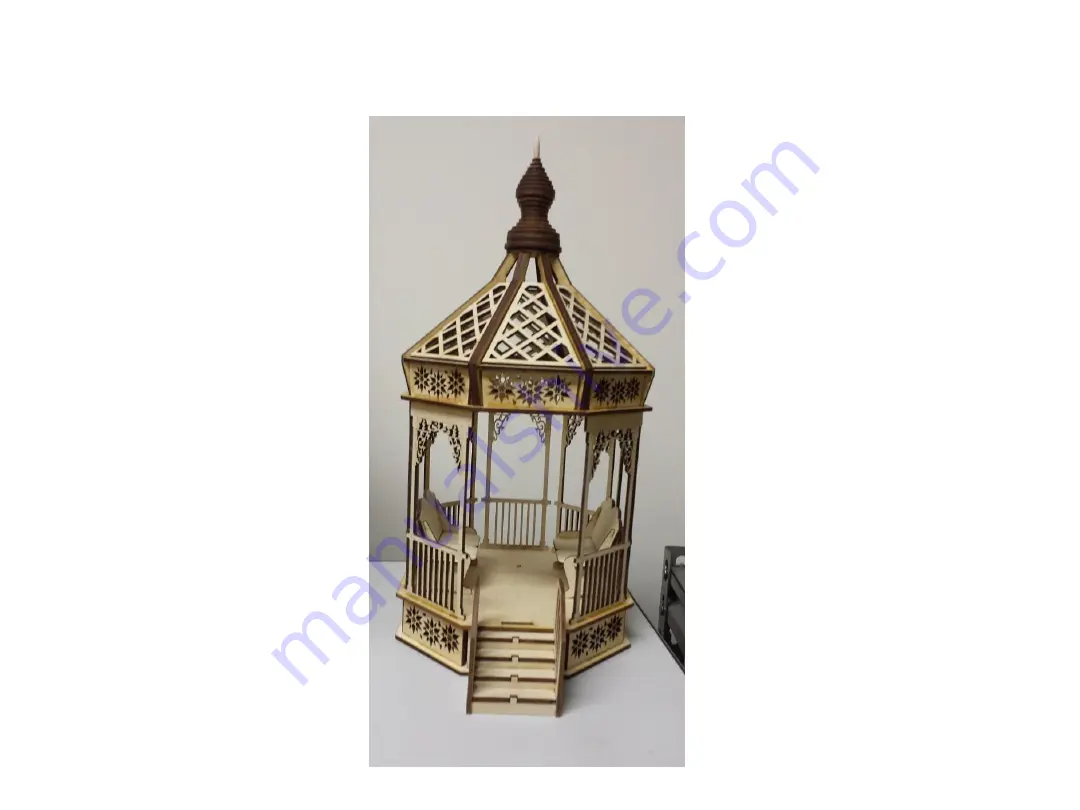
Страница 12: ...Figure20 Step 20 Add seat back as seen in figure 20 Put stair inside or outside gazebo as you see fit Gazebo is completed ...
Страница 13: ...Laser Dollhouse Designs www laserdollhouses com Email laserdollhouses aol com ...