


SoundAdvisor Model 831C
Making an Automated Event Sound Recording
18-3
FIGURE 18-2
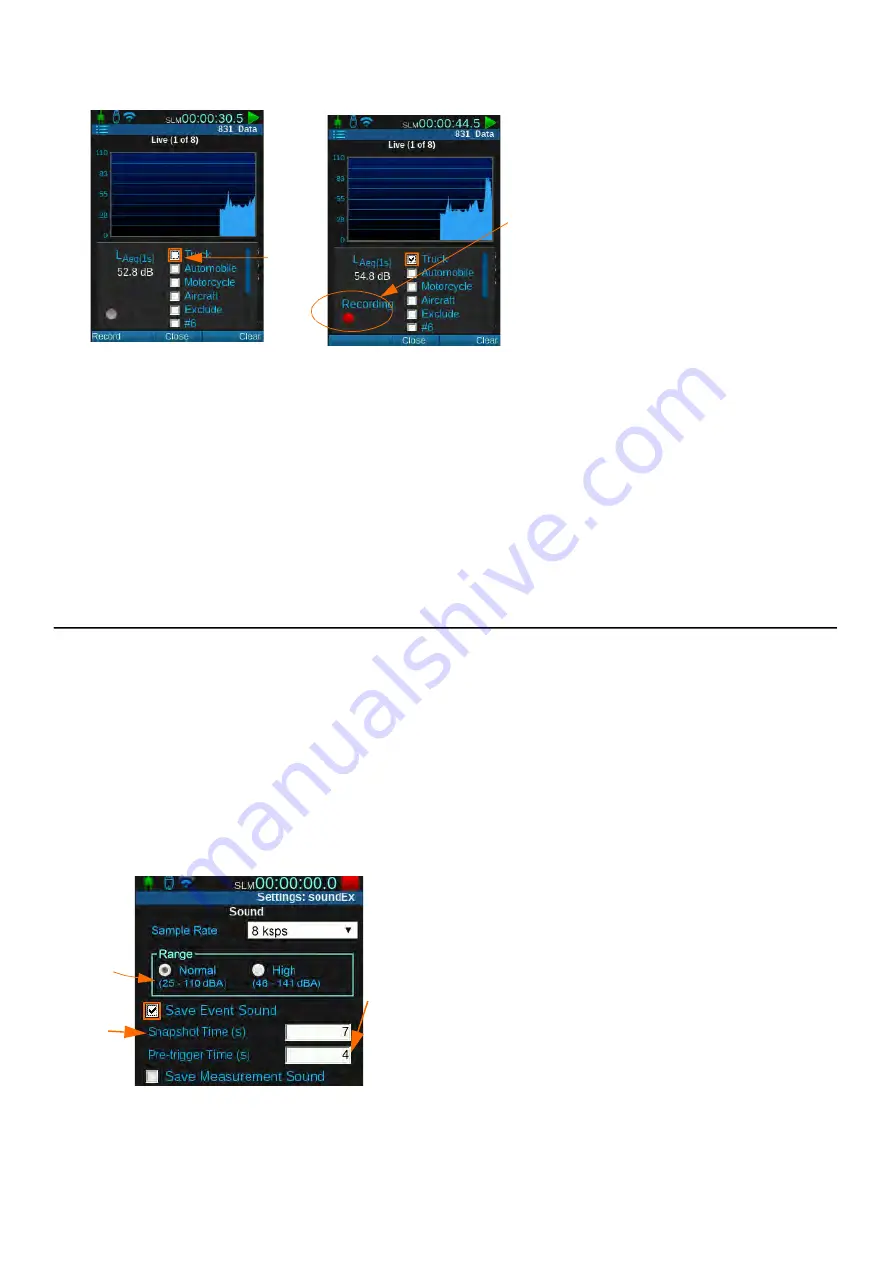
Mark Sound Type Sound Recording
1.
Select a marker with sound recording
enabled.
2.
This initiates the Pre-trigger period
followed by the sound recording.
Step 3
Select the checkbox in-line with a marker to start the recording. When finished, a
labeled sound record displays in the data file.
TAKE NOTE
You can also press the left softkey (
*//
) to initiate a sound recording. To
stop recording using this method, select
Stop
,
Close
, or stop the
measurement. If you don’t manually stop the sound recording, it will stop
when the memory is full. Very large data files are time consuming to download
and playback.
18.3 Making an Automated Event Sound Recording
Before you begin:
•
Create a setup file with Event History enabled as shown in
"Setting Up the Event History Measurement" on page 17-1
Step 1
On your meter, go to
Tools
Setup Manager
.
Highlight your setup file
, then
press the top-left softkey (
*//
) to open the
Sound
tab.
Step 2
Select the checkbox in-line with
Save Event Sound
, and enter any other
applicable values.
FIGURE 18-3
Sound Event Settings
1.
For more information, see
lution, Peak Overload, and Range" on page 18-6
.
2.
Snapshot Time
is the time set to record after the event.
3.
Pre-trigger Time
is the period prior to the event-based
trigger that you want to include in the recording.
TAKE NOTE
If Event History is not enabled, but Event Sound
is, the 831C will still make a sound recording for an event. The
Minimum Duration is ignored and the sound recording begins
immediately.
1.
2.
1.
2.
3.


