


Configuration Using DeviceInstaller
14
WiPort™
User
Guide
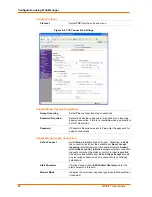
Host List Configuration
If this option is set to
True
, the device server scrolls through the host list until it
connects to the first available device listed in the host list table. Once it connects, the
unit stops further attempts. If this connection fails, the unit continues to scroll through
the table until it is able to connect to the next available IP address in the host list.
The host list supports a minimum of 1 and a maximum of 12 entries. Each entry
contains an IP address and a port number. This field is available for configuration
only when Active Connection is not set to
None
.
Note:
The host list is disabled for Manual and Modem Mode. The unit will not
accept a data connection from a remote device when the hostlist option is
enabled.
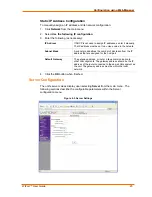
To configure the WiPort’s host list:
1. From the Configure Device window for the WiPort unit, click the
Advanced
tab.
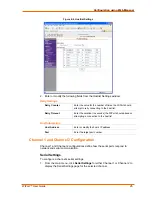
2. In the Host List section, modify the following fields:
Retry Counter
Enter the value for the number of times the WiPort should
attempt to retry connecting to the host list.
Retry Timeout
Enter the duration (in seconds) the WiPort should abandon
attempting connection to the host list.
3. Click the “
…
” next to the
Host List
field to open the HostListEntry Collection
Editor Window. The list of host list IP addresses display in the Members section.
4. Click on a host list member to highlight it and enter the following information in
the Properties section:
Host
Enter or modify the Host’s IP address.
Port
Enter the port on which the Host’s IP address resides.
5. Click
Apply
to apply the changes immediately to the WiPort and automatically
reboot. Click
OK
to save the changes to apply at the next reboot.
OEM Pin Configuration
There are 11 configurable hardware pins on the WiPort unit. For each pin, configure
the pin function, communication direction, and its active level. For more information,
see
Configurable Pins
on page
62
.
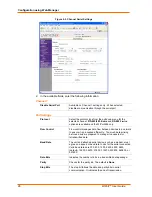
To configure the WiPort’s Configurable Pins:
1. From the Configure Device window for the WiPort unit, click the Advanced tab.
2. In the OEM Configurable Pins section, click the … button next to the
Configurable Pins field to open the ConfigurablePin Collection Editor window.
3. Highlight a Configurable Pin from the Members section to select it for
configuration.
4. In the Configurable Pin Properties section (right side of the window), modify the
following fields:
Config Pin Function
From the pull down menu, select the purpose of the specified
pin.


