background image


12


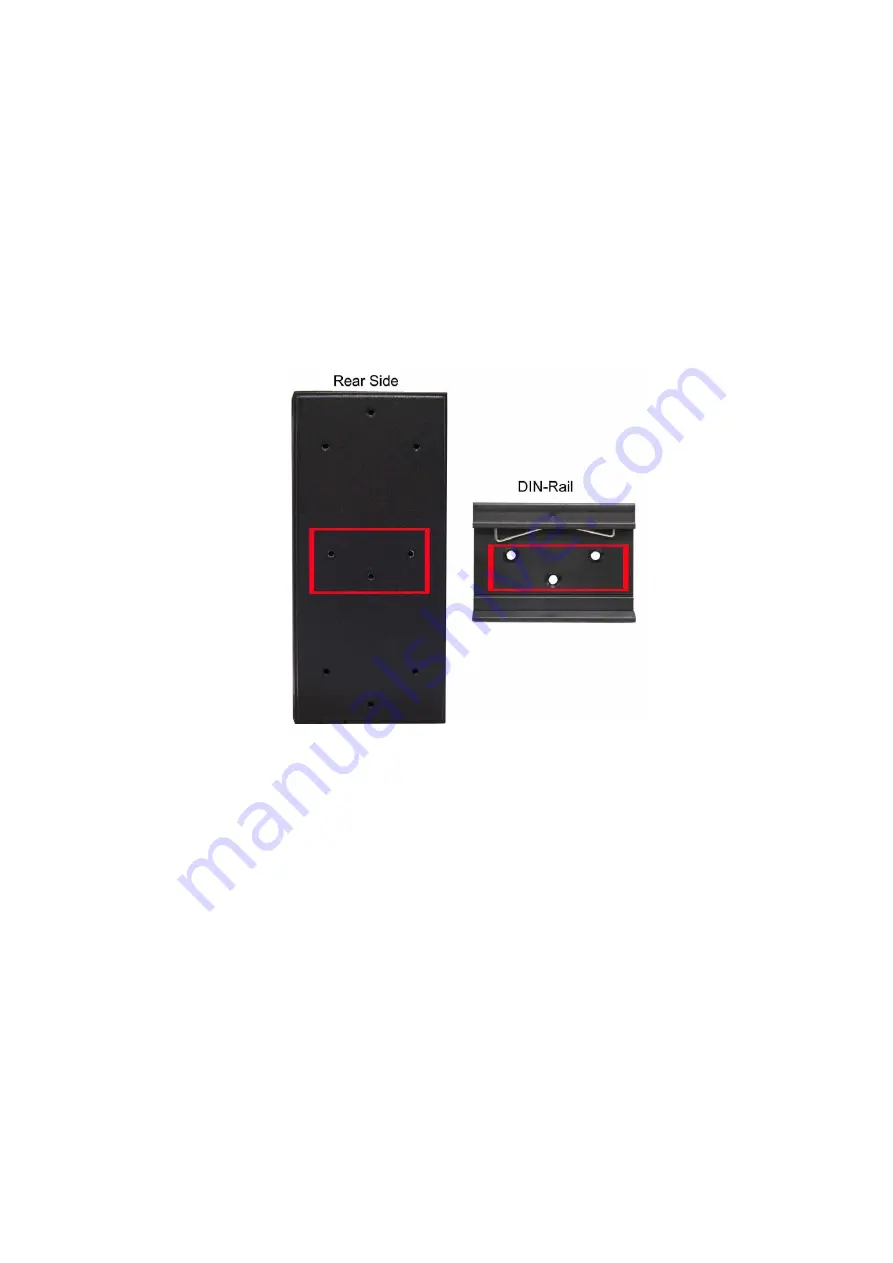
3.2  DIN-Rail Mounting 


The  DIN-Rail  is  screwed  on  the  industrial  switch  when  out  of factory.  If  the  DIN-Rail  is 

not screwed on the industrial switch, please see the following pictures to screw the DIN-

Rail on the switch. Follow the steps below to hang the industrial switch. 


Содержание IES-3 Series

Страница 1: ...ES 3XXX I P ES 5XXX IP30 rated Series IP30 rated DIN Rail L2 Industrial Managed Switch User Manual Hardware For 19 inch rack mount models please refer to hardware manual with specific model name Oct 2...

Страница 2: ...y an STP network cable in demanding electrical environments Examples of demanding indoor environments are where the network cable is located in parallel with electrical mains supply cables or where la...

Страница 3: ...consent of Lantech Communications Global Inc Products offered may contain software which is proprietary to Lantech Communications Global Inc The offer or supply of these products and services does no...

Страница 4: ...occur in a particular installation If this equipment does cause harmful interference to radio or television reception which can be determined by turning the equipment off and on the user is encourage...

Страница 5: ...ardware installation 10 3 2 DIN Rail Mounting 12 3 3 Wall Mount Plate Mounting 14 3 4 Wiring the Power Inputs 15 3 4 1 For 12V 24V 48V models 15 3 4 2 For HV models 16 3 5 Wiring the Fault Alarm Conta...

Страница 6: ...Rating classifies and rates the degree of protection provided against the intrusion including body parts such as hands and fingers dust accidental contact and water in mechanical casings and with elec...

Страница 7: ...of protection that the enclosure provides against harmful ingress of water Level Protected against Testing for Details 0 Not protected 1 Dripping water Dripping water vertically falling drops shall ha...

Страница 8: ...against the enclosure from any direction shall have no harmful effects Test duration at least 3 minutes Water volume 100 litres per minute Pressure 100 kPa at distance of 3 m 7 Immersion up to 1 m In...

Страница 9: ...ide real time information of system and optional status are located on the front panel of the industrial switch The following table provides the description of the LED status and their meanings for th...

Страница 10: ...device Off No device attached PoE FWD For PoE model Off The port is not operating in PoE mode On The port is operating in PoE mode SFP Port LED On A network device is detected Blinking The port is tra...

Страница 11: ...se refer to Wall Mount Plate Mounting section for wall mount plate installation NOTE Wall mount kits are optional accessories 3 To hang the Industrial switch on the DIN Rail track or wall 4 Power on t...

Страница 12: ...e Please refer to the LED Indicators section for LED light indication NOTE Make sure that the connected network devices support MDI MDI X If it does not support use the crossover category 5 cable 7 Wh...

Страница 13: ...l is screwed on the industrial switch when out of factory If the DIN Rail is not screwed on the industrial switch please see the following pictures to screw the DIN Rail on the switch Follow the steps...

Страница 14: ...sert the top of DIN Rail into the track 2 Then lightly push the DIN Rail into the track 3 Check if the DIN Rail is tightened on the track or not 4 To remove the industrial switch from the track revers...

Страница 15: ...s to remove the DIN Rail 2 Place the wall mount plate on the rear panel of the industrial switch 3 Use the screws to screw the wall mount plate on the industrial switch 4 Use the hook holes at the cor...

Страница 16: ...the contacts 1 and 5 with negative electrode of power and 2 and 6 with positive electrode of power contacts 1 and 2 are defined as power input 1 and contacts 5 and 6 are defined as power input 2 you...

Страница 17: ...e electrode of power and 6 with positive electrode of power the HV models are single power design Tighten the wire clamp screws for preventing the wires from loosing Using AC power AC power resource h...

Страница 18: ...e switch will detect the fault status of the power failure or port link failure available for managed model and then forms an open circuit The following illustration shows an application example for w...

Страница 19: ...d 2DO DI Digital input DO Digital output When disconnection of the specific port was detected DO will activate the signal LED to alarm DI can integrate the sensors for events and DO will trigger the a...

Страница 20: ...ct optical transceiver used in optical communications for both telecommunication and data communications The SFP slots supporting Gigabit speed up to 1000Mbps DSFP DFT models support dual speed 100M o...

Страница 21: ...20 Transceiver to the SFP module Transceiver Inserted Second insert the fiber cable of LC connector into the transceiver...

Страница 22: ...21 LC connector to the transceiver...

Страница 23: ...follow the steps shown below First press the upper side of the LC connector to release from the transceiver and pull it out Remove LC connector Second push down the metal loop and pull the transceive...

Страница 24: ...or Attach the end of RS 232 connector to PC or terminal and the other end of RJ 45 connector to the console port of the switch The connected terminal or PC must support the terminal emulation program...

Страница 25: ...f the console port Baud Rate 115200 bps Data Bits 8 Parity none Stop Bit 1 Flow control None The settings of communication parameters Having finished the parameter settings click OK When the blank scr...

Страница 26: ...25 Console login interface Notice For web based management please refer to our Software Management Manual Please contact support lantechcom tw for more information...

Отзывы: