


Safety
25
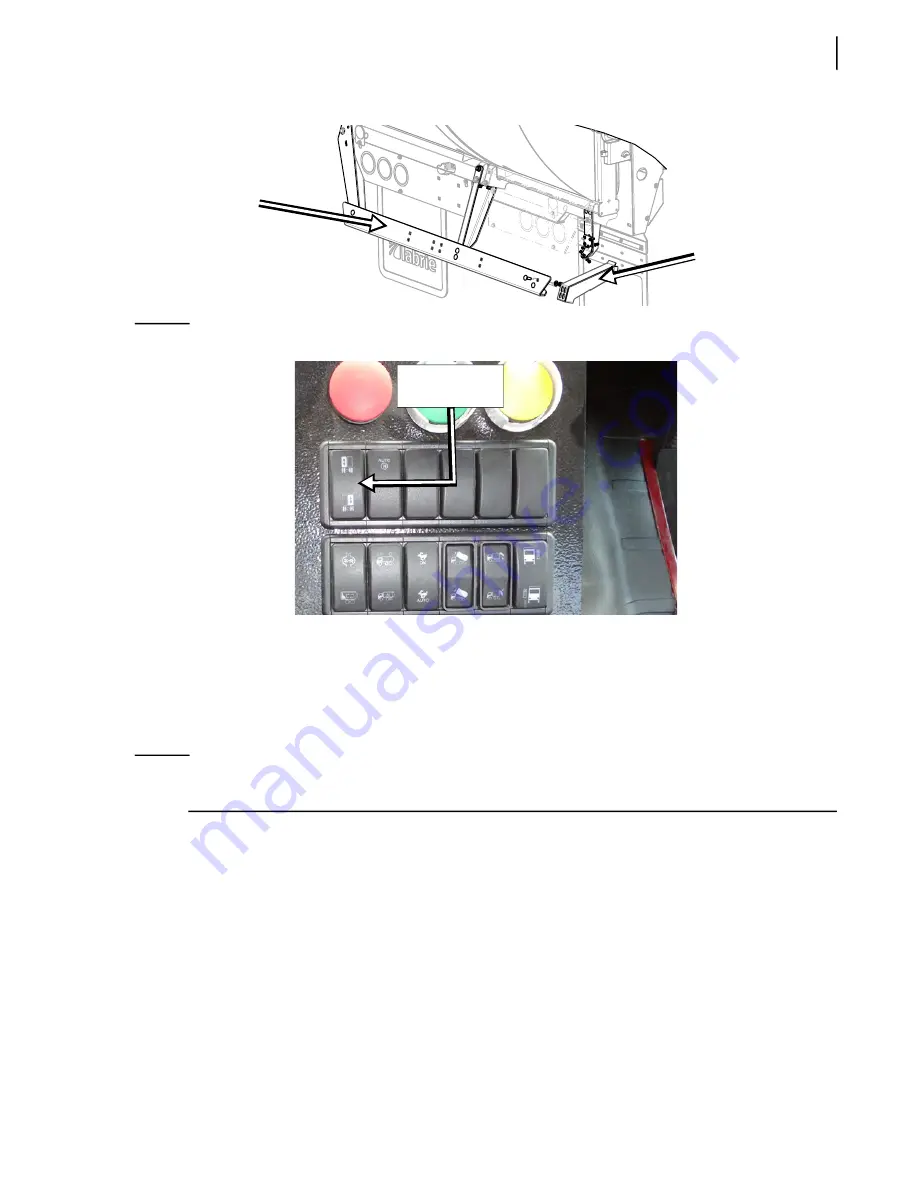
Figure 2
-
16 Tailgate Selector switch
6.
With the Tailgate Up switch on the in-cab control panel (see Figure 2
12), raise the selected
tailgate about 3 feet (enough to lift and rotate the safety prop).
7.
Pull the safety prop upward and set it down (see Figure 2
13).
8.
Slowly lower the tailgate onto the safety prop using the Tailgate Down switch on the in-cab
control panel (see Figure 2
12).
N
OTE
:
If the tailgate is not resting properly on the safety prop, see
Tailgate Safety Prop Adjustment
page 26 to correct the problem.
Putting the Tailgate Safety Prop Back in Place (Co-Mingle Units)
To put the tailgate safety prop back in its home position:
1.
Start the engine.
2.
Turn ON the pump (see Figure 2
5).
3.
Raise the tailgate by about 3 feet using the Tailgate Up switch on the in-cab control panel
12).
4.
Raise the tailgate safety prop (see Figure 2
14).
5.
Release your grip on the safety prop to set it in its home position (see Figure 2
15).
ICC bumper
Support
Tailgate Selector
switch
Содержание EXPERT
Страница 1: ...EXPERT TM MAINTENANCE MANUAL...
Страница 2: ......
Страница 3: ...EXPERT MAINTENANCE MANUAL...
Страница 10: ...viii Table of Contents...
Страница 18: ...8 Introduction...
Страница 244: ...234 General Maintenance...
Страница 251: ...Lubrication 241 Figure 4 11 Glass compartment lubrication chart optional...
Страница 252: ...242 Lubrication Figure 4 12 EXPERT lubrication chart...
Страница 261: ...Lubrication 251 Figure 4 27 Packer lubrication points 2 Grease fitting LH side front cylinder pin...
Страница 263: ...Lubrication 253 Pump Drive Shaft U Joint Figure 4 30 Pump drive shaft lubrication points Grease fittings...
Страница 264: ...254 Lubrication...
Страница 320: ...310 Hydraulic System...
Страница 357: ...Troubleshooting 349...
Страница 358: ...350 Troubleshooting...
Страница 386: ...378 Multiplexing...
Страница 388: ...380 Lifting Arms Figure 10 1 Mounting bolts Figure 10 2 Wear pads Figure 10 3 Helping Hand gripper...


